203820
Rev. G, 3/14/09
© 2009, THE STANLEY WORKS. ALL RIGHTS RESERVED.
5 of 15
3.2
Installing the Solenoid Lock Assembly
3.2.1
Refer to Figure 2, and PERFORM the following:
•
POSITION the lock assembly in the header at the position shown.
•
ENSURE the lock assembly is aligned with the track tube mark from step 3.1.5.
3.2.2
INSTALL, but do not tighten, the fasteners securing the lock assembly to the header.
NOTE
If the latch does not retract into the position shown in Figure 1, the cam may have been manually rotated
and its motion restricted by the switch rollers S2 and S3. Using a small screwdriver or similar tool,
carefully press the two switch rollers to release the cam.
3.2.3
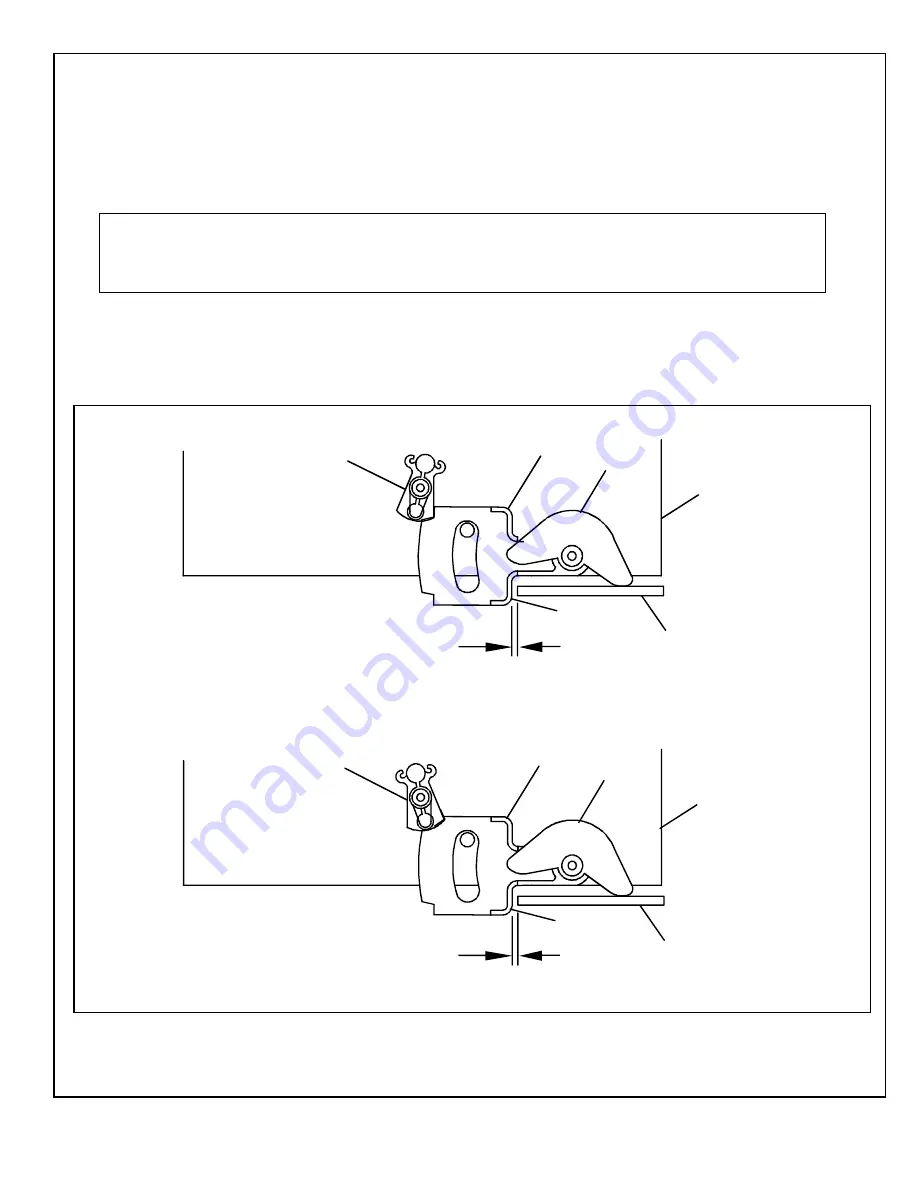
Manually RELEASE (UNLOCK) the pawl such that the latch retracts into the lock
assembly housing.
3.2.4
Manually SLIDE the door(s) to the fully closed position.
3.2.5
Refer to Figure 3, and MOVE the lock assembly to the position shown.
Figure 3. Installing the Solenoid Lock
SL003
1/8"
1/8"
BELT BRACKET
(DOOR CLOSED)
GREASE
HERE
DOOR CLOSED AND LOCKED
LOCK
HOUSING
CAM
LATCH
PAWL
(UNLOCKED)
DOOR CLOSED AND UNLOCKED
BELT BRACKET
(DOOR CLOSED)
GREASE
HERE
CAM
PAWL
(LOCKED)
LOCK
HOUSING
LATCH


