36
Mounting and connecting the camera
Important information
First connect the camera to your router!
The camera can be positioned on a flat surface or mounted on the wall or ceiling using the support
included in the scope of delivery. Consider the following when selecting the positioning or mounting
location of the camera:
For indoor use only:
The camera and power supply unit are exclusively designed for indoor
operation and must not be exposed to the weather in the open!
Range:
Check whether the connection between the camera and your WLAN router is stable at
the intended mounting position.
Lighting conditions:
The camera should not be orientated towards direct, strong light sour-
ces/sunlight, since overexposed images may result.
Positioning/mounting location:
Do not position the camera in immediate proximity to heatings,
ovens or other sources of heat.
Make sure that the mounting surface is stable and does not give rise to strong vibrations and/or
falls.
Wall or ceiling mounting:
First, install the camera only provisionally and check whether the
desired monitored area is completely covered prior to drilling the holes for the camera support!
Make sure that no cables or conducts are placed in the wall which may be damaged when drilling!
Mark the position pf the drill holes (using the support as drilling jig) and drill the holes.
First, insert the power supply plug through the rear opening
of the support (s. fig.) and fix the support using screws which
are suitable for the mounting surface.
Connect the plug to the DC IN socket of the camera. Position
the camera on the support such that the objective faces towards
the front. Now carefully turn the camera towards
Lock
until it
locks in.
Plug the power supply unit into a socket (230 V) and switch
the camera on.
Note:
For ceiling mounting, the image shot needs to be rotated by 180° with the help of the app
function Video Rotation!
Controlling the camera objective
(panning/tilting using the app)
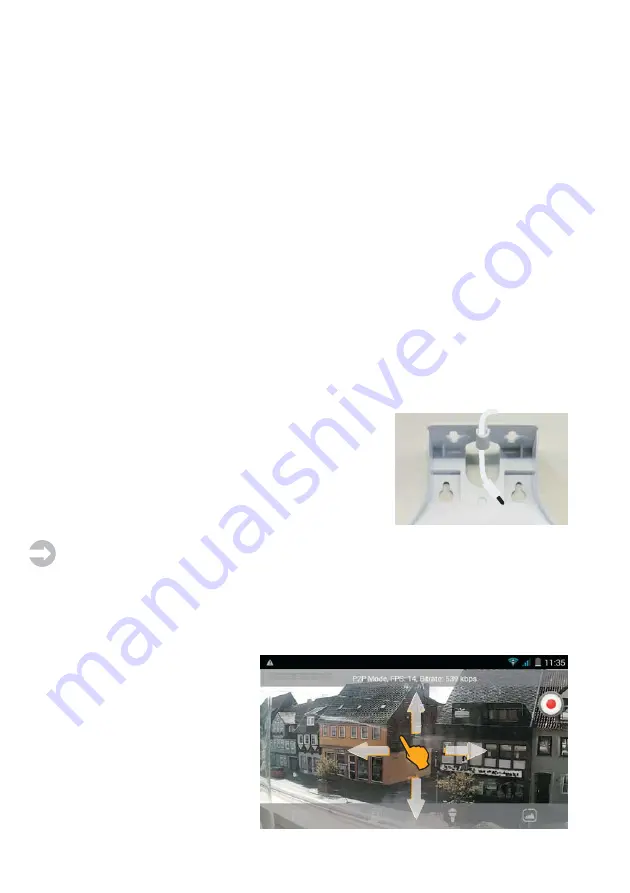
Tap the middle of the live image and control the objective by wiping on the display.
For tilting upwards: Wipe from top to
bottom
For tilting downwards: Wipe from
bottom to top
For panning to the left: Wipe from the
left to the right
For panning to the right: Wipe from
the right to the left
Содержание 51089
Страница 52: ...52 Notizen Notes ...
Страница 53: ...53 Notizen Notes ...


