background image

WWW.SSTAUTOMATION.COM

38

5.6.5 Switching of Working Mode

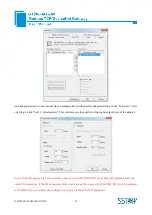
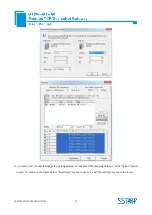
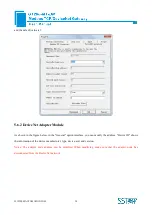
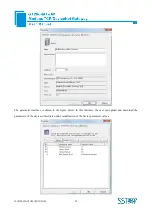
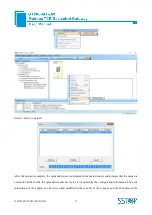
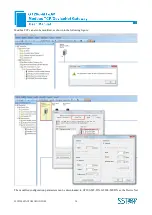
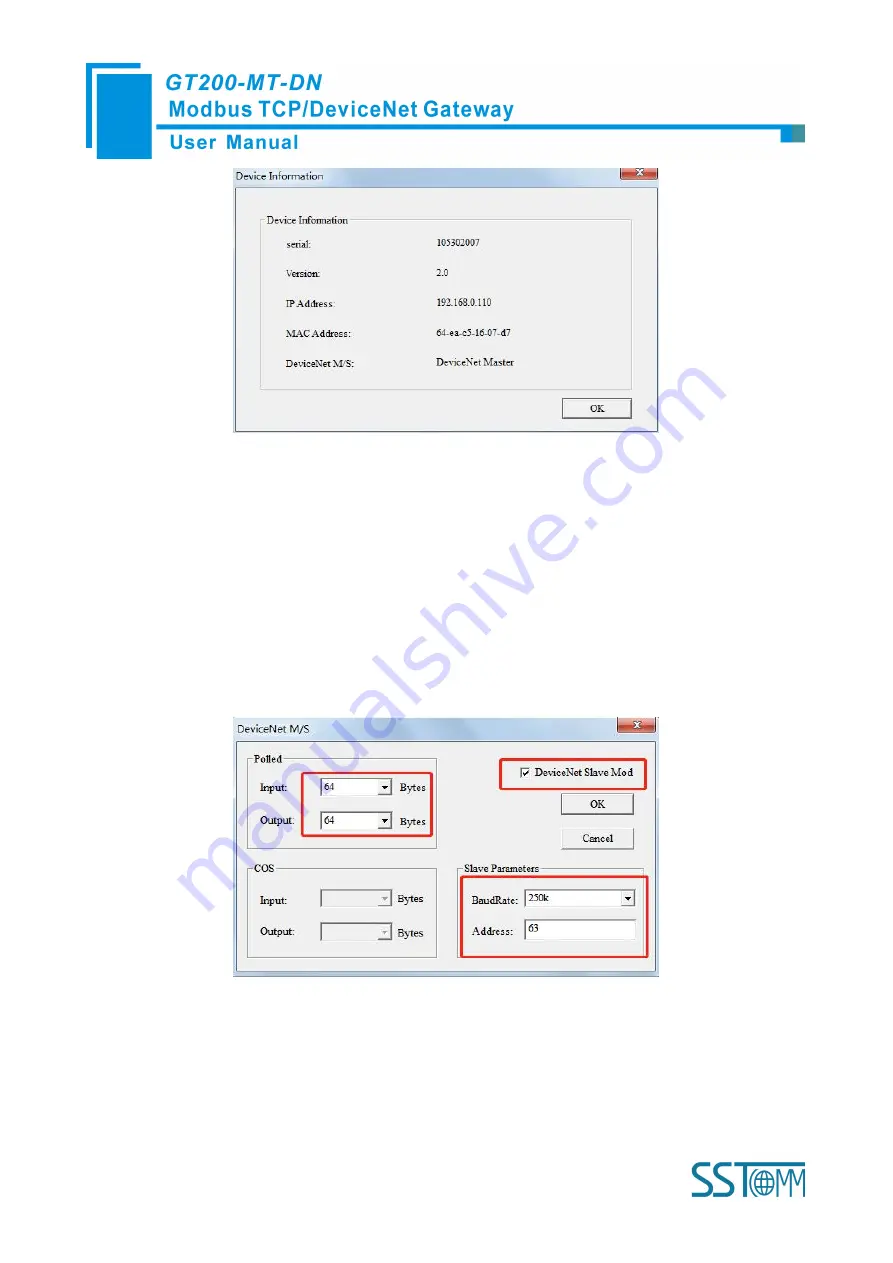
Please switch the DIP to 1ON 2OFF before switching the working mode. Open the property bar of

GT200-MT-DN, click "DeviceNet Parameters" -> "DeviceNet Adapter" -> "DeviceNet Adapter Mode"(Ticking it

means adapter mode, not ticking means scanner mode), then set the number of input and output bytes, baud rate

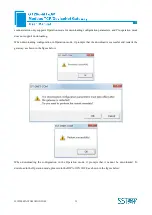
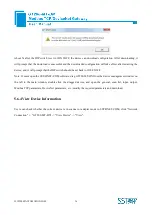
and adapter address of the adapter, and click "OK "->"Download", SST-DNET-COM will prompt whether the

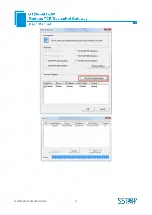
mode does not match, whether to switch, as shown in the figure below:

Содержание GT200-MT-DN

Страница 1: ...Modbus TCP DeviceNet Gateway GT200 MT DN User Manual V 2 0 Rev A SST Automation Email SUPPORT SSTAUTOMATION COM SUPPORT SSTCOMM COM WWW SSTAUTOMATION COM WWW SSTCOMM COM ...

Страница 2: ...product has many applications The users must make sure that all operations and results are in accordance with the safety of relevant fields and the safety includes laws rules codes and standards Copyright Copyright 2022 by SST Automation All rights reserved Trademark is the registered trade mark of SST Automation Technical Support Contact Information www sstautomation com E mail support sstautomat...

Страница 3: ... Dimensions 8 3 2 Installation Method 8 4 Quick Start Guide 9 4 1 Hardware Connection 9 4 2 Communication Debugging 9 5 SST DNET COM Software Instructions 10 5 1 Notes Before Configuration 10 5 2 Software Main Interface 10 5 3 Toolbar 12 5 4 DeviceNet Device Network Configuration 12 5 5 DeviceNet Network Scanning 21 5 6 Equipment Parameter Modification and I O Data Test 22 6 Working Principle 40 6...

Страница 4: ...ots welder PLCs and other devices with DeviceNet scanner interface and the host computer Users don t need to know the technical details of Modbus TCP and DeviceNet only refer to this manual and the application cases provided complete configuration according to requirements the network can be connected in a short time Transparent communication According to the mapping relationship between Modbus TC...

Страница 5: ...n mode and operation mode 3 As DeviceNet Scanner Pre operation mode Configuration switch 1 ON 2 OFF Supports device search namely online scanning DeviceNet adapter through SST DNET COM software Supports one click application of the scanned DeviceNet adapter I O parameter configuration and reading and writing configuration through SST DNET COM software Supports reading and writing DeviceNet adapter...

Страница 6: ...and the power supply voltage is DC 11 30V Supports DeviceNet I O Poll scanning Supports DeviceNet baud rate 125K 250K and 500K 6 Operating temperature 40 F 140 F 20 C to 50 C Relative Humidity 5 to 95 non condensing 7 Power 24VDC 11V 30V maximum 80mA 24V 8 Built in electrostatic protection 15 KV ESD 9 External dimensions W H D 1 0 in 4 0 in 3 6in 25mm 100mm 90mm 7 Installation 35mm DIN RAIL 10 Pro...

Страница 7: ...COM 4 2 Hardware Descriptions 2 1 Product Appearance Notes This picture is for reference only The product appearance is subject to the actual product DeviceNet Interface Ethernet Interface Indicators Configuration Switch ...

Страница 8: ...nitialization has not yet been completed Green Blinking Initialization completed The scanner is online but no connection has been established with the adapter Green Connected with the adapter Red Blinking Disconnected with the adapter Red There is no adapter on CAN network Detected address confliction CAN network error like baud rate error MNS DeviceNet Adapter Red DeviceNet network error Red Gree...

Страница 9: ...OFF ON Configuration mode the IP address is fixed at 192 168 0 10 Users can only read and write configuration data and operation is prohibited ON ON Enter the factory setting mode forbidden to use by customers Notes 1 To apply the mode switching please restart the gateway 2 When the GT200 MT DN works as DeviceNet adapter after finishing configuration it s recommended to set the switch to 1 ON 2 OF...

Страница 10: ...EE802 3u 100BASE T standard 10 100M adaptive its pin standard Ethernet signal is defined as below Pin Description S1 TXD Transmit Data Output S2 TXD Transmit Data Output S3 RXD Receive Data Input S4 Bi directional Data S5 Bi directional Data S6 RXD Receive Data S7 Bi directional Data S8 Bi directional Data ...

Страница 11: ...WWW SSTAUTOMATION COM 8 3 Hardware Installation 3 1 Mechanical Dimensions Size width height depth 1 0 in 4 0 in 3 6 in 25 mm 100 mm 90 mm 3 2 Installation Method Using 35mm DIN RAIL ...

Страница 12: ...wiring conforms to the instructions of the manual 4 Power on the module and it will enter the running state 4 2 Communication Debugging 1 The default configuration of GT200 MT DN is DeviceNet scanner mode the DIP switches are all OFF and the default IP address is 192 168 0 X Users can change the operating mode according to the actual application 2 The gateway uses the network port connection confi...

Страница 13: ...ation software SST DNET COM is developed by SST Automation It needs to be used with SSTCOMM s GT200 MT DN or other DeviceNet scanner modules The following introduction is aimed at helping you get quickly started for using our gateway More details about using software please refer to Help Content in the SST DNET COM software 5 2 Software Main Interface For the first time to use the SST DNET COM sof...

Страница 14: ...can view device properties by dragging the device icon to the window Tree View Displays registered DeviceNet devices in different ways device type manufacture Under different manufacturers different devices are displayed separately according to the device type Comment Interface Dynamic display of network scanning information registered device information delete device information etc display the r...

Страница 15: ...nfigure Send Explicit Message Property Device Management Output 5 4 DeviceNet Device Network Configuration EDS Registration Wizard Users can configure different DeviceNet devices by registering new EDS files Register the new EDS file select Tools EDS wizard or click EDS wizard button in the toolbar Or directly click the right button in the Equipment management window and select EDS wizard which wi...

Страница 16: ...ose to register an EDS file log out of an existing device and change the icon of a device Take Register an EDS file as an example to introduce the following steps for registering a new EDS file After selecting Register an EDS file click Next step and select the storage path of EDS file you want to register in the pop up interface as shown in the figure below ...

Страница 17: ... test report interface If there is an error in the EDS file the error message will be displayed in the interface and there is no Next step operation If there is no error in the file continue the Next step operation pop up selection device icon interface as follows ...

Страница 18: ... file registration step is over At this time you can see the newly registered device in the equipment Management Window If you want to change EDS file for the same device please first find the device in the device management library and right click After logging out re register the new EDS file or complete the logout operation through the EDS operation PC DeviceNet Interface Setting ...

Страница 19: ...eNet network Power Supply of GT200 MT DN is 24VDC Power on After correctly Connecting to Power Supply the connection of DeviceNet network can be established by Internet Connection in the menu bar or toolbar Click Internet Connection and pop up the path selection interface Then click the interface setting the software will display the searched device in the list select the scanner station to be con...

Страница 20: ...At default the GT200 MT DN act as a DeviceNet adapter mode Please change to the scanner mode if you want to use it as a DeviceNet scanner mode Firstly upload the gateway by right clicking the blank area Double click the module ...

Страница 21: ...WWW SSTAUTOMATION COM 18 Choose DeviceNet Parameters click DeviceNet Slave Uncheck the box and click OK then click Downlaod button ...

Страница 22: ...WWW SSTAUTOMATION COM 19 Choose the gateway shown click Selected ...

Страница 23: ...ode Notes the interface settings configuration IP address is the IP of the device selected at the time of search DeviceNet Node Address is the Address of DeviceNet Scanner Module Set any value between 0 and 63 which can t conflict with other node addresses on the bus DeviceNet baud rate is the baud rate of DeviceNet scanner module 125K 250K 500K optional Keep Bus Baud Rate Consistent ...

Страница 24: ...WW SSTAUTOMATION COM 21 5 5 DeviceNet Network Scanning After the interface is set up the network scanning interface pops up The scanned device is displayed in the main window as shown in the figure below ...

Страница 25: ...onnected the user can Disconnect the network through the toolbar button as shown in the figure below 5 6 Equipment Parameter Modification and I O Data Test Double click the scanned network node and appear the device property page Disconnect DeviceNet network ...

Страница 26: ...dified in the interface settings as specified in Chapter 5 5 of this manual Device ID displays the information of the device manufacturer type device sort and version If you choose to configure GT200 MT DN after setting all the parameters you can click the Apply button to download In the Scan List option interface users can select devices to add to the Scan List of the scanner and set its I O para...

Страница 27: ...ers This interface sets the number of input and output bytes of the adapter Notes If the I O parameters of the node have been saved in GT200 MT DN the scanned I O parameters are the saved I O parameters if the I O parameters of the node have not been saved in GT200 MT DN this I O parameter is the default value and users can configure it according to the actual I O parameters ...

Страница 28: ...h the third byte If users need to map manually they can also click the Advanced button to set the starting address in the dialog box shown below In the advanced Settings interface the user can also set the byte exchange mode of this adapter device There are three types of byte exchange no exchange two byte exchange and four byte exchange The meanings are as follows no exchange data transfer normal...

Страница 29: ...COM 26 If you need to set the unit that maps the starting address in advanced I O mapping Settings click option button to set it As shown in the figure below Byte Align means in one byte and Word Align means in two bytes ...

Страница 30: ...et DeviceNet parameters Input Data Hold clear means whether the corresponding DeviceNet input data is cleared when the number of DeviceNet command response errors reaches the number of DeviceNet command retransmissions Select clear DeviceNet input data is cleared select hold DeviceNet input data keep the correct data received last time Number of command resends means that when DeviceNet command re...

Страница 31: ...e figure below in the General option interface you can modify the address Device ID shows the information of the device manufacturer type device sort and version Notes The adapter node address can be modified When modifying make sure that the adapter node has disconnected from the DeviceNet network ...

Страница 32: ...OMATION COM 29 The parameter interface is shown in the figure below In this interface the user can upload and download the parameters of the device to facilitate online modification of the device parameter values ...

Страница 33: ...con before the ID the parameter cannot be modified online by the configuration software Whether the parameters support online modification is determined by the EDS file that is registered The display of the property interface also includes parameter ID parameter name and the current value of the parameter SST DNET COM software supports relevant linear operations on parameters defined in EDS files ...

Страница 34: ... Polled Input and Polled Output as examples Click the Polled Input button and then click the Read button DeviceNet software will read the network input data If the user selects the Continuous reading check box SST DNET COM software will continuously read the network input data of the field DeviceNet device As shown in the figure below Similarly by clicking the Polled Output button users can see th...

Страница 35: ...on has been disconnected at this time the I O data input and output operation will not be able to see the data You need to disconnect SST DNET COM s Internet Connection and re establish the internet connection 5 6 3 Offline Upload and Download Configuration The upload device can only be used when the network connection is disconnected After opening the software click Device Upload GT200 MT DN or r...

Страница 36: ...d device is displayed in the main window and prompts that the upload is successful Double click the uploaded scanner device to view and modify the configuration information The node information of the adapter can be viewed and modified in the scan list of the scanner and the IP address of the ...

Страница 37: ...WWW SSTAUTOMATION COM 34 Modbus TCP can also be modified as shown in the following figure The modified configuration parameters can be downloaded to GT200 MT DN GT200 MT DN as the DeviceNet ...

Страница 38: ...t downloading When downloading configuration in Operation mode it prompts that the download is successful and restarts the gateway as shown in the figure below When downloading the configuration in the Operation mode it prompts that it cannot be downloaded To download in the Operation mode please turn the DIP to 1ON 2OFF as shown in the figure below ...

Страница 39: ...hould be set back to 1OFF 2OFF Note If users open the SST DNET COM software drag GT200 MT DN from the device management window on the left to the main window double click the dragged device and open the general scan list input output Modbus TCP parameters DeviceNet parameters etc modify the required parameters and download 5 6 4 View Device Information Users can check whether the current device is...

Страница 40: ...WWW SSTAUTOMATION COM 37 ...

Страница 41: ...00 MT DN click DeviceNet Parameters DeviceNet Adapter DeviceNet Adapter Mode Ticking it means adapter mode not ticking means scanner mode then set the number of input and output bytes baud rate and adapter address of the adapter and click OK Download SST DNET COM will prompt whether the mode does not match whether to switch as shown in the figure below ...

Страница 42: ...ATION COM 39 Click OK to switch the mode prompting that the switch is successful please download again as shown in the figure below Click Apply Download again it prompts that the download is successful and restart ...

Страница 43: ... Exchange GT200 MT DN has two data buffers one is sending buffer the other is receiving buffer 6 2 Terminating Resistor In the case of high baud rate 1M 500k the CAN network needs to connect a 120Ω terminal resistor at the two farthest ends of the network ...

Страница 44: ...output bytes can be configured as 8 16 32 48 64 72 96 112 160 192 224 bytes 7 2 DeviceNet Parameters Input Bytes DeviceNet I O connection input bytes Output Bytes DeviceNet I O connection output bytes The above two parameters must be consistent with the configuration input output bytes in the DeviceNet scanner scan list of configuration software such as RSNetWorx otherwise the connection will fail...

Отзывы: