67
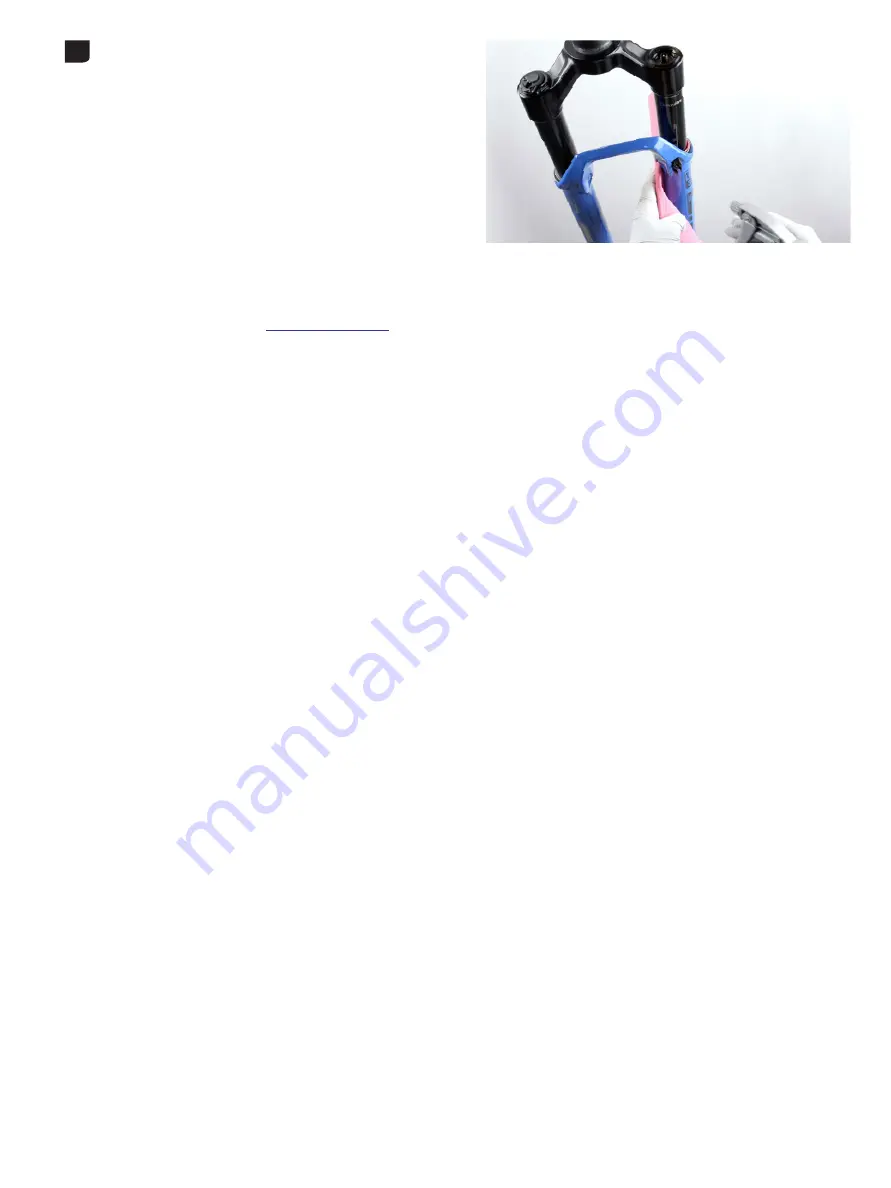
Lower Leg Installation
Clean the entire fork.
This concludes the service of your RockShox SID suspension fork. For Remote user manuals, please visit
www.sram.com/service.
12
Страница 1: ...SERVICE MANUAL GEN 0000000006161 Rev B 2020 SRAM LLC 2021 SID SID SL...
Страница 2: ...y does not apply to products that have been incorrectly installed adjusted and or maintained according to the respective SRAM user manual The SRAM user manuals can be found online at sram com service...
Страница 3: ...SAFETY FIRST We care about YOU Please always wear your safety glasses and protective gloves when servicing RockShox products Protect yourself Wear your safety gear...
Страница 4: ...15 50 HOUR SERVICE LOWER LEG SERVICE 18 200 HOUR SERVICE LOWER LEG SEAL SERVICE 20 AIR SPRING SERVICE 23 TRAVEL CHANGE ADJUSTMENT OPTIONAL 23 BOTTOMLESS TOKEN OPTIONAL INSTALLATION 23 200 HOUR SERVIC...
Страница 5: ...with Clean the part with RockShox Suspension Cleaner or isopropyl alcohol and isopropyl alcohol and a clean lint free shop towel For hard to reach places e g upper tube lower a clean lint free shop t...
Страница 6: ...ngs to return your fork to its pre service settings Record your service date to track service intervals Service Hours Interval Date of Service Air Pressure Rebound setting count the number of clicks w...
Страница 7: ...Lower Leg Oil Weight Volume mL Oil Weight Volume mL Oil Weight Volume mL Grease Oil Weight Volume mL SID Ultimate 110 120 Charger Race Day 3wt Bleed 0w 30 10 DebonAir 0w 30 3 Apply Rock Shox Dynamic S...
Страница 8: ...LUSH 7wt Suspension Oil RL3 RLC3 RockShox Dynamic Seal Grease PTFE Bicycle Tools Bicycle stand Downhill tire lever Shock pump Common Tools Air compressor and nozzle Bench vise and aluminum soft jaws C...
Страница 9: ...und adjuster Rebound nut Crush washer Rebound damper shaft Compression damper Top cap Bottomless Token s Upper tube Brake hose guide Lockout adjuster knob and retaining screw Lower leg Seal head Jounc...
Страница 10: ...ew Spool and screw Crush washer Bottom bolt Rebound adjuster Rebound nut Crush washer Rebound damper shaft Compression damper Top cap Bottomless Token s Upper tube Brake hose guide Lockout adjuster kn...
Страница 11: ...nut Crush washer Rebound damper shaft Compression damper Top cap Bottomless Token s Upper tube Brake hose guide Lockout adjuster knob and retaining screw Lower leg Seal head Jounce bottom out bumper...
Страница 12: ...ottomless Token s Upper tube Lockout adjuster knob and retaining screw Lower leg Wiper seal Coupler Cartridge tube Seal head Dig Valve Air shaft Air piston Top out bumper cup Bumper cone Crush washer...
Страница 13: ...t Crush washer Rebound damper shaft Compression damper Top cap Bottomless Token s Upper tube Brake hose guide Lockout adjuster knob and retaining screw Lower leg Seal head Jounce bottom out bumper Ret...
Страница 14: ...Compression damper Top cap Bottomless Token s Upper tube Lockout adjuster knob and retaining screw Lower leg Wiper seal Coupler Cartridge tube Seal head Piston Spool Retention screw Air shaft Air pist...
Страница 15: ...hrader valve and release all air pressure CAUTION EYE HAZARD Verify all pressure is removed from the fork before proceeding Failure to do so can result in injury and or damage to the fork Wear safety...
Страница 16: ...spring side spring side bottom bolt Clean the bolt and set it aside bottom bolt Clean the bolt and set it aside Ultimate Ultimate Use a 10 mm socket and extension to remove the rebound Use a 10 mm soc...
Страница 17: ...uid begins to drain Continue pulling downward to remove the lower leg pulling downward to remove the lower leg If the lower leg does not slide off of the upper tube or if oil does not If the lower leg...
Страница 18: ...eg Service 5 0 H o u r S e r v i c e L o w e r L e g S e r v i c e Remove the wire spring Remove the wire spring Remove the foam rings Remove the foam rings Clean the foam rings Clean the foam rings 1...
Страница 19: ...and outside of the lower leg Clean the wiper seals of the lower leg Clean the wiper seals Install the foam rings under the wiper seals Install the foam rings under the wiper seals Confirm the foam rin...
Страница 20: ...e lever under the wiper seal Press down on the downhill tire lever handle to remove the seal tire lever handle to remove the seal Repeat on the other side Discard the wiper seals Repeat on the other s...
Страница 21: ...each new wiper seal and set them aside aside SID SL SID SL Use the 32 mm RockShox Dust Seal Installation tool Use the 32 mm RockShox Dust Seal Installation tool SID SID Use the 35 mm RockShox Dust Sea...
Страница 22: ...until the seal surface is flush with the top of the lower leg lower leg Repeat on the other side Repeat on the other side NOTICE Only press the wiper seal into the lower leg until it is flush with th...
Страница 23: ...n a l I n s t a l l a t i o n Bottomless Tokens can be added to or removed from the air top cap to fine tune the bottom out feel and spring curve Bottomless Tokens reduce the air volume in your fork...
Страница 24: ...eads Remove the jounce bottom out bumper from the air shaft if installed Remove the jounce bottom out bumper from the air shaft if installed Push the air shaft into the upper tube to prevent it from g...
Страница 25: ...be Clean and inspect the assembly for damage Clean the inside and outside of the upper tube Clean the inside and outside of the upper tube Inspect the inside and outside of the upper tube for damage I...
Страница 26: ...an and inspect the shaft for damage Clean and inspect the shaft for damage NOTICE Scratches on the air spring shaft can cause air to leak If a scratch is visible the air spring assembly may need to be...
Страница 27: ...to plastic dowel approximately 60 mm from one end Use the dowel to apply the grease to the inside surface of the upper tube approximately apply the grease to the inside surface of the upper tube appr...
Страница 28: ...ur finger to prevent the retaining ring Guide the retaining ring with your finger to prevent the shaft from from getting scratched while installing the retaining ring shaft from from getting scratched...
Страница 29: ...ect or pour RockShox suspension oil into the air spring upper tube Install the top cap and tighten Install the top cap and tighten 200 Hour Service Continue the 200 Hour Service for a Charger Race Day...
Страница 30: ...e screw screw RL RL Turn the lockout adjuster knob to the open unlocked position Turn the lockout adjuster knob to the open unlocked position Remove the knob Remove the knob RL R RL R Loosen the remot...
Страница 31: ...amper Removal Remove the Race Day Damper assembly Remove the Race Day Damper assembly Clean the upper tube threads Clean the upper tube threads Replace the o ring on the top cap Replace the o ring on...
Страница 32: ...ss the rebound shaft to Hold the damper over an oil pan Compress the rebound shaft to purge the oil from the port in the damper top cap Cycle the rebound purge the oil from the port in the damper top...
Страница 33: ...all Make sure the rebound shaft is fully extended and there is a small amount of positive pressure in the system before the syringe is amount of positive pressure in the system before the syringe is r...
Страница 34: ...tion by waiting a few the bladder to come to a natural resting position by waiting a few moments until the syringe stops filling moments until the syringe stops filling Use a shop towel to cover the b...
Страница 35: ...to the bleed port CAUTION EYE HAZARD Oil will eject from the damper assembly if the rebound shaft is compressed Wear safety glasses Push the assembly down to compress the rebound shaft The syringe Pus...
Страница 36: ...ke sure the damper is fully extended and there is a small amount of positive pressure in the system before the syringe is removed This of positive pressure in the system before the syringe is removed...
Страница 37: ...d tighten RL RL Set the lockout adjuster knob on the top cap pin so the screw is Set the lockout adjuster knob on the top cap pin so the screw is facing toward the steerer tube in the unlocked positio...
Страница 38: ...lly compressed Tighten the set screw Tighten the set screw Install the remote spool with the cable set screw oriented within the Install the remote spool with the cable set screw oriented within the 2...
Страница 39: ...urn the lockout adjuster knob to the open unlocked position Remove the knob Remove the knob RL R RL R Remove the cable stop collar Remove the spool Remove the cable stop collar Remove the spool Remove...
Страница 40: ...d remove the rebound damper assembly Wrap Use the wrench flats and remove the rebound damper assembly Wrap a shop towel around the cartridge tube to absorb oil a shop towel around the cartridge tube t...
Страница 41: ...er into the damper damper Place the tube on a shop towel for a few minutes to allow any excess Place the tube on a shop towel for a few minutes to allow any excess cleaner to drain cleaner to drain Dr...
Страница 42: ...Ring Solid Band Glide Ring The solid band glide ring is not removable and The solid band glide ring is not removable and only requires cleaning Do not remove only requires cleaning Do not remove Appl...
Страница 43: ...b into the rebound damper shaft until it Insert the rebound adjuster knob into the rebound damper shaft until it contacts the rebound adjuster screw Rotate the knob contacts the rebound adjuster screw...
Страница 44: ...fluid DOT brake fluid will permanently damage the damper Thread the syringe into the seal head bleed port Thread the syringe into the seal head bleed port Depress the plunger to pressurize the damper...
Страница 45: ...the bleed tip and charger bleed port then Use a shop towel to cover the bleed tip and charger bleed port then unthread and remove the syringe unthread and remove the syringe CAUTION EYE HAZARD Oil ma...
Страница 46: ...embly to test the bleed The shaft should not move more than 2 mm if the bleed was successful more than 2 mm if the bleed was successful If the shaft moves while locked out repeat the bleed section If...
Страница 47: ...he top cap and tighten Install the top cap and tighten RL RL Install the lockout adjuster knob on the top cap so the knob rotates Install the lockout adjuster knob on the top cap so the knob rotates f...
Страница 48: ...e hex adjuster Damper top caps with a groove must be used with a spool that also Damper top caps with a groove must be used with a spool that also has a groove has a groove Proceed to the next step if...
Страница 49: ...spool retention screw Install the spool with the cable set screw oriented within the Install the spool with the cable set screw oriented within the 87 degree range in the diagram 87 degree range in t...
Страница 50: ...the compression adjuster knob counter clockwise to the full open position until it stops open position until it stops RL RL Remove the retaining screw and remove the knob Remove the retaining screw an...
Страница 51: ...l Unthread the damper top cap and remove the damper assembly Unthread the damper top cap and remove the damper assembly Clean the upper tube threads Clean the upper tube threads 4 RL Top Cap Cassette...
Страница 52: ...and free of oil to provide enough grip to unthread the top cap If the cartridge tube slips clean and dry the tube and vise blocks Carefully remove the compression damper Carefully remove the compressi...
Страница 53: ...Spray RockShox Suspension Cleaner or isopropyl alcohol into the Spray RockShox Suspension Cleaner or isopropyl alcohol into the cartridge tube and clean the inside of the tube with a shop towel and a...
Страница 54: ...ply grease to new o rings and install them Remove the glide ring from the rebound damper piston and discard it Remove the glide ring from the rebound damper piston and discard it Install a new glide r...
Страница 55: ...e seal head shaft into the recessed end of the seal head Slide the seal head toward the piston Slide the seal head toward the piston Insert the rebound adjuster knob into the rebound damper and rotate...
Страница 56: ...bound damper shaft Thread a bottom bolt into the rebound damper shaft Pour Maxima PLUSH 3wt suspension oil into the tube until it is almost Pour Maxima PLUSH 3wt suspension oil into the tube until it...
Страница 57: ...s Pour Maxima PLUSH 3wt suspension oil into the tube until the oil is just below the purge holes just below the purge holes Insert the compression damper into the cartridge tube and slowly Insert the...
Страница 58: ...vertical and slowly damper cartridge purge holes Hold the damper vertical and slowly pull the shaft out to full extension Slowly push the rebound damper pull the shaft out to full extension Slowly pu...
Страница 59: ...be purge holes Wear saftey glasses and keep your eyes and face away from the purge holes when compressing the rebound damper Push down on the damper assembly slowly to test the firmest Push down on th...
Страница 60: ...ead the top cap into the upper tube and tighten it upper tube Thread the top cap into the upper tube and tighten it RL RL Install the adjuster knob with the tab in the 7 8 o clock unlocked Install the...
Страница 61: ...all the remote spool onto the hex adjuster with the cable set screw oriented within the 20 degree range in the diagram oriented within the 20 degree range in the diagram Install and tighten the remote...
Страница 62: ...wiper seals Wiper seals may already be greased from the factory Wiper seals may already be greased from the factory Do not apply extra grease to seals that already have Do not apply extra grease to s...
Страница 63: ...een the shaft ends and the lower leg bolt holes should be visible holes should be visible Position the fork at an angle with the lower leg bolt holes oriented Position the fork at an angle with the lo...
Страница 64: ...exposed through the bolt hole so the threads are exposed 200 hour service only 200 hour service only Use a pick and needle nose pliers to remove Use a pick and needle nose pliers to remove the crush w...
Страница 65: ...adjuster nut Install and tighten the rebound adjuster nut onto the and tighten the rebound adjuster nut onto the damper side damper side shaft of shaft of the lower leg the lower leg Select Select Sel...
Страница 66: ...gauge You may see a drop in the indicated air pressure on the pump gauge while filling the air spring this is normal Continue to fill the air spring while filling the air spring this is normal Continu...
Страница 67: ...67 Lower Leg Installation Clean the entire fork Clean the entire fork This concludes the service of your RockShox SID suspension fork For Remote user manuals please visit www sram com service 12...
Страница 68: ...tchMaker Maxle Maxle 360 Maxle DH Maxle Lite Maxle Lite DH Maxle Stealth Maxle Ultimate Micro Gear System Mini Block Mini Cluster Monarch Monarch Plus Motion Control Motion Control DNA MRX Noir NX OCT...
Страница 69: ...1598 8 Chung Shan Road Shen Kang Hsiang Taichung City Taiwan R O C WORLD HEADQUARTERS SRAM LLC 1000 W Fulton Market 4th Floor Chicago Illinois 60607 U S A EUROPEAN HEADQUARTERS SRAM Europe Paasbosweg...