background image

English Manual

Page 5

1019548-A

Hardware Identifier 

DO NOT RETURN PRODUCT IF YOU ARE MISSING PARTS.  

PLEASE CALL: 1 (800) 972-6130 

ILLUSTRATIONS ON THIS PAGE ARE TO SCALE FOR FASTER 

IDENTIFICATION OF HARDWARE DURING ASSEMBLY.

Bolt;  Hex Head   

5/16"-18 x 1”  (x2) 

  . . . .

2M1016P

18

Washer;  Flat,  

5/16”   (x4) 

. . . . . . . . . . . . . .

45M1111P

20

22

Nut;  Nylon Lock 

5/16" -18  (x2) 

  . . . . . . . . . . . . . 

B-4786

Bolt; Carriage,  3/8"-16 x 2-1/4”  (x1) 

  . . . . . . . . . . . . . . . . . . . . .

11M1236P

9

Bolt;  Hex Head,  3/8"-16 x 3-1/2”   (x4) 

. . .

2M1256P

11

Bolt;  Hex Head   

1/4"-20 x 1”  (x4) 

  . . . . .

2M0816P

17

Washer;  Flat 

1/4”  (x8) 

  . . . . . . . . . . . . . . . .

45M0909P

19

21

Nut;  Nylon Lock, 

1/4" -20  (x4) 

  . . . . . . . . . . . . . . 

B-1673P

Bolt;  Hex Head,  1/2”-13 x 3”  (x4) 

. . . . . . . . . . . 

2M1648P

10

Nut;  Reg Hex, 

3/8” -16  (x2) 

  . . . . . . . . . . . . . .

30M1200P


6

Nut;  Nylon Lock, 

3/8” -16  (x4) 

  . . . . . . . . . . . . . .

B-4820

7

Nut;  Nylon Lock 

1/2”  (x4) 

  . . . . . . . . . . . . . . . 

B-5096Y

8

 ADDITIONAL HARDWARE


  ( Only needed for the Lesco Hitch )

Hairpin Cotter 

(x1) 

. . . . . . . . . . . . . . . . . . . . . . . . . . . . . . .  

D-146P

14

* Exterior circumference of washers can vary. These dimensions

are a measurement of the internal diameter of the washer.  

Washer;  

Flat, 1/2”  (x8) 

45M1717P

12

Washer;  

Flat, 3/8”  (x8) 

45M1313P

13

Содержание KSPLS15

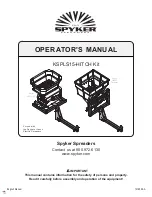
Страница 1: ...yker com IMPORTANT This manual contains information for the safety of persons and property Read it carefully before assembly and operation of the equipment OPERATOR S MANUAL KSPLS15 HITCH Kit For use with the Spyker or Lesco Electric Spreaders Spyker S80 12010 Lesco 102497 Truckster ...

Страница 2: ...the words DANGER WARN ING and CAUTION are used with this safety alert symbol DANGER identifies the most serious hazards The operator s manual also explains any potential safety hazards whenever necessary in special safety messages that are identified with the word CAUTION and the safety alert symbol TABLE OF CONTENTS Safety 2 4 Parts Hardware Identifier 5 Part List 6 Part Explosion 7 Assembly 8 13...

Страница 3: ...when operating the spreader Wear appropriate clothing footwear and safety equipment when operating spreader Do not operate the spreader when barefoot or wearing open sandals This Spreader is designed to be attached to 4 Wheel Vehicles only While significant effort was made to ensure that the recommended vehicles are safe for operation it is up to the operator to use the spreader and vehicle with t...

Страница 4: ...V specifications are recommended Review your Vehicle Operators Manual for your vehicle specifications Must have a 2 0 receiver hitch or an adaptor to accept a 2 0 receiver hitch AND Minimum vehicle dry weight of 1050 lb AND Minimum wheelbase of 70 9 AND Minimum payload capacity of 800lb AND Vehicle tire pressure is at manufacturer s recommended settings AND The Gross Vehicle Weight GVW must never ...

Страница 5: ...x1 11M1236P 9 Bolt Hex Head 3 8 16 x 3 1 2 x4 2M1256P 11 Bolt Hex Head 1 4 20 x 1 x4 2M0816P 17 Washer Flat 1 4 x8 45M0909P 19 21 Nut Nylon Lock 1 4 20 x4 B 1673P Bolt Hex Head 1 2 13 x 3 x4 2M1648P 10 Nut Reg Hex 3 8 16 x2 30M1200P 6 Nut Nylon Lock 3 8 16 x4 B 4820 7 Nut Nylon Lock 1 2 x4 B 5096Y 8 ADDITIONAL HARDWARE Only needed for the Lesco Hitch Hairpin Cotter x1 D 146P 14 Exterior circumfere...

Страница 6: ...Hex Head 1 4 20 x 1 4 18 2M1016P Bolt Hex Head 5 16 18 x 1 2 19 45M0909P Washer Flat 1 4 8 20 45M1111P Washer Flat 5 16 4 21 B 1673P Nut Nylon Lock 1 4 20 4 22 B 4786 Nut Nylon Lock 5 16 18 2 Part List No Part Description Qty 1019549 Hardware Bag 1 4 1001569 Plug Sq Plastic 2 6 5 1007748 01 Pin Hitch Plated 1 6 30M1200P Nut Reg Hex 3 8 16 2 7 B 4820 Nut Nylon Lock 3 8 16 4 8 B 5096Y Nut Nylon Lock...

Страница 7: ...2 These Additional Parts are only needed for attaching to a LESCO Spreader They re unnecessary for a Spyker Assembly 10 12 8 12 4 4 3 8 12 12 12 16 19 17 15 19 19 17 18 22 20 20 20 18 20 22 21 19 19 21 19 19 19 13 2 13 13 5 14 13 9 7 11 11 6 1 13 13 13 7 6 4 13 ...

Страница 8: ...Hardware Identifier DO NOT RETURN PRODUCT IF YOU ARE MISSING PARTS PLEASE CALL 1 800 972 6130 ILLUSTRATIONS ON THIS PAGE ARE TO SCALE FOR FASTER IDENTIFICATION OF HARDWARE DURING ASSEMBLY Bolt Carriage 3 8 x 2 1 4 x1 11M1236P 9 Bolt Hex Head 3 8 x 3 1 2 x4 2M1256P 11 Bolt Hex Head 1 2 x 3 x4 2M1648P 10 Nut Reg Hex 3 8 16 x2 30M1200P 6 Nut Nylon Lock 3 8 16 x4 B 4820 7 Nut Nylon Lock 1 2 x4 B 5096Y...

Страница 9: ...s 11 Run these bolts through the adjustment plate 2 and the spreader mount 3 Secure with another 3 8 washer 13 and 3 8 nylon lock nut 7 Tighten the bolts down Fig 5 Align the spreader mount 3 with the adjustment plate 2 as illustrated below Fig 5 Add a 3 8 washer 13 to two 3 8 hex bolts 11 Run these bolts through the adjustment plate 2 and the spreader mount 3 Secure with another 3 8 washer 13 and...

Страница 10: ...o each of four 1 2 x 3 hex head bolts 10 Slide these bolts through the adapter plates 15 and 16 After each bolt passes through the plates and mount 3 secure in place using the remaining four 1 2 flat washers 12 and 1 2 hex nuts 8 SPYKER LESCO 15 12 12 12 12 10 10 10 10 8 8 8 8 12 12 12 12 3 16 Fig 6 7 Adding Spreader Adapter Brackets The assembly process for the next few steps will vary depending ...

Страница 11: ...llustrated below 3 B 3 2 LESCO Measure from the ground to the top of the center tubing of the spreader mount 3 as illustrated below B 3 3 2 IF THIS MEASUREMENT IS MORE THAN 15 INCHES The Spreader Mount 3 will need to be moved down Each hole in the Adjustment Plate 2 will allow for 1 of drop Move the Spreader Mount 3 down until dimension B is 15 off the ground NOTE In the Spyker configuration the S...

Страница 12: ...tor plate 16 Add a 1 4 flat washer 19 to two 1 4 x 1 hex head bolts 17 Slide these bolts through the hitch mount and spreader as illustrated After bolts pass through secure each with an additional 1 4 flat washer 19 and 1 4 hex nut 21 Next add a a 5 16 washer 20 to a 5 16 x 1 hex bolt 18 At the base of the adaptor plate 16 run the bolt through the small gap and secure on the outside with another 5...

Страница 13: ...p 14 check all bolts and nuts to be sure they are tight and secure 16 The spreader must be secured with ratchet straps not included before use Secure one end of the strap to the spreader frame and the opposite end of the strap to the UTV roll cage or bed if not skip to Step 13 11 To adjust the spreader fan angle all ballast must be removed Using the slot in the adjustment plate 3 rotate the spread...

Страница 14: ...readers will not be liable for any loss damage or expense including but not limited to consequential or incidental damages arising from the operation condition or use of the item The sole and exclusive remedy against Spyker Spreaders being the replacement of the defective parts This warranty gives you specific legal rights and you may also have other rights which vary from state to state This expr...

Отзывы: