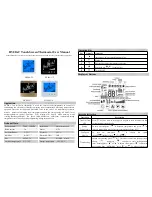
Display Elements
1. Primary display: T1, T2, IR, T3, T4,
T1-T2, T1-IR, T2-IR, T3-T4, IR-T3, or
IR-T4 reading.
2. Tertiary display: The elapsed time or IR
temperature reading.
3. MIN:SEC or HOUR:MIN display.
4. Fourth display: T1 or T3 reading.
5. Thermocouple type.
6. IR temperature.
7. Displays while Setup menu is activated.
8. Setup menu; offset of T1, T2, IR, T3, T4.
9. Auto power OFF.
10. Low power.
11. Fifth display: T2 or T4 reading.
12. MAX, MIN, AVG display.
13. Secondary display: T1, T2, T3, or T4
reading.
14 Unit of temperature.
15. Displays while recording data.
16. Displays while freezing data.
Back, Sheet 1
1
2
3
4
5
6
7
8
9 10
11
12
13
14
15
16
T1-T2-Ir-T3-T4 HOLd reC
T1-Ir
Ir-T4
T1-T2-T3-T4
T1-T2-T3-T4
-888.8
Ir
Ir
-8888 -8888
hour : min : sec MaX MIn aVG
T1
T2
T3
T4
-8888 -8888
K
•
f
•
C
K Ir TeMP SeTUP OffSeT
OPERATING INSTRUCTIONS
Displaying Temperatures
1. Plug a thermocouple(s) into the T1, T2, T3, or T4 input connector located at the top of the thermometer.
2. Turn the thermometer ON by pressing .
3. Press to select the preferred temperature scale (Celsius, Fahrenheit, or Kelvin).
4. Hold or attach the thermocouple(s) to the location requiring a temperature measurement. The
temperature reading appears in the primary display.
5. Press to toggle the T1, T2, T3, T1-T2,T1-T3, and T2-T3 readings to show in the primary or
secondary displays.
Notes:
•
“ - - - -” is displayed when a thermocouple is defective or not connected.
•
OL (overload) is displayed when the temperature being measured is outside the thermometer’s range.


