

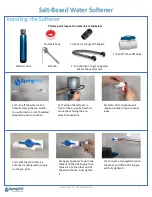
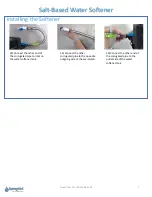

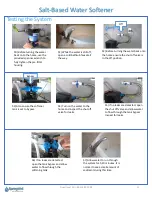


Installing the Softener
13) Position the softener in
front of the pre-plumb with its
connections facing the pre-
plumb connections.
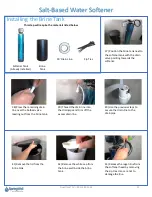
Softener Tank
This step will require the materials listed below
Plumbers Tape
Wrench
1-inch (24-inch Long) Corrugated
Water Connectors (x2)
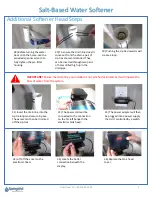
12) Turn off the water to the
home and prep the pre-plumb.
You will attach a 1-inch threaded
adapter to each connection.
Questions? Call (800)-589-5592
6
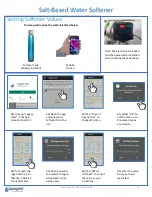
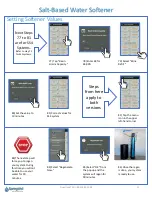
Salt-Based Water Softener
14) Note: All connections will
require plumbers' tape to avoid
leaks.
16) Apply plumbers' tape to the
threads on the PVC Nipple then
thread it into the other end of
the shut off valve. Fully tighten
it.
17) Connect a corrugated pipe to
the other end of the PVC Nipple
and fully tighten it.
15) Install the shut off valve
onto the incoming water supply
on the pre-plum.
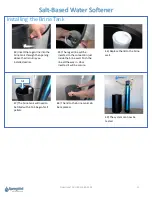
1-inch (3-inch long) PVC Nipple
1-Inch PVC Shut Off Valve


