background image

18


1-800-732-0144


WWW.SPORTDOG.COM


19


TO MANUALLY PROGRAM THE REMOTE TRANSMITTER’S ID CODE FOLLOW THESE STEPS:

1 . Turn the intensity dial to level 9, flip the toggle switch up, and then press and release the mode  

  button on the back of your Remote Transmitter. This does not change the mode, so the current mode  

  will still be active after the ID change is complete.

2 . Once the mode button is released, the green indicator light will illuminate and stay on for  

  15 seconds. 

3 . While the green light is on, turn the intensity dial to select the 1st digit of the ID, using 1-9,  and  

  then press and  release the top button. The green light will flash rapidly confirming selection. 

4 . Again, while the green light is on, turn the intensity dial to select the 2nd digit of the ID, using 1-9,    

  and then press and release the top button. The green light will flash rapidly confirming selection.  

  The 2nd digit is optional, and if not desired, just wait until the green light turns off and refrain from  

  pressing the top button.

5 . At the end of 15 seconds, or after the second press of the top button, the green light will turn off  

  and the ID of the unit will be updated. At this point, the unit will be in the same mode it was  

  in prior to setting the ID. 

6 . Upon changing the ID Code, you will need to match the Collar Receiver to the Remote Transmitter.  

  See Step 6 below.

NOTE: If you press the top button only once (skipping Step 4) the ID is still a two digit ID. The left 

digit is defaulted to 1. For example, if you selected 6 in Step 3 and pressed the button only once, the 

ID you get will be 16. 

To return the unit to the factory ID follow these steps:

1 . Turn the intensity dial to level 9, flip the toggle switch up, and then press and release the mode  

  button on the back of your Remote Transmitter. This does not change the mode, so the current mode  

  will still be active after the ID change is complete.

2 . Do not press any buttons and wait until the green indicator light turns off.

3 .  You will now need to match the Collar Receiver to the Remote Transmitter. See Step 6 below.

MATCH THE COLLAR RECEIVER AND REMOTE 
TRANSMITTER

To reset the Collar Receiver to work with a new Remote Transmitter or to reprogram a new Collar 

Receiver to work with your existing Remote Transmitter:

1. Flip the toggle switch on your Remote Transmitter to the 

up

 position.

2. Turn the Collar Receiver off.

3. Press and hold the On/Off Button. The Receiver Indicator Light will come on, then turn off after 4-5 

seconds. If the On/Off Button is released too early, the Receiver Indicator Light will begin flashing 

as  normal. If this occurs, start over and repeat from 

(2)

.

4. After the Receiver Indicator Light has turned off, release the On/Off Button. 

5.  Press and hold the Top Button on the Remote Transmitter until the Receiver Indicator Light flashes 

5 times. You may need to hold both units 2-3 feet from each other before this occurs. Once the 

Receiver Indicator Light has flashed 5 times, the Collar Receiver has been reset and will begin 

flashing as normal. If the Receiver Indicator Light does not flash 5 times, start over and repeat 

from 

(1)

.

S

TE

P


::


06

Содержание PROHUNTER 2525

Страница 1: ...OPERATING GUIDE PLEASE READ THIS ENTIRE GUIDE BEFORE BEGINNING ...

Страница 2: ... which if not avoided could result in harm to your dog Not for use with aggressive dogs Do not use this product if your dog is aggressive or if your dog is prone to aggressive behavior Aggressive dogs can cause severe injury and even death to their owner and others If you are unsure whether this product is appropriate for your dog please consult your veterinarian or a certified trainer This device...

Страница 3: ...discontinue use of the collar until the skin has healed If the condition persists beyond 48 hours see your veterinarian For additional information on bed sores and pressure necrosis please visit the FAQ section for remote trainers at www sportdog com These steps will help keep your dog safe and comfortable Millions of dogs are comfortable while they wear stainless steel contacts Some dogs are sens...

Страница 4: ...e able to help you faster Most importantly SportDOG will never give or sell your valuable information to anyone Complete warranty information is available online at www sportdog com ____________________________________________________________________ TABLE OF CONTENTS COMPONENTS 5 HOW THE SYSTEM WORKS 5 KEY DEFINITIONS 6 PREPARE THE REMOTE TRANSMITTER 7 PREPARE THE COLLAR RECEIVER 8 FIT THE COLLAR...

Страница 5: ...ion level to your dog s temperament eliminating the risk of over correction IMPORTANT THE PROHUNTER 2525 HAS A RANGE OF UP TO TWO MILES DEPENDING ON THE WAY YOU HOLD THE REMOTE TRANSMITTER THE MAXIMUM RANGE MAY VARY FOR CONSISTENT RESULTS AT LONGER RANGES HOLD THE REMOTE TRANSMITTER IN A VERTICAL POSITION AWAY FROM YOUR BODY AND ABOVE YOUR HEAD TERRAIN WEATHER VEGETATION TRANSMISSION FROM OTHER RA...

Страница 6: ...h the Remote Transmitter is waterproof without it keep the cover in place when not charging to keep debris out of the opening See Step 1 COLLAR RECEIVER Receives the radio signal from the Remote Transmitter and delivers the stimulation vibration and or a tone for correcting your dog It is waterproof and can be submerged in water to a depth of 25 feet RECEIVER INDICATOR LIGHT Indicates when the Col...

Страница 7: ...te battery life between charges is 40 to 60 hours depending on frequency of use The Remote Transmitter is factory set to mode 1 in the toggle up position see page 14 TRANSMITTER INDICATOR LIGHT OPERATIONAL MODE LIGHT COLOR BATTERY STATUS LIGHT FUNCTION Continuous stimulation or Tone only button pressed Green Good Light is solid in color while button is pressed Continuous stimulation or Tone only b...

Страница 8: ...harger into a standard 120 240 volt AC wall outlet 4 Charge the Collar Receiver for 2 hours for the first charge and every charge thereafter Using Li Ion technology the Collar Receiver only requires a 2 hour charge It is not harmful to let the unit charge for more than 2 hours Press and release the On Off Button when the Receiver Indicator Light comes on The Collar Receiver will beep 1 to 3 times ...

Страница 9: ...g as button is pressed RECHARGEABLE BATTERIES This device contains Lithium Ion Li Ion batteries never incinerate puncture deform short circuit or charge with an inappropriate charger Fire explosion property damage or bodily harm may occur if this warning is not followed Risk of explosion if battery is replaced by an incorrect type Dispose of used batteries according to the instructions page 25 Bat...

Страница 10: ...s beyond 48 hours see your veterinarian For additional information on bed sores and pressure necrosis please visit the FAQ section for remote trainers at www sportdog com These steps will help keep your dog safe and comfortable Millions of dogs are comfortable while they wear stainless steel contacts Some dogs are sensitive to contact pressure You may find after some time that your dog is very tol...

Страница 11: ... no response check to see if Collar Receiver is snug against your dog s neck Then go back to Intensity Level 1 and repeat the process If your dog still does not indicate he is feeling the stimulation you have two options you may either have to trim the hair beneath the Contact Points or switch to the longer Contact Points included in your system If after completing all of these steps your dog stil...

Страница 12: ...ory of misbehaving unless you can supervise him and use the ProHunter 2525 for applying tone vibration or stimulation If you notice one situation in which your dog misbehaves repeatedly set up this situation as a training session This will dramatically increase your chances of success If your dog has a timid reaction to the tone vibration or stimulation especially the first couple of times do not ...

Страница 13: ...ton When the mode button is pressed the Transmitter Indicator Light will be solid in color When it is released it will flash the mode selected For example if mode 5 is desired in the toggle up position adjust the Intensity Dial to Level 5 Once the mode button has been depressed the Transmitter Indicator Light will be solid and once the mode button is released the Transmitter Indicator Light will f...

Страница 14: ...t by intensity dial OR Tone if V T on Dial Dog 2 5 Continuous HIGH stimulation Level set by intensity dial OR Tone if V T on Dial Dog 3 6 Continuous HIGH stimulation Level set by intensity dial OR Tone if V T on Dial 6 Dog 1 4 Continuous HIGH stimulation Level set by intensity dial OR Vibe if V T on Dial Dog 2 5 Continuous HIGH stimulation Level set by intensity dial OR Vibe if V T on Dial Dog 3 6...

Страница 15: ...wing you to set the desired stimulation level While the LED is solid the user can set the desired level using the intensity dial and save it by pressing the top button The Transmitter Indicator Light will quickly flash acknowledging your selection If no button is pressed within the 15 second window the previous value will be used If no level has ever been set then the unit will default to the maxi...

Страница 16: ...nsity dial OR Tone if V T on Dial 3 N A Continuous MEDIUM stimulation Level set by intensity dial OR Vibe if V T on Dial Continuous LOW stimulation Level set by intensity dial OR Vibe if V T on Dial 4 N A Continuous HIGH stimulation Level set by intensity dial OR Vibe if V T on Dial Tone Only 5 N A Continuous HIGH stimulation Level set by intensity dial OR Tone if V T on Dial Vibe Only 6 N A Dog 1...

Страница 17: ...vel set by intensity dial OR Tone if V T on Dial Dog 1 2 2 Continuous HIGH stimulation Level set by intensity dial OR Vibe if V T on Dial Dog 1 2 2 N A Dog 1 2 2 N A Dog 1 2 2 N A UP Continuous HIGH stimulation Level set by intensity dial OR Vibe if V T on dial Down Tone Only 2 N A UP Continuous HIGH stimulation Level set by intensity dial OR Tone if V T on dial Down Vibe Only 2 N A Dog 1 2 2 N A ...

Страница 18: ... 1 For example if you selected 6 in Step 3 and pressed the button only once the ID you get will be 16 To return the unit to the factory ID follow these steps 1 Turn the intensity dial to level 9 flip the toggle switch up and then press and release the mode buttononthebackofyourRemoteTransmitter Thisdoesnotchangethemode sothecurrentmode will still be active after the ID change is complete 2 Do not ...

Страница 19: ...efer to the back cover for compatible Add A Dog Collar Receivers for this system THREE DOG OPERATION 1 Making sure the toggle switch on your Remote Transmitter is in the up position program the Remote Transmitter to mode 3 4 5 6 or 8 see pages 14 15 2 Program the first Collar Receiver A Turn the Collar Receiver off B Press and hold the On Off Button The Receiver Indicator Light will come on then t...

Страница 20: ...e Collar Strap SAC00 10815 3 4 Blue Collar Strap SAC00 11921 3 4 Red Collar Strap SAC00 11820 3 4 Yellow Collar Strap SAC00 12795 3 4 Green Collar Strap SAC00 10817 3 4 White Collar Strap SAC00 12796 Collar Receiver does not include collar strap SDT00 12490 Remote Transmitter Only SDT00 13488 Antenna SAC00 13513 Contact Points Short SAC00 12571 Contact Points Long SAC00 12570 Battery Kit Collar Re...

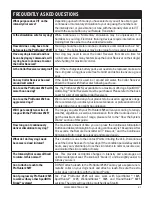
Страница 21: ...eivers Can I use the ProHunter 2525 on aggressive dogs We do not recommend any of our products to be used on aggressive dogs We recommend you contact your local veterinarian or professional trainer to determine if your dog might be aggressive Will I get exactly two miles of range with the ProHunter 2525 The range you get with your ProHunter 2525 will vary according to terrain weather vegetation as...

Страница 22: ...ions section for details on page 23 Increase the Intensity Dial Refer to Find the Best Intensity Level for Your Dog for more information Increase the Stimulation Range Refer to Changing Stimulation Ranges for more information Make sure the Collar Receiver s Contact Points are placed snugly against your dog s skin Refer to Fit the Collar Receiver for more information You may need to switch to the l...

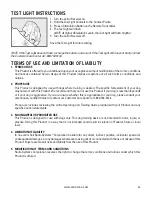
Страница 23: ... We recommend that you not use this Product if your dog is less than 8 pounds or if your dog is aggressive If you are unsure whether this is appropriate for your dog please consult your veterinarian certified trainer or contact our Customer Care Center at 1 800 732 0144 Proper use includes reviewing the entire Operating and Training Guide provided with your Product and any specific Caution stateme...

Страница 24: ...a Increase the separation between the equipment and the receiver Connect the equipment to an outlet on a circuit different from that to which the receiver is connected Contact customer service or an experienced radio TV technician for assistance Caution Unauthorized changes or modifications to the equipment may violate FCC regulations and could void the user s authority to operate the equipment Un...

Страница 25: ...TE TRANSMITTER UNTIL YOU HAVE RECEIVED THE REPLACEMENT Using a 5 64 hex key for your Remote Transmitter and or a 3 32 Allen wrench for your Collar Receiver remove the case screws Remove the case back cover from your Collar Receiver and or the bottom cover from your Remote Transmitter Removetheoldbatterypack NOTE Whenremovingtheoldbatterypack caremustbetakenwhengrippingthe connector firmly to avoid...

Страница 26: ...26 1 800 732 0144 ...

Страница 27: ...WWW SPORTDOG COM 27 ...

Страница 28: ...ille TN 37932 1 800 732 0144 400 1295 2011 RADIO SYSTEMS CORPORATION SDR A ADD A DOG NOTE SDR FS SDR FH SDR SDR CH SDR FC SDR BEEP AND SDR H ADD A DOG COLLARS ARE NOT COMPATIBLE WITH THIS SYSTEM OTHER COMPATIBLE COLLARS INCLUDE SDR AH SDR AW ADD A DOG ...

Отзывы: