5
The step counter values cannot be reset. Only the values of calories counter can be reset and the new settings can be made.
PULSE SENSOR FUNCTION
press the button for pulse measuring to enter the mode of pulse (this is a red button which is located on the lower part of the pedometer edge)- put
your index finger on the pulse sensor, which is located on the left upper edge of the pedometer (do not press the finger against the sensor too
heavily).
The pedometer starts the pulse measuring automatically. The BPM (beats per minute) value can be displayed after a few seconds of measuring, so
please wait patiently for the result.
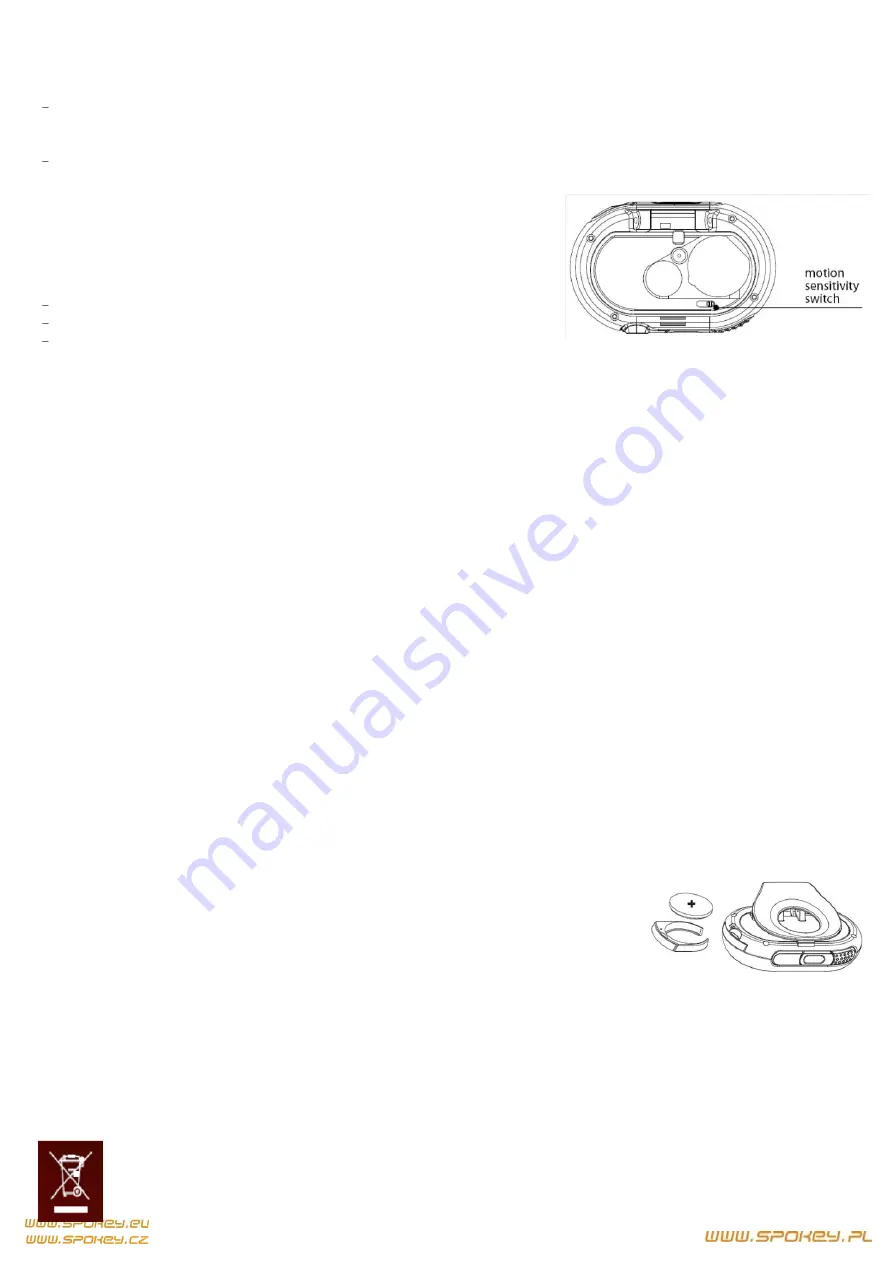
Switcher to adjust the level of movements accuracy.
Change the position of the switcher slightly to adjust the level of movements accuracy. Try to
set switcher in different positions to make the best adjustment to individual needs of a user
USE OF CHRONOGRAPH
Chronograph starts working automatically once the pedometer is on.
Chronograph turns off once the pedometer is off.
Chronograph values will reset once the button UP is pressed for around 3 seconds in mode
„Step”.
VALUES OF TECHNICAL PARAMETERS
Step counter
- 1-99 999 steps
Distance
- Distance can be displayed up to 99.999 mile (km) with 0.001 mile (km) resolution.
Stride length
- 10-80 inches/ 25-203 cm
Calories -
Calories burned can displayed up to 9999.9 kcal with 0.1 kcal resolution.
User’s weight -
50-300 lbs / 23-136 kg
HOW MANY STEPS SHOULD BE MADE EACH DAY
It is recommended to make 10.000 steps daily to prevent chronic diseases. In order to lose weight efficiently, it is suggested to make 12.000 up to
15.000 steps every day.
It is recommended to make at least 3000 steps daily to remain fit.
PEDOMETER WEARING
Pedometer can be easily clipped to waist or belt of a user. In order to get the most precise training values, it is recommended to attach pedometer in
line with the outer seam of clothes.
NOTE: Some situations may result in incorrect step counting:
1
The step counter is not directly perpendicular to the ground:
The face of pedometer should be at least 60 degrees angle positioned towards the walking surface.
2
Uneven walking, irregular stepping;
3
Training other than walking or running;
4
Driving a car or other mobile device;
5
Motion of standing up, sitting down, climbing the stairs.
BATTERY REPLACING
1. Release the battery compartment by taking out the screw, as shown in the below photo. Be careful to avoid getting the screw lost.
2. Take out the cover of the battery compartment with the help of a coin or any other small and sharp object
3. Remove the old battery and replace it with new ones. Make sure that polarities of battery are placed in right positions.
4. Put the cover back on the battery compartment
5. Close the battery cover and tighten the screw.
PRESERVATION OF PEDOMETER
1. Do not put pedometer into water. Do not clean in water and do not touch with wet hands. Make sure that
water will not get inside of the device.
2. Clean pedometer only with a soft and dry cloth or with a cloth slightly moistured with water and/ or a
neutral detergent. Never use detergents in spray.
3. Prevent from dropping, strong shocks etc.
4. Keep pedometer in a dry and cold place.
5. Very low temperatures may cause improper working of the display. The malfunctioning of display should cease once the temperature goes up.
6. Avoid direct sunlight, high temperatures, high level of moisture or dust.
7. Remove batteries in case the device is not used for more than 3 months.
8. Keep this instruction manual and other information about this pedometer in a safe place for future reference.
This marking informs that this device is subject to WEEE Directive that regulates the management of waste electrical and electronic
equipment. A product marked with this symbol cannot be treated as a household waste and should be utilised. For thi purpose, contact the
shop where the product was purchased, the representative of local authorities or the deliverer of recycling services. An appropriate waste
recycling helps to protect natural environment.
Содержание 83512
Страница 9: ...8 5 6 1 2 3 4 5 6 7 8 WEEE...


