5. After about 2 minutes check web access to the STREAMbox by entering http://splash/ into your web browser.
This requires a network name resolver (DNS) to be accessible on your network which isn’t always available, so it
may not work. The password is the first 5 characters of your fingerprint (see separate document for instructions
on the Streambox’s Web Information Page). The STREAMbox acquires an IP address from the DHCP server, so
if you’re able to determine this address you can use that instead of http://splash. **
6. After about 5 minutes log onto the Splash Monitoring web site and enter your fingerprint into the Dashboard and
click “Scan”. If the installation was successful you should see data from the Bootloader(s) appear.
7. If you have data on the Dashboard then you can go on to configure your site as described in the “Getting Started”
document.
** You can ascertain the IP address of the STREAMbox by plugging a monitor into the VGA socket on the back of the
STREAMbox, then switch off and back on to re-boot. At the end of the boot sequence the STREAMbox’s IP address will
be displayed on the monitor. Enter this IP address into your web browser to get the STREAMbox web information page.
Alternatively you could try entering ‘arp –a’ at the command prompt on your network attached Windows PC. This will
sometimes give the STREAMbox’s IP address as “splash.local (aaa.bbb.ccc.ddd) …..” where aaa.bbb.ccc.ddd is the
STREAMbox’s IP address.
Getting the Memory Manager Software
1. Remove any previous Memory Manager installs from your PC.
2. Download Memory Manager for the Bootloader from:
http://www.ta.co.at/en/downloads/software/memory-manager
Setting the IP address on the Bootloader.
1. Start Memory Manager.
2. Click Setup.
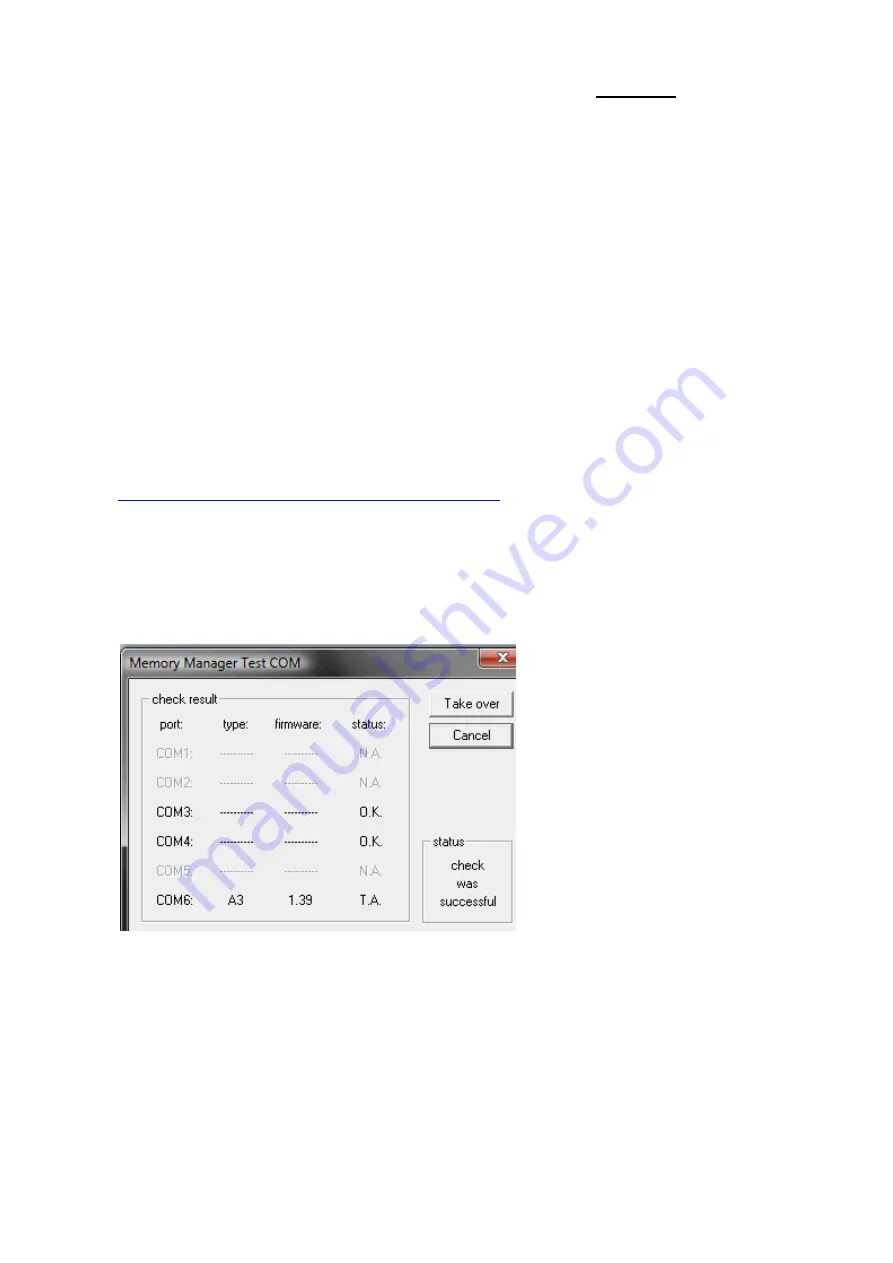
3. Run a COM test to see if it recognizes a T.A. Device
4. If you see T.A. as above example, click cancel and select the radio button that corresponds to the correct
COM port (in this case COM6). Click Save.


