Customer Service 1-888-707-1880
Dyaco Canada Inc. 2016
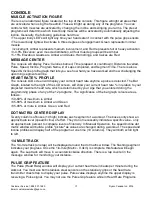
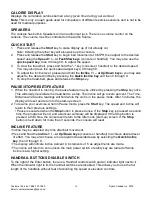
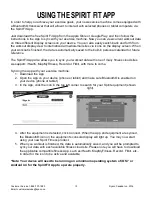
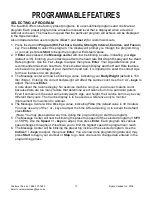
Email: [email protected]
9
'
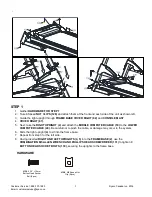
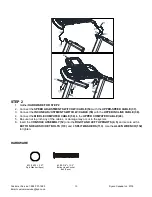
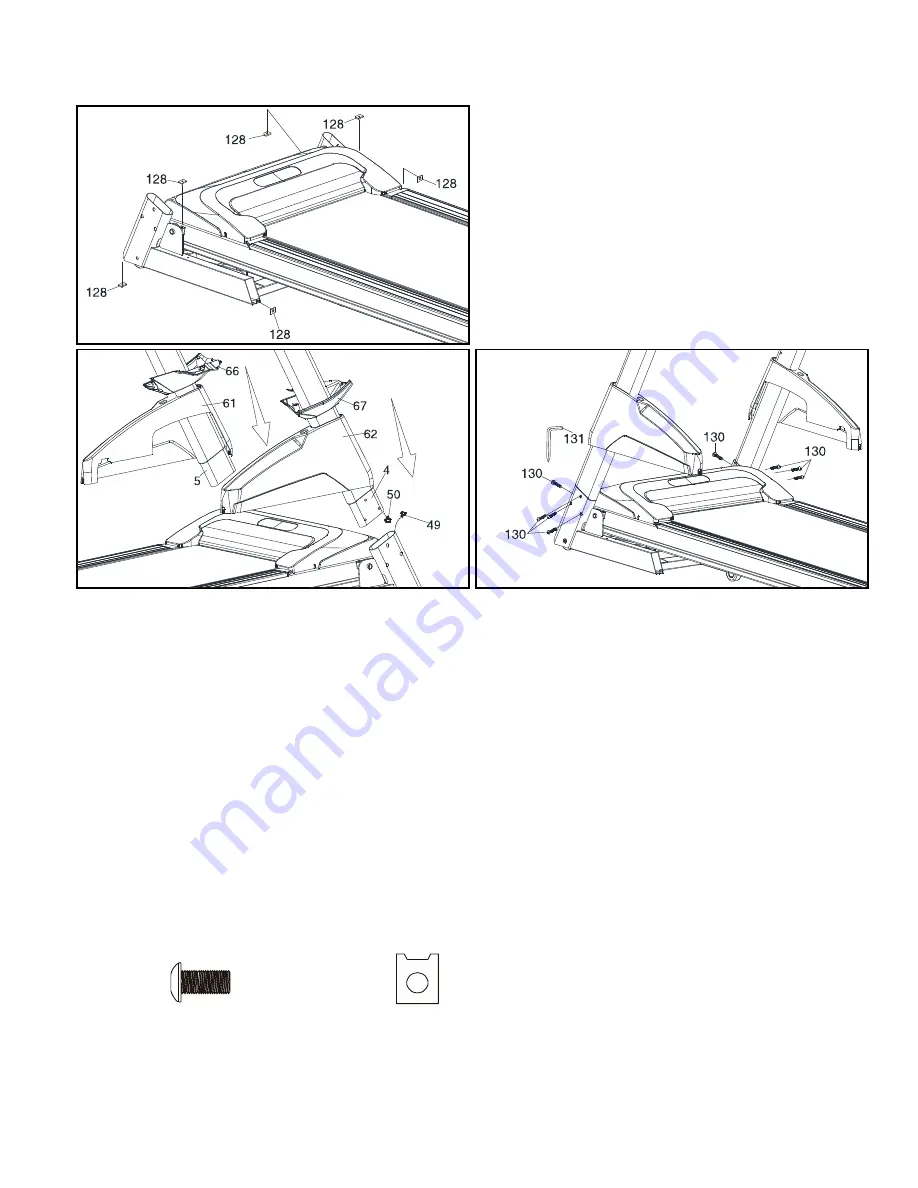
STEP 1
1. Gather
HARDWARE FOR STEP 1
.
2. Take 6 Speed
NUT CLIPS (128)
and attach them at the front and each side of the unit as shown left.
3. Guide the right upright through
FRAME BASE COVER RIGHT (62)
and
CONSOLE MAST
4.
COVER RIGHT (67).
5. Next, take the
RIGHT UPRIGHT (4)
and attach the
MIDDLE COMPUTER CABLE (50)
to the
LOWER
COMPUTER CABLE (49).
Be careful not to pinch the cable, or damage may occur to the system.
6. Slide the right upright
(4)
to sit into the frame base.
7. Repeat from step 3 for the left side.
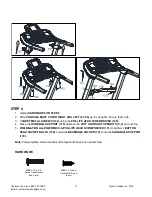
8. Having inserted
RIGHT AND LEFT UPRIGHTS (4, 5)
into the
FRAME BASE (2)
, use the
COMBINATION M5 ALLEN WRENCH AND PHILLIPS HEAD SCREWDRIVER (131)
to tighten 8
BUTTON HEAD SOCKET BOLTS (130),
securing the uprights to the frame base.
HARDWARE
#
130
. 5/16” × 15mm
Button Head Socket
Bolt (8 pcs)
#
128
. M5 Speed Nut
Clip (6 pcs)


