
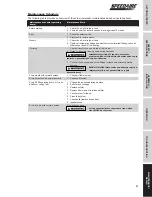


MAINTENANCE
See Maintenance Schedule on Page 21.
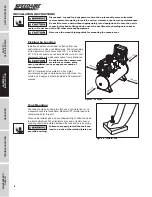
Disconnect, tag and lock out power source then release all pressure from the
system before attempting to install, service, relocate or perform any maintenance.
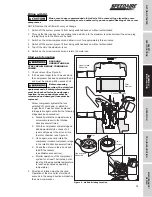
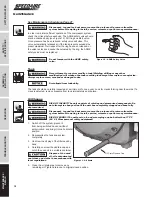
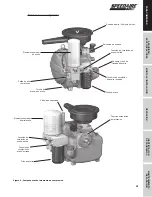
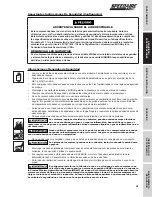
In order to maintain efficient operation of the compressor system,
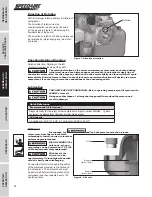
check the oil level before each use. The ASME safety valve should
also be checked daily (see Figure 10). Pull ring on safety valve.
Once pressure has been relieved, safety valve will close. This
valve automatically releases air if the tank pressure exceeds the
preset maximum. If air leaks after the ring has been released, or
the valve is stuck and cannot be actuated by the ring, the ASME
safety valve must be replaced.
Do not tamper with the ASME safety
valve.
Tank
Never attempt to repair or modify a tank! Welding, drilling or any other
modification will weaken the tank resulting in damage from rupture or explosion.
Always replace worn, cracked or damaged tanks.
Drain liquid from tank daily.
The tank should be carefully inspected at a minimum of once a year. Look for cracks forming near the welds. If a
crack is detected, remove pressure from tank immediately and replace.
Oil Change
RISK OF INJURY! The unit consists of rotating and pressurized components. Do
not attempt to change oil until the unit has completely stopped and been fully
depressurized.
Disconnect, tag and lock out power source then release all pressure from the
system before attempting to install, service, relocate or perform any maintenance.
RISK OF BURNS! The unit parts, oil, and screw plug can be hotter than 175° F
(80° C)! Wear personal safety equipment!
1. Switch off the system, prevent it
from being switched back on without
authorization, and bring it into a horizontal
position.
2. Depressurize the tank and system
completely.
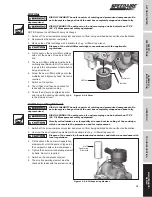
3. Unscrew the oil plug of the filler neck by
hand.
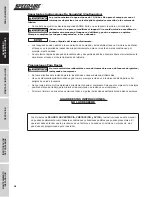
4. Carefully unscrew the oil drain cap and
catch the used oil in a suitable container.
Dispose of the used
oil, oil-contaminated
container, and cloths in accordance with
local regulations.
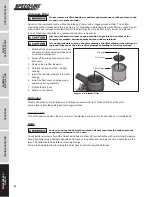
5. Clean the oil drain pipe to remove any
remaining oil. Tighten drain cap to original closed position.
18
MAINTENANCE /
REP
AIR
TROUBLESHOOTING
OPERA
TION
ASSEMBL
Y /
INST
ALLA
TION
SAFETY
/
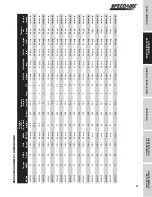
SPECIFICA
TIONS
GETTING ST
ARTED
Figure 10 - ASME Safety Valve
Figure 11 - Oil Drain
Oil Drain Pipe and Cap


