background image

ENGLISH

ENGLISH

3

4

FAUCET INSTALLATION

6

5

2

Thank you for purchasing this Pfister product.  All Pfister products are carefully engineered, and factory tested to provide 

long trouble-free use under normal conditions.  This product is easy to install using basic tools and our easy to follow illus-

trated instructions.  If you have any questions regarding this product, call 1-800-Pfaucet (1-800-732-8238).

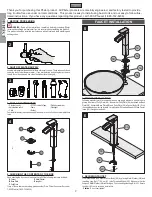
1  BEFORE PROCEEDING

WARNING:

 Read all the instructions completely before proceeding. Pfister 

recommends calling a professional if you are uncertain about installing this product!

This product should be installed in accordance with all local and state plumbing and 

building codes.

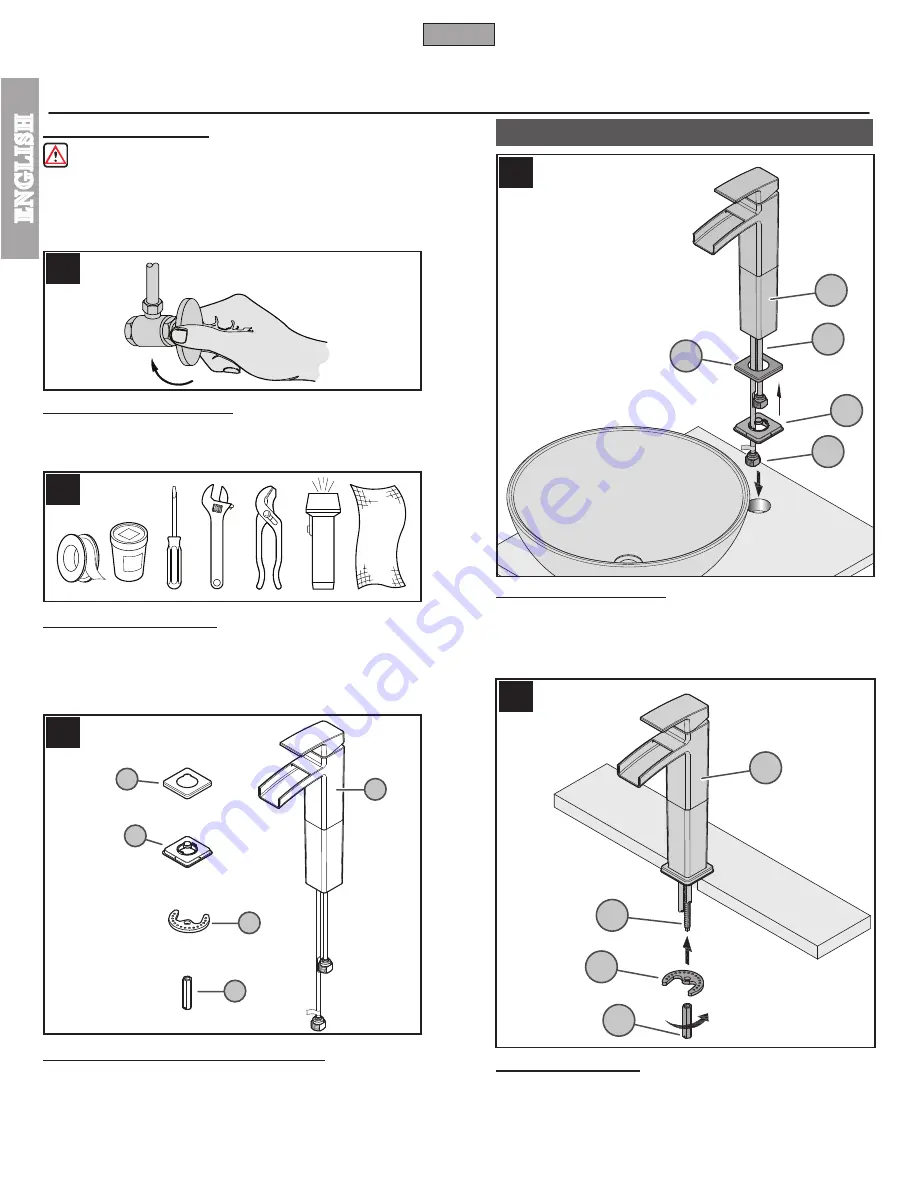
2  SHUT OFF WATER SUPPLY

Locate water supply inlets and shut off the water supply valves.  These are usually found 

under the sink or near the water meter.  If you are replacing an existing faucet, remove 

the old faucet from the sink and clean the sink surface thoroughly.

3  TOOLS RECOMMENDED

• Plumber's putty 

• PTFE Plumber's Tape 

• Slotted screwdriver 

• Adjustable wrench 

• Pliers 

• Flashlight 


• Cloth 

• Bucket 

Your installation may require new supply lines and / or shut-off valves or other additional 

tools.

4  CHECKING THE CONTENTS OF THE BOX

Upon opening the box, check to ensure that all of the following items are included.

A

  Faucet 

D

  Metal Washer

B

  Base Plate 

E

  Long Nut

C

  Putty Plate 

If any of these items are missing, please contact Price Pfister Consumer Service at 

1-800-Pfaucet (1-800-732-8238).

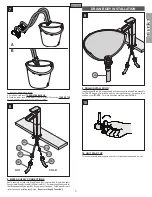
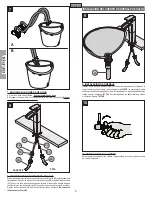
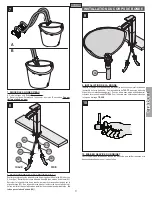
5  FAUCET INSTALLATION

Following manufacturer’s recommendations on use, apply plumber’s putty into putty 

groove in bottom of Putty Plate (

5A

).  Ensure that Putty Plate (

5A

) is pressed on Base 

Plate (

5B

).  Assemble Base Plate (

5B

) and Putty Plate (

5A

) to Faucet Body (

5C

).  With 

the handle and spout facing forward, carefully insert Threaded Shank (

5D

) and Faucet 

Inlets (

5E

) through hole on sink.

6  SECURING FAUCET

From underneath sink, secure Faucet Body (

6A

) by placing Metal Washer (

6B

) and 

threading Long Nut (

7

/

16

“ Hex.) (

6C

) onto Threaded Shank (

6D

).  Make sure that the 

bumps on Metal Washer (

6B

) are facing up.  Firmly hand tighten Long Nut (

6C

).  Secure 

Long Nut (

6C

) not to exceed a quarter turn.

Caution

: Do not over tighten!

2

5C

5D

5E

A

B

C

D

E

5A

5B

6A

6D

6C

6B

Содержание Pfister Kenzo 40 Series

Страница 1: ...e 1 llamar al 1 800 Pfaucet 1 800 732 8238 para hablar con un representante de servicio al cliente que lo pueda ayudar o 2 escribir al departamento de servicio al consumidor c o Pfister Inc 19701 DaVinci Lake Forest CA 92610 U S A e incluir una descripción del problema el número del modelo su nombre dirección número de teléfono y fecha aproximada de compra o 3 enviar un e mail al departamento de s...

Страница 2: ...ber s Tape Slotted screwdriver Adjustable wrench Pliers Flashlight Cloth Bucket Your installation may require new supply lines and or shut off valves or other additional tools 4 CHECKING THE CONTENTS OF THE BOX Upon opening the box check to ensure that all of the following items are included A Faucet D MetalWasher B BasePlate E LongNut C PuttyPlate If any of these items are missing please contact ...

Страница 3: ...y Tubes 8A 7 FLUSH WATER LINES A Point lines into Bucket TURN WATER BACK ON B Flush the water lines Allow water to run for at least 30 seconds TURN WATER BACK OFF BEFORE CONTINUING INSTALLATION 9 DRAIN INSTALLATION Install and adjust Drain 9A using separate instructions supplied with the Drain assembly For T40 YP models grid strainers must be ordered separately For sinks with an overflow order T47...

Страница 4: ...faucet information call 1 800 PFAUCET 1 800 732 8238 or visit www pfisterfaucets com Installation Support Care and Warranty Information 12 HANDLE REMOVAL Turn off water before proceeding Detach Decorative Button 12A Using a 3 32 Hex wrench loosen Set Screw 12B and remove Handle 12C 13 CARTRIDGE REPLACEMENT Turn off water supplies and relieve pressure before working on your faucet Remove handle see...

Страница 5: ...cierre las válvulas de suministro de agua Generalmente se encuentran debajo del fregadero o cerca del medidor de agua Si se trata de un reemplazo de grifo quite el grifo viejo y limpie completamente la superficie del fregadero 3 HERRAMIENTAS RECOMENDADAS Masilla para plomería Destornillador recto Destornillador en cruz Tenazas Llave ajustable Linterna de mano Paño Balde Para hacer la instalación p...

Страница 6: ...a caliente indicado con la etiqueta roja 8D Las tuberías de suministro no está incluidos Siga las instrucciones del fabricante al instalar las líneas de fuente No tuerza los tubos de suministro 8A 9 INSTALACIÓN DE DRENAJE Instale y ajuste el cuerpo de drenaje 9A con las instrucciones que son incluidas en el conjunto del cuerpo de drenaje Para los modelos de T40 YP los cuerpos de drenaje se deben o...

Страница 7: ...ratis llame al 1 800 PFAUCET 1 800 732 8238 o visite www pfisterfaucets com Apoyo a instaladores Información sobre cuidado y garantías 11 FUNCIÓN DE LA VÁLVULA Al levantar la manija de palanca 11A la válvula se activará y permitirá el flujo de agua El flujo de agua aumentará al continuar levantando la manija de palanca 11A Al girar la manija de palanca 11A en sentido contrahorario la temperatura d...

Страница 8: ...fier qu elle contient toutes les pièces suivantes A Robinet D Rondellemétallique B Plaque de surface E Longe crou C Plaque inférieure Si l une quelconque de ces pièces manque bien vouloir contacter le département du service après vente de Price Pfister au 1 800 Pfaucet 1 800 732 8238 5 INSTALLATION DE ROBINET Appliquer du mastic de plombier dans la rainure prévue à cet effet sur la plaque inférieu...

Страница 9: ...ée d eau et les raccords ne sont pas fournis Suivez les instructions du fabricant en installant des canalisations d alimentation Ne tordez pas es tubes d arrivée 8A 9 INSTALLATION DE LA BONDE Installez et adapte le corps de bonde 9A avec les instructions qui sont inclus dans l ensemble du corps de bonde Pour des modèles de T40 YP des corps de bonde doivent être commandés séparément Pour les éviers...

Страница 10: ...732 8238 Pour les renseignement concernant le service san frais de Pfaucet appelez 1 800 PFAUCET 1 800 732 8238 appel ou visite www pfisterfaucets com Aide pour le montage Rensignements sur l entretien et la garantie 12 DÉPOSE DE LA MANETTE Couper l eau avant de commencer Détacher le bouton décoratif 12A Desserrer la vis de pression 12B à l aide d une clé Hexagonal de 3 32 po et déposer la manette...

Страница 11: ...FRANÇAIS FRANÇAIS 11 ...

Страница 12: ...odels grid strainers must be ordered separately For sinks with an overflow order T47 9GS For sinks without an overflow order T47 7GL Para los modelos de T40 YP los cuerpos de drenaje se deben ordenar la separada mente Para los fregaderos con menos desbordamiento ordene el cuerpo de drenaje T47 7GL Para los fregaderos con desbordamiento ordene el cuerpo de drenaje T47 9GS Pour des modèles de T40 YP...

Отзывы: