SpectraPure
®
10
SpectraPure
®
Inc.
480.894.5437 Call us toll-free 1.800.685.2783
2167 East Fifth St, Tempe, Arizona 85281
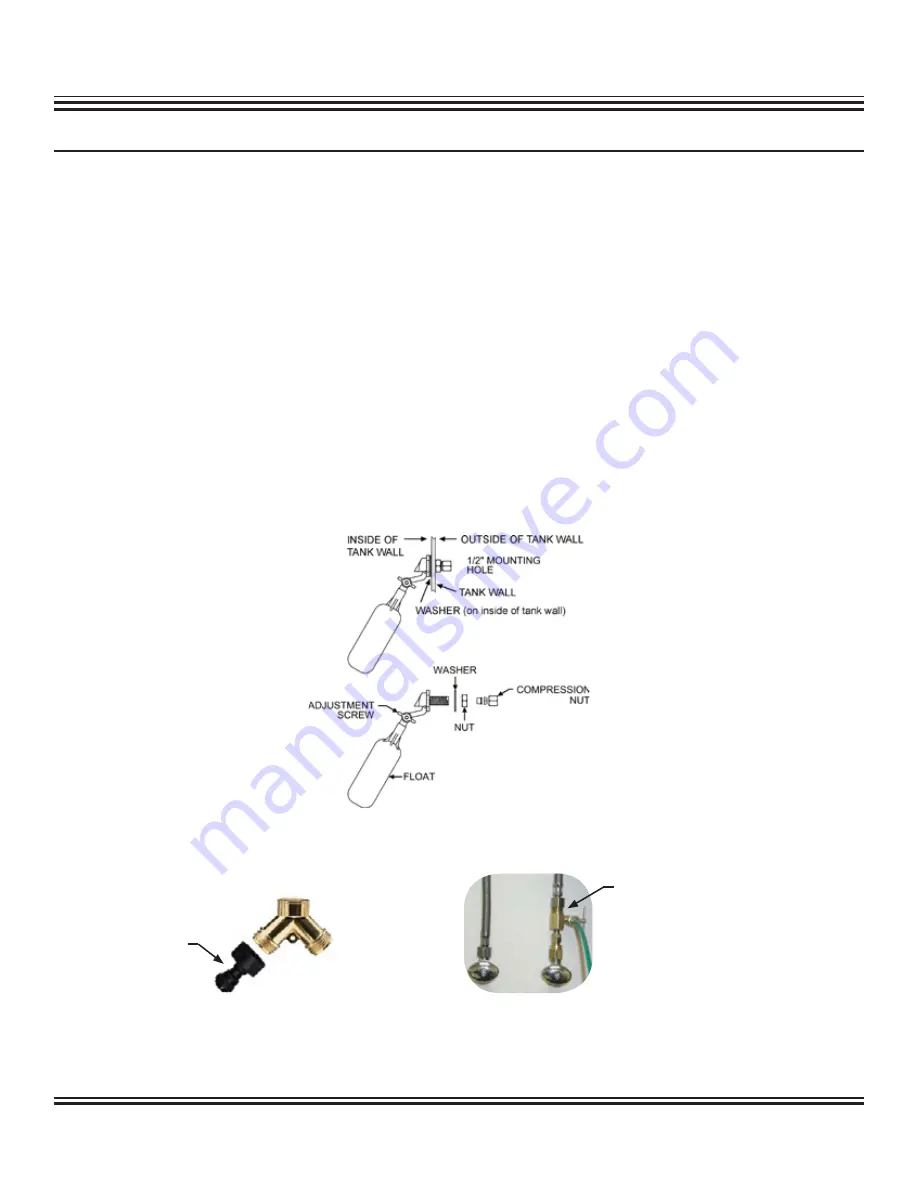
STEP 3: INSTALL THE FLOAT VALVE near the top of the reservoir. This will act as a fill valve and as a safety backup
float. The Float Valve should be mounted higher than the High Float and offset to one side so that it does not
interfere with the High Float when the reservoir is being filled.
a. Drill a 1/2” hole near the top of your reservoir.
NOTE: If you are installing the Float Valve onto an acrylic tank we recommend using a new Fostner Bit to reduce
the chance of cracking the acrylic.
b. (Refer to Diagram below) Remove the Compression Nut from the float body.
c. Insert the 1/4” Blue Tubing into the 1/2” Compression Nut with the threads towards the end of the tube.
d. Unscrew and remove the remaining nut from the float body.
e. Insert the float body and washer into the 1/2” hole and tighten the nut, which securely tightens the float to
the tank wall.
f. Push the Compression Nut towards the end of the tubing and screw the Compression Nut back onto the float
body.
g. To tighten, use one 1/2” wrench on the flats of the plastic threads and another 1/2” wrench on the Compression
Nut.
STEP 4: Connect the 1/4” Black Line to the cold water line by using either the garden hose adapter, which is provided
with the system, or a Feed Water Adapter.
Feed Water
Adapter
Garden Hose
Adapter
SETUP PROCEDURES (continued)
(Setup Procedures are continued on next page)


