background image


29 


IP Camera User Manual


Appendix 2 Specifications 


Specifications /Model 

  O4VLD5 

  O4VLB5 

Camera 

Image Sensor 

1/3” CMOS, 4M pixel 

Max Resolution 

2592 x 1520 

Electronic Shutter 

1/25s ~ 1/100000s 

Iris Type 

Fixed Iris 

Min. llumination 

F1.2, 0 lux with IR 

Lens 

2.8mm fixed lens, horizontal field of view: 103° 

Day&Night 

IR cut filter 

WDR 

120dB 

BLC 

Supported 

HLC 

Supported 

Defog 

Supported 

DNR 

2D/3D 

Angle Adjustment 

Pan: 0-240

°, 

Tilt: 0-68°, Rotate: 0-220° (applicable for dome) 

Video 

Video Compression 

H.265 / H.264 (HP/MP/BP) / MJPEG 

Video Bit Rate 

128Kbps ~8Mbps 

Main Stream 

2592x1520/2560x1440/2304x1296/ 1920×1080/1280×720 @ 30fps max 

Interface 
 

Network 

RJ45 

Video   

BNC × 1 (analog output) 

Audio 

Mic in × 1 (3.5mm) 

Unit 

IR Distance 

65 ft (dome), 98 ft (bullet) 

IP Rating 

IP66 

Power 

DC12V/PoE 

Power Consumption 

< 6.5W 

Operating 
Conditions 

Temperature: -4°F ~ 122°F;    Relative humidity: 10%~90% 

Dimensions 

4.6”(Ø) × 3.6”(H) 

2.6”(W) x 2.6”(H) x 6”(D) 

Weight 

1.4 lbs 

13oz 


Содержание O4B6M

Страница 1: ...User Manual 4MP 8MP 4K IP Camera O4VLB5 O4VLD5 O4B6M O4D6M O8B6M O8D6M Please read this manual carefully before operating the unit and keep it for further reference ...

Страница 2: ...a 3 Operation and Daily Maintenance Please shut down the device and then unplug the power cable before you begin any maintenance work Do not touch the CMOS sensor optic component You can use a blower to clean the dust on the lens surface Always use the dry soft cloth to clean the device If there is too much dust use a cloth dampened with a small quantity of neutral detergent Finally use the dry cl...

Страница 3: ...rt 15 of the FCC Rules These limits are designed to provide reasonable protection against harmful interference This equipment generate uses and can radiate radio frequency energy and if not installed and used in accordance with the instruction manual may cause harmful interference to radio communication However there is no guarantee that interference will not occur in a particular installation If ...

Страница 4: ... Detection 11 4 4 2 Alarm In Sensor Input 12 4 4 3 Alarm Out 13 4 4 4 Alarm Server 13 4 5 Analytics Configuration 13 4 5 1 Object Removal 13 4 5 2 Abnormality 14 4 5 3 Line Crossing 15 4 5 4 Intrusion 16 4 6 Network Setup 18 4 6 1 TCP IP 18 4 6 2 Port 18 4 6 3 DDNS 18 4 6 4 SNMP 19 4 6 5 RTSP 20 4 6 6 UPnP 20 4 6 7 Email 21 4 6 8 FTP 21 4 7 Security Configuration 23 4 7 1 User Admin 23 4 7 2 Onlin...

Страница 5: ...ference Should you require any technical assistance please contact Speco Technologies Technical Support Main Features Built in PoE Power over Ethernet Integrated IR LEDs for clear vision in low light True WDR wide dynamic range for image compensation in high contrast areas IP66 rated for outdoor installations Remote viewing support via web browser mobile app and VMS Applications ...

Страница 6: ...Routers typically have a DHCP server built in Install IP Scanner from the CD and run it after installation IP Scanner is the tool for discovering the IP cameras on the local network In the device list the IP address model number and MAC address of each device will be listed Select the applicable device and double click to open up the web viewer You can also manually enter the IP address in the add...

Страница 7: ...Abnormal color indicator Start stop two way audio Abnormal clarity indicator Enable disable audio Scene change indicator Snapshot Sensor alarm indicator Start stop local recording Motion alarm indicator All indicator icons above will flash in live view interface only when the corresponding events are enabled In full screen mode to exit double click on the mouse or press the ESC key on the keyboard...

Страница 8: ...e preset Select and set the preset and then click to save the position of the preset To delete a preset select the preset and click to delete it Icon Description Icon Description Move upper left direction Move upper right direction Move up Stop movement Move left Move right Move lower left direction Move lower right direction Move down Speed adjustment Zoom out Zoom in Focus Focus Iris Iris Auto s...

Страница 9: ...erface Select the applicable time zone and enable disable DST as needed Click the Date and Time tab to set the time and date 4 1 3 Local Recording Go to System Local Recording to set up the storage path of captured disable the bitrate display in the recorded files configuration interface o save the settings information of the device is listed Date and Time Please refer to the following interface b...

Страница 10: ...rd When the card is used for the first time click the Format button to format the SD card All data on the card will be cleared by clicking this button Click the Eject button to stop writing data to the SD card Then the SD card can be ejected safely Recording Settings 1 Go to the Record tab to go to the interface shown below 2 Set record stream and pre record time ...

Страница 11: ...ode HLC lowers the brightness of the entire image by suppressing the brightness of the image s bright area and reducing the size of the halo area BLC if enabled the auto exposure will activate according to the scene so that the object of the image in the darkest area will be seen clearly Antiflicker Off disables the anti flicker function This is used mostly in outdoor installations 50Hz reduces fl...

Страница 12: ...djusted in this section terface shown below the video is smoother variable Bitrate is related to the image quality CBR means that no matter how will be kept constant VBR means that the compression bitrate will be adjusted For example for scenes that do not have much movement the bitrate will be kept at a lower value This The higher the bitrate the better the image quality will be the mode is set t...

Страница 13: ...nes that have been drawn are shown as blocked out in the image To clear the privacy mask zones Click the Clear button to delete the zones 4 2 5 Region of Interest Configuration Go to Video Region of Interest An area in the image can be set as a region of interest This area will then have a higher bitrate than the rest of the image resulting in better image quality for the identified area 1 Click E...

Страница 14: ...can be controlled If the image is out of focus after a manual adjustment one key focus can be used to set the focus automatically 4 3 PTZ Configuration This function is only available to use with a compatible external PTZ enclosure Go to the PTZ Protocol interface shown below Set the protocol address and baud rate corresponding to the enclosure ...

Страница 15: ...s only available for the models with a micro SD slot 4 Trigger Email If Trigger Email and Attach Picture are checked email address must be set first in the Email setup interface under Network Setup the captured images will be sent to the email address 5 Trigger FTP If Trigger FTP and Attach Picture are checked the captured images will be sent into FTP server address Please refer to FTP setup secti...

Страница 16: ...Input Click it for a specific day to enter specific start and end times This adds more granularity minutes Day schedule Set the alarm time for alarm a specific day such as a holiday Note Holiday schedule takes priority over the weekly schedule 4 4 2 Alarm In Sensor Input This function is only available for motorized lens models Go to the Event Setup Alarm In interface shown below 1 Click Enable Al...

Страница 17: ...more accuracy here are some recommendations for installation Cameras should be installed on stable surfaces as vibrations can affect the accuracy of detection Avoid pointing the camera at reflective surfaces Avoid places that are narrow or have too much shadowing Avoid scenarios where the object s color is similar to the background color At any time of day or night make sure the image of the camer...

Страница 18: ...cts in the camera should be from 3 to 5 seconds 3 The defined area cannot be covered frequently and continuously like people and traffic flow 4 It is necessary for object removal detection that the drawn frame must be very close to the margin of the object in enhancing the sensitivity and accuracy of the detection 5 Object removal detection cannot determine the objects ownership For instance there...

Страница 19: ... Configuration requirements of camera and surrounding area 1 Auto focusing function should not be enabled for abnormality detection 2 Try not to enable abnormality detection when light changes greatly in the scene 4 5 3 Line Crossing Line Crossing Alarms will be triggered if someone or something crosses the pre defined alarm lines Go to Analytics Line Crossing shown below 1 Enable the alarm and se...

Страница 20: ...cts for at least 2 seconds in the detected area for accurate detection 7 Adequate light and clear scenery are crucial for line crossing detection 4 5 4 Intrusion Intrusion Alarms will be triggered if someone or something intrudes into the defined areas Go to the Analytics Intrusion interface shown below 1 Enable the region intrusion detection alarm and set the alarm holding time 2 Set alarm trigge...

Страница 21: ...ft or above 4 Keep the mounting angle of the camera at about 45 5 The detected objects should not be less than 1 of the entire image and the largest sizes of the detected objects should not be more than 1 8 of the entire image 6 Make sure the camera can view objects for at least 2 seconds in the detected area for accurate detection 7 Adequate light and clear scenery are crucial to intrusion detect...

Страница 22: ...ange frequently To be notified the IP change notification function can be used Click the IP Change Notification to go to the interface shown below Trigger Email when the IP address of the device is changed the new IP address will be sent to the email address that has been set up Trigger FTP when the IP address of the device is changed the new IP address will be sent to FTP server that has been set...

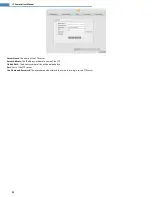
Страница 23: ...se install an SNMP management tool and set the parameters of SNMP such as SNMP port trap address 1 Go to the SNMP tab 2 Check the corresponding version checkbox Enable SNMPv1 Enable SNMPv2 Enable SNMPv3 according to the version of the SNMP software that will be used 3 Set the values for Read SNMP Community Write SNMP Community Trap Address Trap Port and so on Please make sure the settings are the ...

Страница 24: ... Port Access port of the streaming media The default port is 9008 RTSP Address The RTSP address format that can be used to play the stream in a media player If Allow anonymous login is checked there is no need to enter the username and password to view the video 4 6 6 UPnP If this function is enabled the camera can be quickly accessed through the LAN Go to the UPnP tab Enable UPnP and then enter t...

Страница 25: ...of the account Recipient Address receiver s email address 4 6 8 FTP After an FTP server is set up captured images from events Go to the FTP tab If you need to trigger Email when an alarm happens or IP address is changed please set the Email here first sender s user name and password Connection pull down list according to what s required The time interval of sending email For example if it is set t...

Страница 26: ...of the FTP server Server Address The IP address or domain name of the FTP Upload Path The directory where files will be uploaded to Port Port of the FTP server Use Name and Password The username and password that are used to login to the FTP server ...

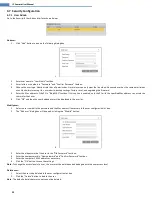
Страница 27: ...fied Mac address can access the camera for that user 6 Click OK and then the newly added user will be displayed in the user list Modify user 1 Select a user to modify the password and the Mac address if necessary in the user configuration list box 2 The Edit user dialog box will pop up by clicking the Modify button 2 3 Enter the old password of the user in the Old Password text box 4 Enter the new...

Страница 28: ...filtering check box Select Block the following IP address enter the IP address in the IP address list box and click the Add button The setup steps for Allow the following IP address and MAC address filter settings are the same as Block the following IP address 4 8 Maintenance Configuration 4 8 1 Backup and Restore Go to Maintenance Backup and Restore Import Export Settings Configuration settings o...

Страница 29: ...e and then click Save button to save the settings 4 8 3 Upgrade Go to Maintenance Upgrade In this interface the camera firmware can be updated 1 Click the Browse button to select the location of the firmware file 2 Click the Upgrade button to start upgrading the firmware 3 The device will restart automatically Caution Do not close the browser or disconnect the camera from the network during the up...

Страница 30: ...file name in the list to view the captured image The descriptions of the buttons are shown as follows Icon Description Icon Description Close Select an image and click this button to close the image Close all Click this button to close all images Save Click this button to select the path for saving the image on the PC Save all Click this button to select the path for saving all images on the PC Fi...

Страница 31: ...ion Play button After pausing the video click this button to continue playing Pause button Stop button Speed down Speed up Plays the previous record Plays the next record Watermark display Enable disable audio drag the slider to adjust the volume after enabling audio Full screen Click it to display full screen Double click to exit full screen 5 2 2 SD Card Video Search Click the Video tab and sele...

Страница 32: ...ontrol IE browser may be set up to block ActiveX Follow the steps below 1 Open IE browser and then click Tools Internet Options 2 Select Security and then Custom Level 3 Enable all the options under ActiveX controls and plug ins 4 Click OK to finish setup No sound can be heard 1 Audio input device is not connected Please connect and try again 2 Audio function is not enabled at the corresponding ch...

Страница 33: ...pported Defog Supported DNR 2D 3D Angle Adjustment Pan 0 240 Tilt 0 68 Rotate 0 220 applicable for dome Video Video Compression H 265 H 264 HP MP BP MJPEG Video Bit Rate 128Kbps 8Mbps Main Stream 2592x1520 2560x1440 2304x1296 1920 1080 1280 720 30fps max Interface Network RJ45 Video BNC 1 analog output Audio Mic in 1 3 5mm Unit IR Distance 65 ft dome 98 ft bullet IP Rating IP66 Power DC12V PoE Pow...

Страница 34: ...ate 0 360 applicable for dome Image Video Compression H 265 H 264 HP MP BP MJPEG Video Bit Rate 128Kbps 8Mbps Main Stream 2592x1520 2560x1440 2304x1296 1920 1080 1280 720 30fps max Interface Network RJ45 Video BNC 1 analog output Audio Mic in 1 3 5mm Line out x 1 3 5mm Storage Micro SD up to 128 GB RS485 Terminal block Alarm 1ch alarm input 1 ch alarm output terminal block Unit IR Distance 98 ft d...

Страница 35: ...Rotate 0 360 applicable for dome Image Video Compression H 265 H 264 HP MP BP MJPEG Video Bit Rate 128Kbps 12Mbps Main Stream 3840x2160 2560x1440 2304x1296 1920 1080 1280 720 30fps max Interface Network RJ45 Video BNC 1 analog output Audio Mic in 1 3 5mm Line out x 1 3 5mm Storage Micro SD up to 128 GB RS485 Terminal block Alarm 1ch alarm input 1 ch alarm output terminal block Unit IR Distance 98 ...

Отзывы: