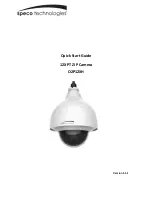
Speco O2P12XH Скачать руководство пользователя страница 14


7


APPENDIX 

 Wire Gauge Reference  


Metric bare wire 

diameter 

mm


AWG 

SWG 

Bare wire cross 

section 

mm

2


0.050 

43 

47 

0.00196 

0.060 

42 

46 

0.00283 

0.070 

41 

45 

0.00385 

0.080 

40 

44 

0.00503 

0.090 

39 

43 

0.00636 

0.100 

38 

42 

0.00785 

0.110 

37 

41 

0.00950 

0.130 

36 

39 

0.01327 

0.140 

35 

0.01539 

0.160 

34 

37 

0.02011 

0.180 

33 

0.02545 

0.200 

32 

35 

0.03142 

0.230 

31 

0.04115 

0.250 

30 

33 

0.04909 

0.290 

29 

31 

0.06605 

0.330 

28 

30 

0.08553 

0.350 

27 

29 

0.09621 

0.400 

26 

28 

0.1257 

0.450 

25 

0.1602 

0.560 

24 

24 

0.2463 

0.600 

23 

23 

0.2827 

0.710 

22 

22 

0.3958 

0.750 

21 

0.4417 

0.800 

20 

21 

0.5027 

0.900 

19 

20 

0.6362 

1.000 

18 

19 

0.7854 

1.250 

16 

18 

1.2266 

1.500 

15 

1.7663 

2.000 

12 

14 

3.1420 

2.500 

4.9080 

3.000 

7.0683 


Содержание O2P12XH

Страница 1: ...Quick Start Guide 12X PTZ IP Camera O2P12XH Version 1 1 1...

Страница 2: ...nstallation 2 2 2 Wall Mount Installation Steps 2 2 2 1 Installation Environments 2 2 2 2 Installation Steps 2 3 IP SCANNER 5 3 1 Overview 5 3 2 Operation 5 4 WEB OPERATION 6 4 1 Login and Main Interf...

Страница 3: ...This manual is designed to be a reference tool for your system Please read this manual carefully before operating the unit and retain it for future reference Should you require any technical assistan...

Страница 4: ...iquid intrusion into the camera 3 Operation and Daily Maintenance Please shut down the device and then unplug the power cable before you begin any maintenance work Do not touch the CMOS sensor optic c...

Страница 5: ...t manuals and specifications may be modified without prior notice Speco Technologies reserves the right to modify these without notice and without incurring any obligation Speco Technologies is not li...

Страница 6: ...ial requirement please contact your local dealer for more information We assume no liability or responsibility for all the fires or electrical shock caused by improper handling or installation 1 2 Che...

Страница 7: ...ries 2 2 2 Installation Steps 1 Drill a hole of 50mm diameter for the cable exit in the installation wall 2 In Figure 2 2 connect the adapter block to the internal thread of the wall mount bracket unt...

Страница 8: ...he bottom of the wall mount bracket Please make sure the cable exit of the bracket is facing the round hole on the wall Connect the cable and then pull it through the hole in the wall Use four hex scr...

Страница 9: ...4 Now the installation is complete See Figure 2 4 Figure 2 4...

Страница 10: ...nd double click to open up the web viewer 5 IP Scanner can search for the device on the local network Please note that only devices that are on the same subnet can be discovered In the device list you...

Страница 11: ...hange the password after initial login 6 This device supports viewing and management via a web browser on a PC Login and Main Interface twork camera address in the address bar or double click the Figu...

Страница 12: ...earth Open floor cable layout should not be used In areas prone to strong thunderstorms or near high sensitive voltage such as near high voltage transformer substation you need to install additional h...

Страница 13: ...31 47 71 14 54 74 54 22 72 190 83 58 16 25 24 43 7 45 38 17 11 63 59 63 18 18 152 66 46 53 30 20 35 6 20 31 80 9 69 49 69 15 15 127 22 38 78 35 17 45 5 32 27 26 8 31 42 60 12 98 109 04 33 24 40 15 27...

Страница 14: ...0 0 130 36 39 0 01327 0 140 35 0 01539 0 160 34 37 0 02011 0 180 33 0 02545 0 200 32 35 0 03142 0 230 31 0 04115 0 250 30 33 0 04909 0 290 29 31 0 06605 0 330 28 30 0 08553 0 350 27 29 0 09621 0 400 2...

Отзывы: