


PTZ
NVR User Manual
33
farther you drag the analog joystick from the middle of the image, the faster the dome or PTZ rotates. The dome or PTZ will stop rotating when you
stop dragging the analog joystick.
Ø
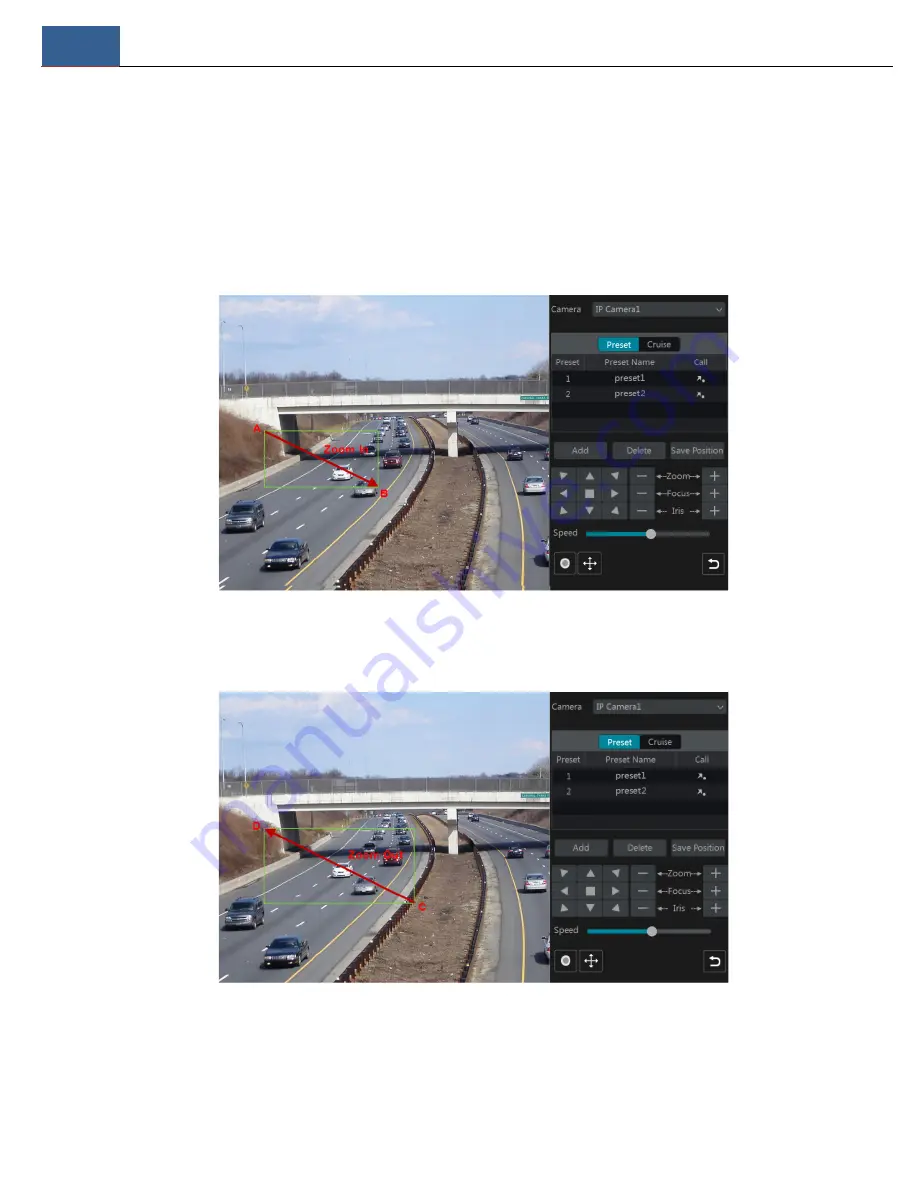
3D Control
Click the camera image on any area and then the image will be centered on the clicked point.
Refer to the picture as shown below. Drag the mouse from A to B to get a green rectangle and the rectangle area will be zoomed in.
Refer to the picture as shown below. Drag the mouse from C to D to get a green rectangle and the rectangle area will be zoomed out.
Ø
Advanced 3D Control
Double click the left button of the mouse on any area of the camera image and then the image size will be doubled and centered on the clicked point.
Press and hold the left button of the mouse on any area of the camera image to zoom in the image; press and hold the right button to zoom out the
Содержание N32NRE
Страница 124: ...FAQ NVR User Manual 117 Fig 11 2...


