


Live View Introduction
NVR User Manual
20
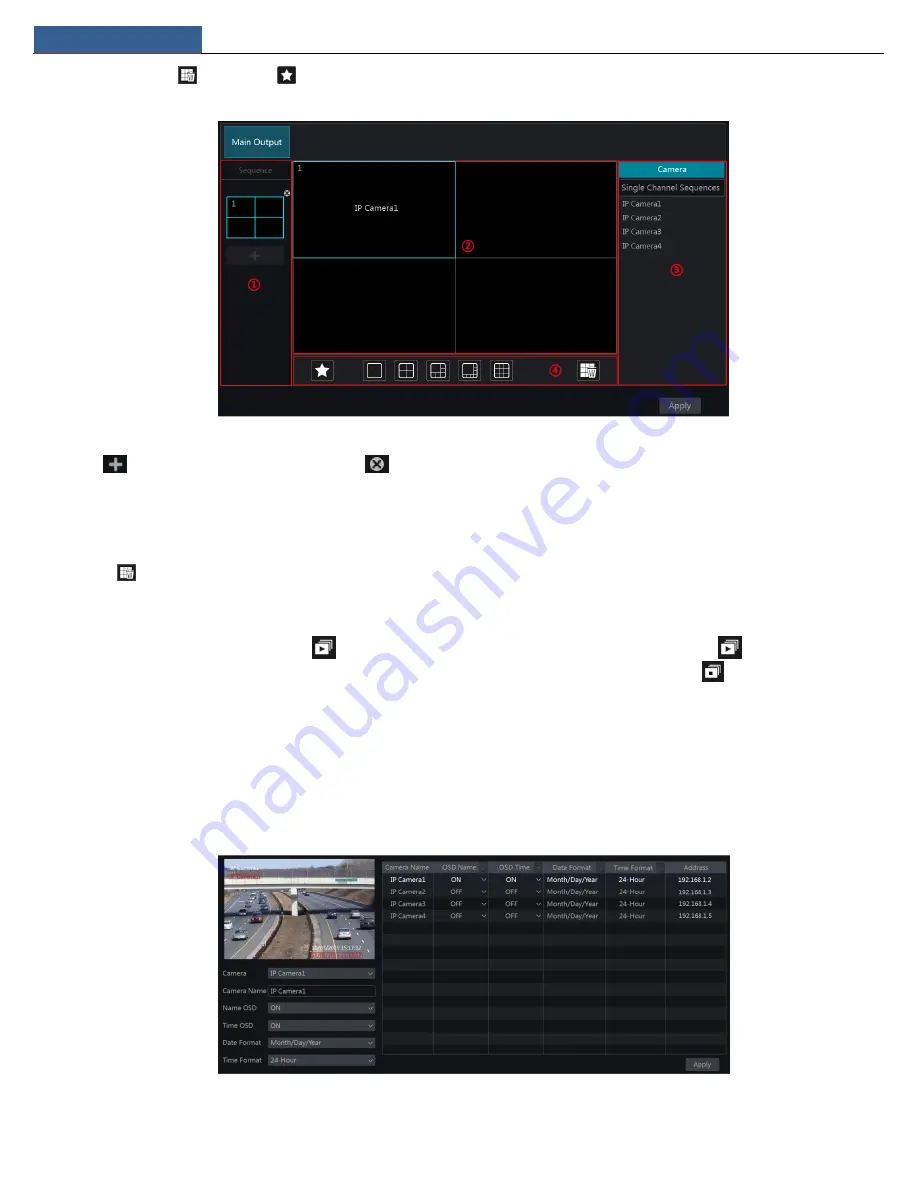
④ is the tool bar (
: clear button;
: favorite button, click it to pop up a window, enter the display mode name in the window and then click
“OK” to save the current display mode; other buttons are screen mode buttons).
Add Scheme
Click
in area ① to create a new scheme. Click
on the top right corner of the scheme to delete it.
Configure Scheme
a)
Select a scheme in area ① and then click the screen mode button on the tool bar to set the screen mode of the scheme.
b)
Select a camera window in area ② and then double click the camera or group in area ③. The camera or group will be added into the
selected window. One camera in the same scheme cannot repeat. You can click the right-click menu “Clear” in area ② to remove a single camera
or click
to remove all the cameras.
c)
Click “Apply” to save the settings.
Start Sequence View
Go to the live view interface and then click
to open a window. Set the dwell time in the window and then click
to start scheme view in
sequence. Double click the sequence view interface to pause the view; double click again to restore the view. Click
to stop the view.
5.3 Image Configuration
5.3.1 OSD Settings
Click Start
Settings
Camera
Image
OSD Settings to go to the interface as shown below. Select the camera, enter the camera name (or double
click the camera name in the camera list to change the camera name), enable or disable the name and time OSDs (if enabled, drag the red name
and time OSDs directly in the image view area to change the OSDs’ display position) and select the date and time formats. Click “Apply” to save the
settings.
Содержание N16NRP
Страница 38: ...Record Disk Management NVR User Manual 34...


