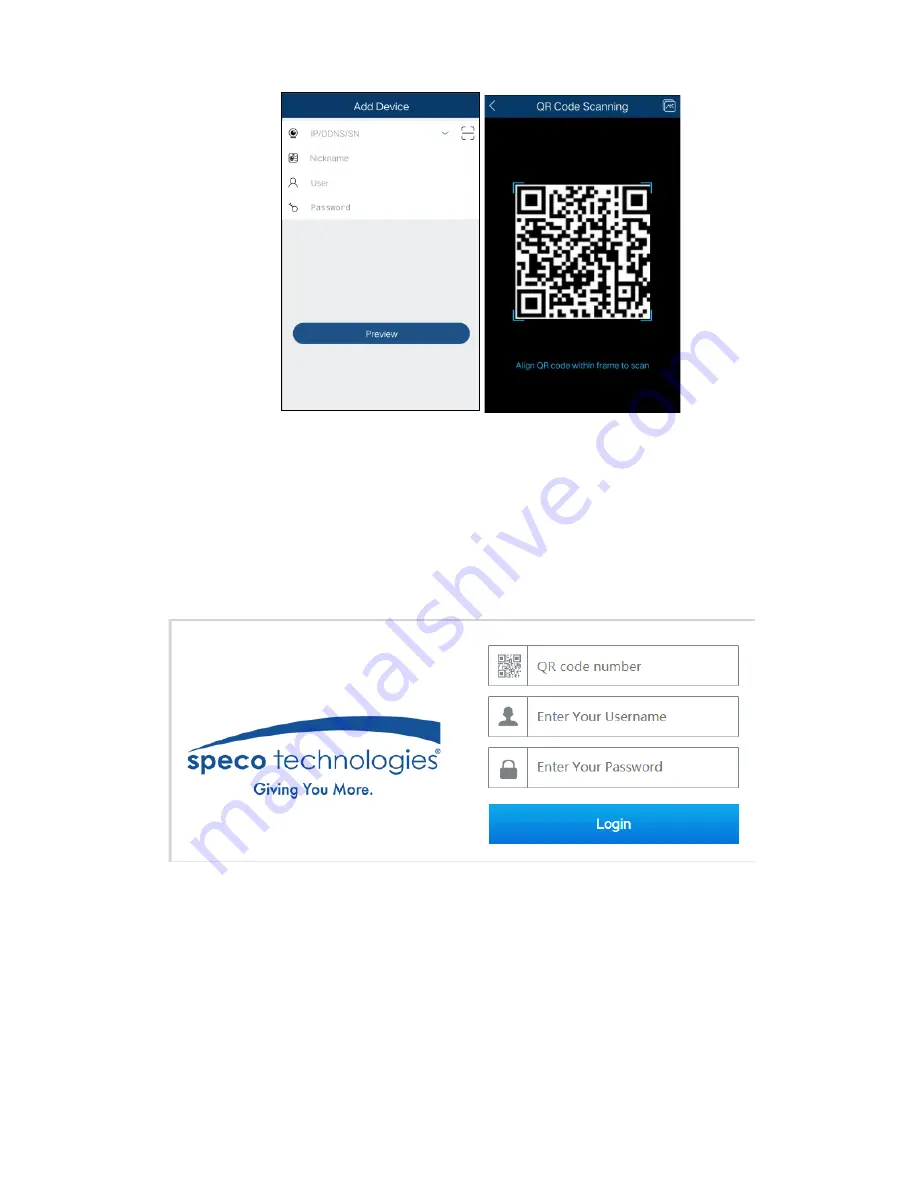
Speco H16HRL Скачать руководство пользователя страница 11


10 


4.9


Web Browser Access 

Click Start

Settings

Network

NAT to go to the interface for NAT configuration and check “Enable”. Click “Apply” to 

save the settings and make note of the QR code number under the QR code. Via Internet Explorer, go to 
connect.specotech.cloud, input the QR code number, your username and password to login. 


4.10


Playback 

Click Start

Playback to go to the playback interface as shown below (click on the tool bar at the bottom of the live 

preview interface to set the default playback time).


On the panel on the right you will see the channel number and the recorded data coded by color. The bar that runs 
across them represents the playback time being viewed. You can move this bar around to export, highlight a section of 
the desired recording, click export and follow the prompts.  You can export single or multiple channels at the same time. 
 

Содержание H16HRL

Страница 1: ...h com for firmware updates 6 Channel Hybrid Digital Video Recorder 4 Configurable Hybrid Channels TVI or IP plus 2 IP Channels 16 Channel Hybrid Digital Video Recorder 8 Configurable Hybrid Channels T...

Страница 2: ...repair Note All of the installation and operations here should conform to your local electric safety rules 1 Contents 1 1 Check Unit and Accessories After unpacking the unit please check for any visib...

Страница 3: ...password strength indicator can be used as a reference Re enter the password to confirm Remember this password 2 2 Enter answers for two security questions You can select which security questions to...

Страница 4: ...tings System Information Basic go to About this machine and click on view You will then be able to see the firmware version number and build date Now go to www specotech com then click on Support then...

Страница 5: ...nce Upgrade to go to Upgrade interface Select the USB device in Device Name option and go to the path where the upgrade software exists Select the upgrade software and then click Upgrade The system ma...

Страница 6: ...me box to display the EZ Setup wizard every time the device is rebooted 4 1 General Settings Date Time When booting up for the first time the device will prompt you for time settings or go to Settings...

Страница 7: ...in WAN via router without port mapping Hit next or Click Start Settings Network UPnP to go to the interface as shown below Make sure the router supports UPnP function and the UPnP is enabled in the r...

Страница 8: ...main name or input your own If invalid or taken please select another domain name Click on test to check if ok If so you may now go to your domain name specoddns net with Internet Explorer and access...

Страница 9: ...s Click to edit the added camera as shown on the above right Input the new camera name IP address port username and the password of the camera You can click Test to test the effectiveness of the input...

Страница 10: ...record mode Manual Set the Sensor Record Motion Record and Schedule Record of each camera Click OK to save Figure 4 5 4 8 QR Code for Remote App Viewing QR Code Enable the NAT function in the interfa...

Страница 11: ...0 Playback Click Start Playback to go to the playback interface as shown below click on the tool bar at the bottom of the live preview interface to set the default playback time On the panel on the ri...

Страница 12: ...face and then click Open button Click the image box to play the record in the small playback box on the left side of the interface the box which has image inside indicates that the record data exist R...

Страница 13: ...12 For detailed operation information please refer to the user s manual...

Отзывы: