background image

Spearhead


Multicut 

460


25


Spearhead Warranty 


Extended Warranty


As an extension to the 12-month warranty set out above, Spearhead will provide an additional 
12-month  warranty  cover  subject  to  the  Spearhead  Warranty  Conditions  above  and  the 
Extended Warranty Conditions below. 
 

Extended Warranty Conditions 
 

1.  The  extended  warranty  applies  to  hydraulic  pumps,  motors,  valves  and  gearboxes 

only.  It  does  not  apply  to  other  parts,  to  consumables  such  as  lubricants,  seals  or 
filters or to labour charges. 

 
2.  The  machinery  must  have  had  an  annual  service  carried  out  by  an  Authorized 

Spearhead  Dealer  or  a  Spearhead  Service  Engineer  within  1  month  of  the  first 
anniversary  of  the  date  of  sale  and  the  Service  Report  form  must  have  been 
completed and stamped by the servicing dealer or Spearhead Service Engineer and 
sent to Spearhead within 14 days after the first annual service. 


3.  The extended warranty does not cover costs of transportation of the machinery to or 

from  the  dealer  or  Spearhead  or  the  call  out  costs  or  traveling  expenses  of  on-site 
visits 


Transfer of Warranty


The Spearhead warranty may be transferred to a subsequent owner of the machinery (for use 
within the UK) for the balance of the warranty period subject to all of the warranty conditions 
and provided that the Change of Owner form is completed and  sent to Spearhead  within 14 
days of change of ownership. 
 

Spearhead reserves the right to make alterations and improvements to any machinery 
without notification and without obligation to do so.


Содержание MULTICUT 460

Страница 1: ...Spearhead Multicut 460 1 MULTICUT 460 11th Edition October 2013 Part No 8999007...

Страница 2: ...hine it relates to please contact the After Sales Department for advice Spearhead Machinery Limited 2004 Please ensure that this manual is handed to the operator before using the machine for the first...

Страница 3: ...007 Safety of Machinery Risk Assessment Part 1 Principles Part 2 Practical Guide and Examples of Methods BS EN ISO 12100 1 2010 Safety of Machinery Part 1 Basic Terminology and Methodology Part 2 Tech...

Страница 4: ...ing To The Tractor 8 Setting Up Your Machine 10 Operation 12 Transportation 13 Machine Protection 14 Servicing Maintenance Safety First 15 Daily 16 Every 8 Hours 17 Torque Settings 17 Regularly 18 Bla...

Страница 5: ...ong as the engine is running Warning Stay clear of mower blade as long as engine is running Warning Stay clear of swinging area of implements Warning Shut off engine and remove key before performing m...

Страница 6: ...no damaged or loose parts Particular attention should be given to the blades to ensure they are not damaged cracked or missing Inspect work area for wire steel posts large stones and other dangerous...

Страница 7: ...tion Never use a machine if the hydraulic system shows signs of damage Never attempt to detect a hydraulic leak with your hand use a piece of card Never allow children to play on or around the machine...

Страница 8: ...P T O Two external hydraulic services are required single acting for height control and single acting for wings with float facility Attaching To The Tractor It is essential to ensure that the tractor...

Страница 9: ...rd tubes equally Fig 1 Shorten the inner and outer sliding profiles by the same length as the guard tubes File all sharp edges and remove burrs Grease sliding profiles To fit the PTO first clean and g...

Страница 10: ...re necessary to compensate for wear and also variation of tolerances We recommend the wings are set 12 25mm 1 higher then the centre chassis to maintain a level cut 2 Coarse adjustment is made via the...

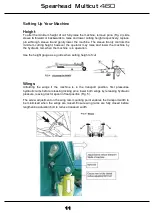
Страница 11: ...er the machine by the hydraulic ram when the machine is in operation Use the height gauge as a guide when setting height of cut Wings Unfolding the wings if the machine is in the transport position fi...

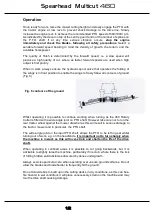
Страница 12: ...ilst operating it is possible to continue working when turning as the 460 Rotary Cutter is fitted with a wide angle joint on PTO shaft However take care not to run the rear tractor wheel against the m...

Страница 13: ...commend for straw Transportation First disengage the PTO drive and raise the machine fold the wings fully upright and secure with locking pin Fig 7 Never transport along public highways with the wings...

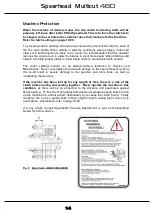
Страница 14: ...The clutch settings should not be altered without reference to Service and Maintenance Never over tighten the pressure springs on the slip clutches Fig 8 as this could result in severe damage to the g...

Страница 15: ...carried out in order not to invalidate your warranty these are carried out before the first operation after the first hour then after 4 hours These checks are 1 Wheel nuts and tyre pressure 40psi 2 Ge...

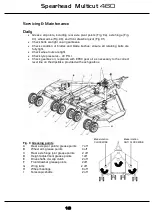
Страница 16: ...ck tyre pressures 40 P S I Check gearbox oil replenish with EP90 gear oil as necessary to the correct level line on the dipsticks provided with each gearbox Fig 9 Greasing points A Rear axle pivot poi...

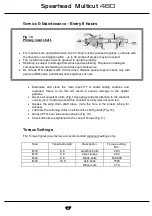
Страница 17: ...rrect Torque Fig 11 Torque Settings The Torque figures given below are recommended maximum settings only Size Tensile strength Description Torque setting Nm M16 8 8 Gearbox bolts 280 M16 8 8 Axle clam...

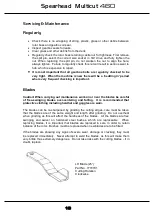
Страница 18: ...carrying out maintenance work on or near the blades be careful of free swinging blades over centering and falling It is recommended that protective clothing including hardhat and goggles are worn The...

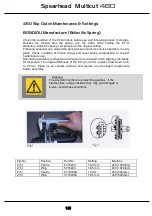
Страница 19: ...and reset spring compression to original height before use Should the assembly overheat due to frequent or prolonged clutch slipping dismantle for inspection The original thickness of the lining is 3...

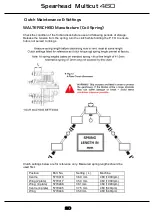
Страница 20: ...he spring turn the clutch while holding the P T O to ensure hub is not seized to linings Clutch settings below are for reference only Measured spring lengths should be used first Position Part No Sett...

Страница 21: ...which are painted red for danger when removing the wheel The outer nuts must not be loosened until the valve has been removed and the inner tube is entirely deflated Then and only then may the outer b...

Страница 22: ...remove all traces of rust on the metal clutch plates Check condition of the friction plates if there is any sign of over heating wear or cracking replace with new Do not attempt to use the machine wit...

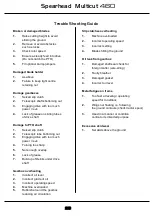
Страница 23: ...oo much power revs 4 Turning too sharp 5 Not enough overlap 6 Lack of grease 7 Build up of Debris under drive shaft Gearbox overheating 1 Incorrect oil level 2 Incorrect grade of oil 3 Incorrect opera...

Страница 24: ...s top links ball ends unless there is a manufacturing or material defect or the cost of normal servicing items such as oils and lubricants 5 This warranty does not cover any expenses or losses incurre...

Страница 25: ...versary of the date of sale and the Service Report form must have been completed and stamped by the servicing dealer or Spearhead Service Engineer and sent to Spearhead within 14 days after the first...

Страница 26: ...Spearhead Multicut 460 26...

Отзывы: