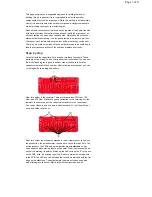
Finally, if the push button is pressed,
playMelody()
is called. All this
function does is go through each note stored in the array
notes
and plays
each one for 300 milliseconds with the
tone()
function. After each note is
played, it checks again for a button press, and the melody stops playing if a
button press is detected. The LED is also turned on while the melody is
playing.
These are the highlights of the core functionality of the default program. At
this point, some exploring and experimenting is required to get a better
grasp on the program. Always feel free to contact us if there is any
confusion and we can do our best to improve the readability of the code
and/or the above explanation.
Resources and Going Further
By building the Gram Piano Kit and working through this tutorial, you have
learned more about soldering, capacitive touch, playing tones, and coding
in Arduino. Congratulations!
From here, you can repurpose your board as you see fit. You could change
the musical scale, make keys play melodies you choose or run blocks of
code, or even simply just leave it as is and enjoy coming up with some
simple tunes. We hope you enjoy your Gram Piano. Feel free to share with
us your feedback about the kit and/or whatever creative uses you have
found for it.
Extra Resources:
• Installing the Arduino Development Environment
• Installing an Arduino Library
• Using Github
• Arduino’s Capacitive Sense Library Reference
• Arduino’s Tone Reference
Check out these other great audio related SparkFun tutorials:
• WAV Trigger Quick Start Guide
• Lilypad MP3 Player Hookup Guide
• My Drunk Kitchen Apron
• MP3 Player Shield Hookup Guide
• MP3 Player Shield Music Box
• RN-52 Audio Bluetooth Hookup Guide
Page 8 of 8
8/5/2016
https://learn.sparkfun.com/tutorials/gram-piano-assembly-guide?_ga=1.51727977.11809772...


