background image

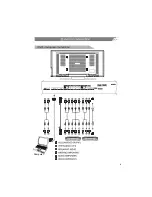
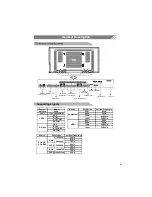
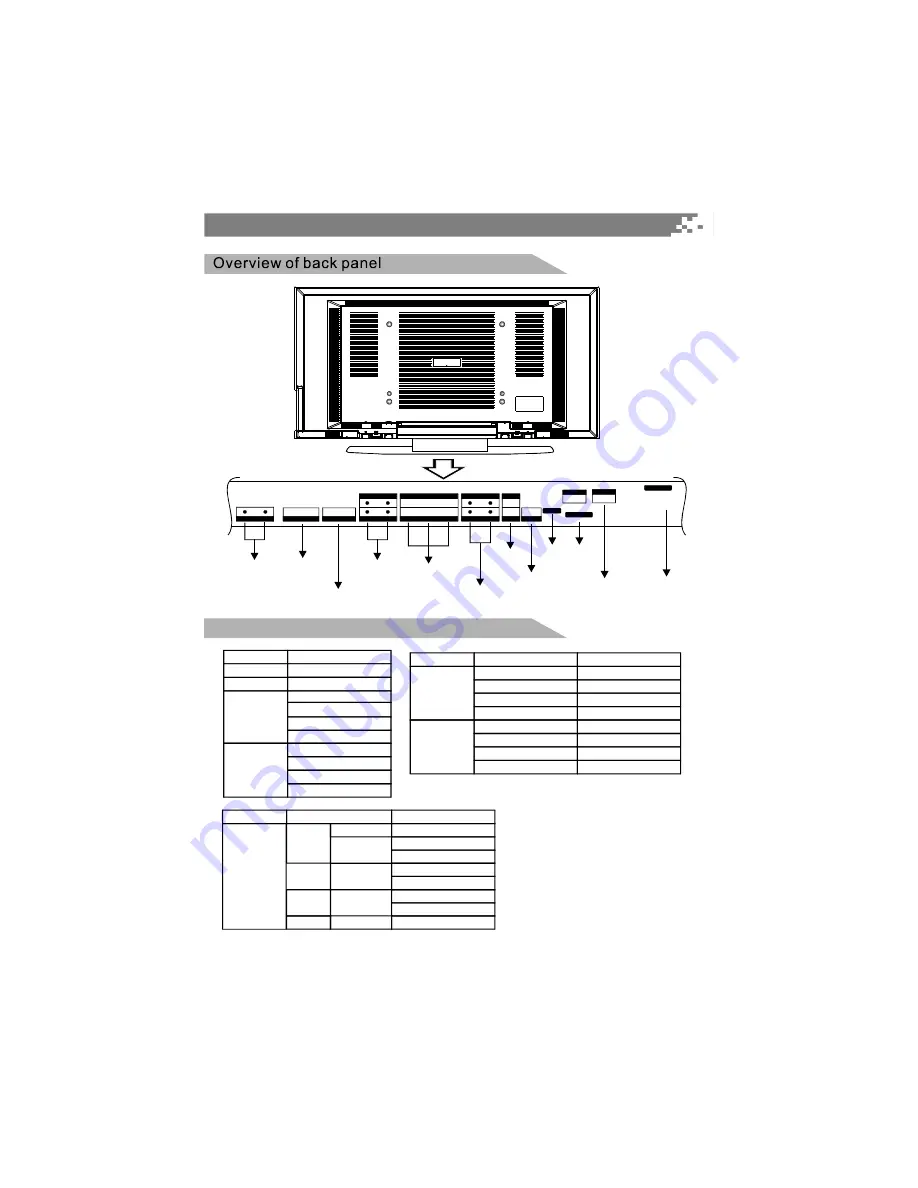
RGB/PC

AUDIO input

Supporting signals

8

RGB/PC input

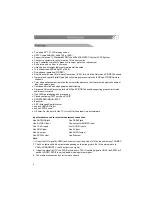
HDMI input

Component

AUDIO input

Component

signal input

AUDIO output/input

VIDEO

output/input

Ethernet

SPDIF

Antenna input

AC input

S-VIDEO input

General Description

ETHERNET

Y

Y

Pb

Pb

Pr

Pr

IN

IN

IN

IN

IN

IN

IN

COMPONENT 2 IN

COMPONENT 1 IN

OUT

IN

OUT

VIDEO

-AUDIO-

-AUDIO-

-AUDIO-

-AUDIO-

-AUDIO-

RGB/PC

HDMI

S-VIDEO

IN

ANTENNA

IN

CABLE

AC INPUT

VIDEO

R

R

R

R

R

L

L

L

L

L

SPDIF

Resolution

Resolution

Source

Mode

Source

Source

VGA

CVBS

Antenna

Cable

S-Video

Component

PAL

8VSB

Free 64/256QAM

60Hz

70Hz

60Hz
60Hz

50/60Hz

480i

NTSC

480p

NTSC 4.43

720p

SECAM

50/60Hz

1080i

PAL
NTSC

HDMI

50/60Hz

50/60Hz

480p
720p

60Hz

60Hz

1080i

480i

NTSC4.43
SECAM

640x480

720x400

PC/VGA
PC/HDMI

SVGA

XGA

SXGA

75Hz
60Hz
75Hz
60Hz
75Hz
60Hz

800X600

1024X768

1280X1024

Vertical Frequency

Vertical Frequency

Содержание 3278AB

Страница 1: ......

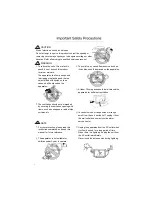
Страница 2: ...pers table cloths curtains etc To avoid fire no naked flame source such as lit candles should be placed on the apparatus At least 10 cm space should be left around the apparatus for sufficient ventilation In case of smoke strange noise or strange smell from the unit switch it off unplug it from the wall outlet and contact your dealer or service center Unplug the apparatus from the AC outlet when i...

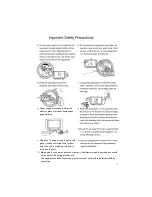
Страница 3: ... place it needs some right time for dew inside the unit to evaporate fully before turning on the unit ii 13 Mains plug is used as the disconnect device It shall remain readily operable and should not be obstructed during intended use This apparatus shall be connected to a mains socket outlet with a protective earthing connection ...

Страница 4: ...Antenna cable connection 5 Stand andwall mounted 5 DVD computer connection 6 Overview of frontand right panel 7 Overview of backpanel 8 SupportingSignals 8 Overview of remote control 9 Turning theTV Onand Off 11 Languagesetup 12 Source set 12 Audio Channel List 13 AudioType List 13 Aspect ratio setup 14 Auto search 14 Channels List 15 Channels Selection 15 Volume adjustment and Mute setup 16 PIPAu...

Страница 5: ...TV Rating 32 C E Rating 33 C F Rating 33 OPEN V CHIP 34 Troubleshooting 35 Picture defects andthe reason 36 Package accessories 36 Appendix 1 TV Rating setup rule 37 Appendix 2 PIP function 39 Notes If you are using the television fist time please read the basic operationbeforeoperating 2 Manufactured under license from Dolby Laboratories Dolby and the double D symbol are trademarks of Dolby Labor...

Страница 6: ...em ATSC System Connect to computer directly to realize TV monitor combo Zero X radiation complies to green environment protection requirement Soft picture and no harm to your eyes Ultra thin and ultra light features to realize wall mounted 16 9 wide screen 480i 480p 720p 1080i Dual channel operation PIP PBP Dual Channel Inverse Color Space Conversion ICSC for both Main Picture and PIP PBP channels...

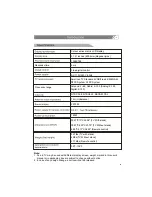
Страница 7: ...5 Remote control 54 7lbs TV with stand 42lbs TV Without stand 0 176lbs Remote control 32 F 104 F o o American TV Standard 8VSB Free 64 256QAM NTSC System ATSC System Antenna 2 69 Cable 2 135 Analog 2 125 Digital 2 135 Frequency range Response time Note 1 Due to TV may be used with different display screen weight marked in this user s manual or in packaging box are subject to change without notice ...

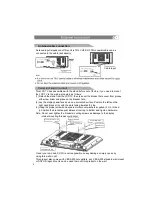
Страница 8: ...istance from top to bottom and tighten hardware Note Do not over tighten the bracket mounting screws as damage to the display internal mounting threads could occur Use at your own risk SOYO is not responsible on any damage or injury cause by using this wall mount Antenna input impedance of this unit is 75 VHF UHF 75 coaxial cable can be connected to the cable jack directly W W Antenna cable connec...

Страница 9: ...er 6 ETHERNET Y Y Pb Pb Pr Pr IN IN IN IN IN IN IN COMPONENT 2 IN COMPONENT 1 IN OUT IN OUT VIDEO AUDIO AUDIO AUDIO AUDIO AUDIO RGB PC HDMI S VIDEO IN ANTENNA IN CABLE AC INPUT VIDEO R R R R R L L L L L SPDIF ...

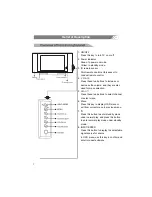
Страница 10: ... to select channel or select menu 6 Menu Press this key to display OSD menu or exit from current menu to previous menu 7 Press this button to enter standby mode under normal play and press this button to enter normal play mode under standby mode 8 INPUT ENTER Press this button to display the selectable signal source for source In OSD menu use this key to confirm and enter into next submenu Green I...

Страница 11: ...DIO AUDIO AUDIO AUDIO AUDIO RGB PC HDMI S VIDEO IN ANTENNA IN CABLE AC INPUT VIDEO R R R R R L L L L L SPDIF Resolution Resolution Source Mode Source Source VGA CVBS Antenna Cable S Video Component PAL 8VSB Free 64 256QAM 60Hz 70Hz 60Hz 60Hz 50 60Hz 480i NTSC 480p NTSC 4 43 720p SECAM 50 60Hz 1080i PAL NTSC HDMI 50 60Hz 50 60Hz 480p 720p 60Hz 60Hz 1080i 480i NTSC4 43 SECAM 640x480 720x400 PC VGA P...

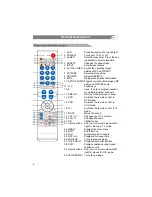
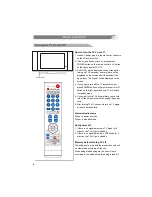
Страница 12: ...IO Toggles current audio between MP audio and PIP PBP audio 11 0 9 Digital keys 12 Uses to enter a program number for multiple program channels 13 PRE CH Returns to the previous channel 14 DVD Switches the remote control to DVD mode 15 VCR Switches the remote control to VCR mode 16 TV Switches the remote control to TV mode 17 MUTE Mutes the sound 18 VOL Changes your TV s volume 19 CH Changes chann...

Страница 13: ...alidation key for DVD mode 34 PIP POSITION Selects the position for PIP window 35 PIP PIP PBP on or off 36 SWAP Toggles between PIP and MP Install your remote control batteries General Description Do not mix old and new batteries Note Universal Remote Control operation please refer to Appendix 3 ...

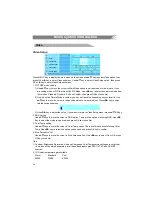
Страница 14: ... and your TV will switch to standby mode 5 If you want to turn TV off completely you should turn off the AC power switch or unplug the power cord 6 After turning TV off you should turn on TV again at least 5 seconds later 1 If there is no signal detected in TV mode for 5 minutes the TV will go to standby 2 If there is no signal detected in VGA Mode for 5 minutes the TV will go to standby The setti...

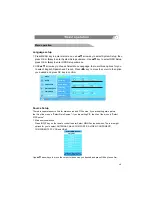
Страница 15: ...arrow key to select System Setup then press OK or key to enter System Setup submenu Use key to select OSD Setup press OK p q u p q or key to enter OSD Setup submenu 2 USE arrow key to choose Select Menu Language there are three options for you to select English Spanish and French Press key to move the cursor to the option you desired and press OK key to confirm u p q t u Menu operation Select MAIN...

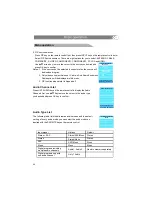
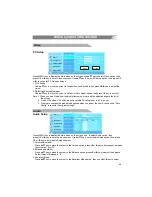
Страница 16: ...ote control to display the Audio Channels List use key to move the cursor to the audio type you desired and press OK key to confirm p q p q Audio Channel List Select PIP Source Audio Channels List Analog Audio Mode ANTENNA Up Down Move Cursor OK Change MAIN Source Up Down Move Cursor OK Change MAIN Source COMPOSITE S_VIDEO COMPONENT1 COMPONENT2 PC VGA HDMI The following table lists the alternative...

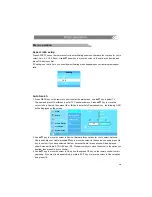
Страница 17: ...move the cursor to Source there are three options for you to select Antenna Cable and Antenna Cable press key to move the cursor to the source you need press OK key to confirm If you have selected Cable or Antenna Cable three options will be displayed under Antenna Cable STD HRC and IRC Press arrow keys to move the cursor to the option you desired then press OK key to confirm 3 Use key to move the...

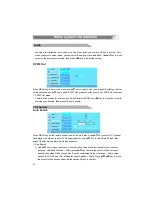
Страница 18: ...press 4 5 6 7 8 9 Main Picture displays 456 789 press 4 5 6 7 8 and Main Picture displays 456 78 press 4 5 6 7 8 and Main Picture displays 56 78 p q p q arrow key to move the cursor to the program you need and press OK key to confirm If there are more than one page in the list you can press PAGE DOWN or PAGE UP keys to turn to next page or previous page 2 Fav List Press FAV key on the remote contr...

Страница 19: ...lay the menu which indicating current audio is from either MP or PIP PBP then you can use this key to toggle between MP and PIP PBP If the program you are receiving is audio program TV will insert one pictures into Video automatically and display them on the screen alternatively every one minute Press PIP POSITION key on the remote control to quickly switch the position for PIP window there are fi...

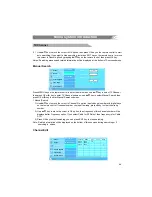
Страница 20: ... _Password menu 2 Enter 3 System Setup_ _MPAA menu Enter System Setup_ _TV Rating menu Menu operation ATV ChannelNo Program name Main Picture MP PIP PBP Displays current accident name only in DTV mode Time ASPECT info and resolution of original signal Displays level information TV detected Icon of Fav Lock Skip Flag of signal intensity of digital signal If the intensity below the critical value th...

Страница 21: ...he screen in the same way you can increase the digit by pressing CH key repeatedly Also you can press CH key to decrease the digit At last press ENTER on the right panel to confirm If the password you have inputted is correct you can enter into the next operation Otherwise you have to return to previous status before inputting Press EPG key to enter EPG menu the first line displays current channel...

Страница 22: ...tting Use keys to move the cursor to DNR option There are five options following DNR Use key to select the mode you desired and press OK key to confirm 3 Color Temp setting Use keys to move the cursor to Color Temp option There are three options following Color Temp Use key to select the option you desired and press OK key to confirm 4 Blue Screen On Off Use keys to move the cursor to Blue Screen ...

Страница 23: ...y to move the cursor to Default or Auto Adjust option then press OK key to confirm Note 1 When you use H size item to adjust picture size picture will be adjusted align to the left of the screen 2 H size H Position V Position are not available if Scaling is set to 4 3 or zoom 3 If there are unexpected problems happened when you adjust the items you can use Auto Config to resume the original settin...

Страница 24: ...h then press OK or key to enter Auto Search submenu 1 Auto Search 1 Use key to move the cursor to Source option there are three options for you to select Antenna Cable and Antenna Cable press key to move the cursor to the Source you desired then press OK key to confirm If you have selected Cable or Antenna Cable three options STD HRC and IRC will display under Antenna Cable Press key to move the c...

Страница 25: ...or key to enter Manual Search submenu 1 Manual Search 1 Use key to move the cursor to Channel No option input channel number with digital keys on the remote control If channel number you input is wrong press key to clear the wrong number 2 Use key to move the cursor to OK option then frequency of this channel number will be displayed after Frequency option If you select Cable for RF Select then fr...

Страница 26: ... submenu you must input password when you select the program 1 If you select a program and the program has been locked the information prompted is The Program was locked input password If the program has been rating block the information prompted is The Program was block input password 2 If the password you input is correct you can enter into this program to watch 3 If the password input is wrong ...

Страница 27: ...etween digital keys and characters Use key to move the cursor right or left Use 0 9 number keys to input characters Use INFO to toggle between LOWERCASE and UPPERCASE Use PRE CH key to delete a character After you finish inputting you may use ENTER to confirm and return The maximum length of program is 8 characters p q u p q u p q p q t u Note Every digit key includes several characters so you mus...

Страница 28: ... press OK or key to enter Closed Caption submenu use key to select Analog Caption then press OK or key to enter Analog Caption submenu 1 Analog Caption Service There are eight services for you to select CC1 CC2 CC3 CC4 TEXT1 TEXT2 TEXT3 and TEXT4 Use key to move the cursor to the service you desired press OK key to confirm CCD Mode Analog Caption p q u p q u p q u p q u p q t u Closed Caption Menu...

Страница 29: ...m Default Style1 Style2 Style3 Style4 Style5 Style6 Style7 and Style 8 If you select one style mode following options will be displayed the specific configuration of this style Size Font Text Color Text Opacity BG Color BG Opacity The specific configuration of every style lists as below Default Default Default Default Default Default Default Style1 Small Font2 White Transparent Blue Solid Style2 N...

Страница 30: ...hing Default Notes When you set above options the PREVIEW window will give the preview of current setting immediately Press MENU key on the remote control to enter the main menu use key to select Time Setup then press OK or key to enter Time Setup submenu use key to select Current Time then press OK or key to enter Current Time submenu 1 Time Mode Use key to move the cursor to Mode option then pre...

Страница 31: ...ff time When the mode has been set in Once or Daily mode you must set auto turn off time The way is same as Input date time Notes 1 When setting time you can t input characters by pressing digital keys on the remote control you can press key to change the digit 2 Default setting of Mode is Off p q p q p q u p q u p q p q p q Auto Turn Off Sleep Timer Time Setup Menu system introduction Video Audio...

Страница 32: ...er the main menu use key to select Time Setup then press OK or key to enter Time Setup submenu use key to select Time Zone then press OK or key to enter Time Zone submenu 1 Setting Time Zone There are nine options for you to select use key to move the cursor to the time zone you desired press OK key to confirm p q u p q u p q p q u p q u p q Time Zone DayLight Saving Time Setup Menu system introdu...

Страница 33: ...move the cursor to the option you desired press OK key to confirm 2 Select Menu Language Use key to move the cursor to select Menu Language option there are English Spanish and French options you can select Use key to move the cursor to the option you desired press OK key to confirm 3 Select OSD transparency Use key to move the cursor to select OSD transparency option there are Low Normal and High...

Страница 34: ...ubmenu the way is same as Password setup The default password is 2580 3 Lock System Use key to move the cursor to Password option select On or Off option and press OK key to confirm If a program or a rating has been locked you must input password before you select the program or the rating 4 Clear Password Move the cursor to Clear Password press OK key to confirm then the password you have set is ...

Страница 35: ... press OK or key to enter TV Rating submenu 1 TV Rating Use key to move the cursor to select the option you desired press OK key to lock the option The setting rule please refer to Appendix 1 Notes 1 If you have set the password you must input correct password before entering the submenu 2 You should set the password before using V CHIP function MPAA Rating TV Rating p q u p q u p q p q u p q u p ...

Страница 36: ...o enter System Setup submenu use key to select CF Rating then press OK or key to enter CF Rating submenu 1 CF Rating Use key to move the cursor to select the option you desired press OK key to lock or unlock the option 2 Block All Use key to move the cursor to Block All option press OK key to confirm All options in the sub menu will be locked If you unlock any option in the submenu the Block All o...

Страница 37: ...t input correct password before entering the submenu 2 You should set the password before using V CHIP function 3 OPEN V CHIP will detect the related item from digital TV signal and display them on this menu For example E I Rating TV Smarts If OPEN V CHIP function is not available for current TV signal these two items will be blank OPEN V CHIP p q u p q u p q System Setup Menu system introduction ...

Страница 38: ...35 8 ...

Страница 39: ...36 Picture defects and the reason A user s manual wall mounted accessories power cord and a remote control ...

Страница 40: ...ed then unlock TV G TV PG TV PG D TV PG L TV PG S TV PG V TV 14 TV 14 D TV 14 L TV 14 S TV 14 V If TV MA is locked then lock TV MA TV MA L TV MA S TV MA V If TV MA is unlocked then unlock TV G TV PG TV PG D TV PG L TV PG S TV PG V TV 14 TV 14 D TV 14 L TV 14 S TV 14 V TV MA TV MA L TV MA S TV MA V If TV PG D is locked then lock TV PG D TV 14 D If TV PG D is unlocked then unlock TV G TV PG TV PG D ...

Страница 41: ...TV PG V TV 14 TV 14 V If TV MA L is locked then lock TV MA L If TV 14 L is unlocked then unlock TV G TV PG TV PG L TV 14 TV 14 L TV MA TV MA L If TV MA S is locked then lock TV MA S If TV 14 S is unlocked then unlock TV G TV PG TV PG S TV 14 TV 14 S TV MA TV MA S If TV MA V is locked then lock TV MA V If TV 14 V is unlocked then unlock TV G TV PGTV PG V TV 14TV 14 V TV MATV MA V Appendix 1 TV Rati...

Страница 42: ... Digital TV Digital TV Composite Composite S VIDEO S VIDEO Component1 Component1 Component2 Component2 PC VGA PC VGA HDMI HDMI X X X X X X X X X X X X X X X X X X X X X X X X X X X X X X X X X X X X X X X X X X X X X X P P P P P P P P P P P P P P P P P P ...

Страница 43: ......

Страница 44: ......

Страница 45: ......

Страница 46: ......

Страница 47: ......

Страница 48: ......

Страница 49: ......

Страница 50: ......

Страница 51: ......

Страница 52: ......

Страница 53: ......

Страница 54: ......

Страница 55: ......

Страница 56: ......

Страница 57: ......

Страница 58: ......

Страница 59: ......

Страница 60: ...39019771 ...

Отзывы: