PL711
/ English Instruction Manual
6
RECORDING WITH A COMPUTER
CONNECTING WITH A COMPUTER
1. Connect this record player to a computer using a
commercially-available
USB cable to
convert audio signals from a record to digital data and send them to the computer.
2. Turn the computer on: confirm that the operating system is working correctly.
3. Turn the record player on and the computer will automatically detect and identify the unit's
USB port as "USB Audio CODEC".
INSTALL “AUDACITY” SOFTWARE IN YOUR COMPUTER
With a computer, you can record the audio from this record player. You must first install a
software that can be used for audio recording on the computer. For example, the software
“Audacity” for free download.
1. Install and open the software.
2. Click
the “Record” icon in the software. The encoding is going on.
3. When finish the encoding, click
“STOP” icon.
4. Open the Files icon in the software and save the project.
The project can be exported in MP3 or other audio format as you like.
CARE
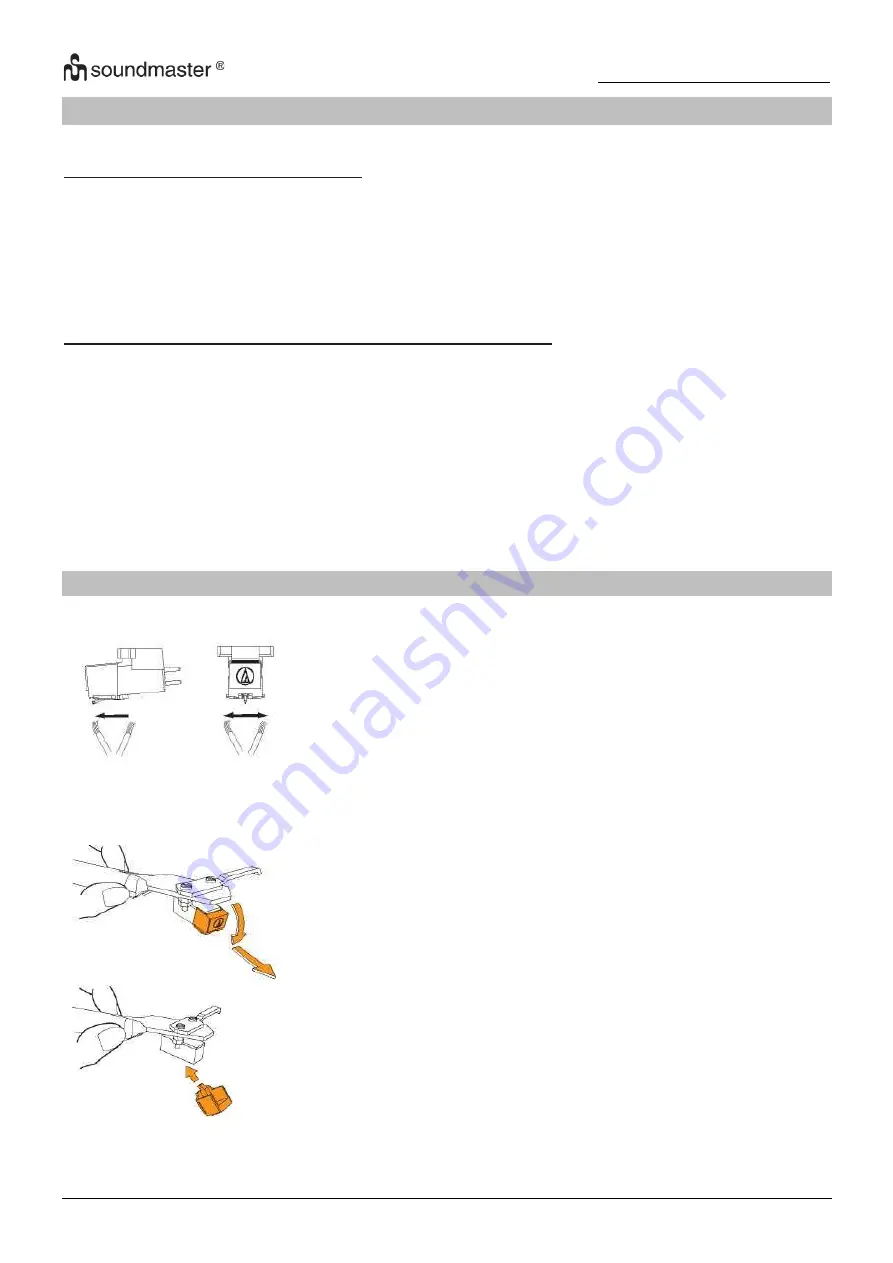
Stylus Tip
If dirt and grime are stuck to the stylus tip, clean it with a
commercially sold brush,
We recommend using a stylus cleaner (not included) if the stylus
tip is considerably dirty.
Clean the stylus tip by moving the brush from the rear to the front
of the stylus tip.
Replacing the Stylus
It's suggested to replace the stylus after 400 hours of use.
In addition to the deterioration of sound quality, records may also
be damaged as the cartridge's stylus tip wears down.
Be sure to disconnect the products AC adapter from the outlet.
When replacing the stylus, hold the head shell and the cartridge
body tightly. Move the front of the stylus in a forward and down
motion.
Mount the new replacement stylus to the cartridge
Lift the stylus up until you hear a click
Make sure there is no gap between the headshell and cartridge.


