SoundFreaq Sound Stack SFQ-03 Скачать руководство пользователя страница 15

.14.

Listening to Tuner

Listening to a Station

Note: 

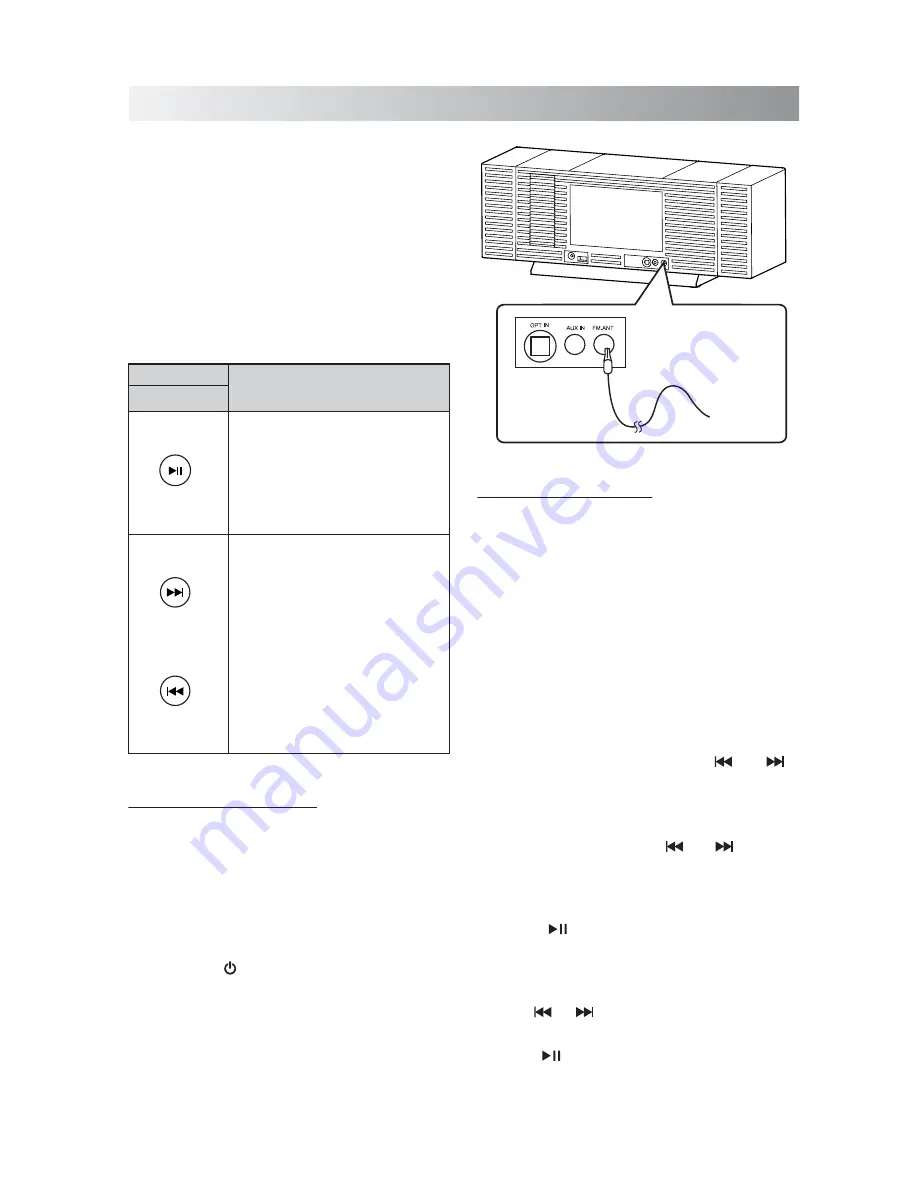
Position  the  antenna  as  far  away  as 

possible  from  the  AC  adapter,  a  TV,  or  other 
radiation source.

1.


Plug  the  supplied  FM  antenna  into  the  

FM.ANT

 jack located on the back of unit.

2.     Press the "       " button to power on the system.
3.   Select tuner mode with the 

SOURCE

 button 

on the remote App.

4.    Select a desired radio station for listening.
5.      Move the antenna in various directions until 

the clearest signal is received.

6.    If necessary, adjust the volume level.

Press the Button

Functions

Remote App

 

Switch between the frequency 

display  and  channel  number 
display.

 

Hold this button to enter saving 

mode. Press to save a channel. 
(see "Presetting a station”)


Select a channel (from 01 to 20).


Change     frequency     (from 

87.5 MHz to 108.0 MHz).


Hold for more than one  second 

to   activate   the   Auto   Scan 
function,  and   then   release  
the   button.   The   frequency  
will  be  scanned automatically 
until a radio station is found. 
Or press again to quit search 
while searching.

Presetting a Station

Note:

  Presetting  station  function  can  be 

completed  through  the  Soundfreaq  App,  in 
either iPod or Bluetooth mode.

1.  Select tuner mode with the 

SOURCE

 button 

on the remote App.

2.  Switch to the frequency display if the display 

is channel number. 

3.  Tune a desired frequency. You can use either  

of the below methods to tune the frequency.

A. Manual Tuning

 - Briefly press "      "/ "      " 

button  repeatedly  to  move  frequency  to 
frequency  (from  87.5  MHz  to  108.0  MHz) 
until you find the desired station. 

B.  Auto Scanning

 - Hold "       "/ "       " button 

until  the  frequency  display  starts  flashing. 
The frequency will be scanned automatically 
until a station is found. 

4.   Hold "          " button to start storing a station.

   The channel number and “Select” word start 

blinking  together  on  the  display  of  the 
iPad/iPhone/iPod touch.

5.   Use "       "/ "       " to select the channel number 

(from 01 to 20) to be set.

6.  Press "        " button again to store the frequency. 

The  selected  frequency  will  then  be  stored 
with the preset channel number.

The FM radio function can be accessed by: 

1)   the remote App, when Bluetooth connection 

has been established; 

2)    the remote App, when the iPad/iPhone/iPod 

touch is set on the unit.

The operation interface of remote App software 
is  similar  to  the  remote  control. You  can  easily 
operate  the  tuner  function  on  the  display  of 

iPad/iPhone/iPod touch.  

FM Antenna

Содержание Sound Stack SFQ-03

Страница 1: ...SFQ 03 Sound Stack...

Страница 2: ...has been damaged in any way such aspower supplycordorplugisdamaged liquid has been spilled or objects have fallen into the apparatus the apparatus has been exposed to rain or moisture does not operat...

Страница 3: ...f this equipment does cause harmful interference to radio or television reception which can be determined by turning the equipment off and on the user is encouraged to try to correct the interference...

Страница 4: ...posal of Old Equipment European Union This symbol indicates that the electricalandelectronicequipment should not be disposed as general household waste at its end of life Instead the product should be...

Страница 5: ...back via Bluetooth Downloading the SoundFreaq App Using Multiple Bluetooth Devices Playing back from Macbook or Macbook Pro Playing back from PC Notebook Listening to Tuner Listening to a Station Pres...

Страница 6: ...artment until you hear a click sound C 2025 3V R DOCK PAIR OPTICAL AUX VOLUME Adapter Cable Switch Mode Power Supply 1 2 Squeeze Pull Warning When Using the Battery Store the battery in a place where...

Страница 7: ...00 240V 50 60Hz before connection Plug the AC adapter only after all other connections are completed 1 Insert the Switch Mode Power Supply into 20V 4 47A DC IN jack of the unit 2 Insert one end of the...

Страница 8: ...storage area magnetically Handling the Remote Control To avoid possible failure read the following instructions and handle the remote control properly Do not drop or cause impact to the remote control...

Страница 9: ...tion Wide Stereo sound effect 8 System Overview Front View 7 10 Vol button Press to increase or decrease the volume level 11 Remote control storage Area 12 DC IN jack 13 USB power jack The jack can be...

Страница 10: ...the volume level 10 U Cubed button Activate or deactives U Cubed High Definition Wide Stereo sound effect 11 MUTE button Turn off the sound Press again to restore the sound output Remote Control Sele...

Страница 11: ...ified by the text or illustrations Notes If you are docking your device with a case you can remove the spacer pad to secure a better fit and connection Both the dock cover and spacer pad can be conven...

Страница 12: ...of this product Sound distortion may occur when playing back audio sources with high recording levels When distortion occurs it is recommended to turn off the equalizer of the iPod For information on...

Страница 13: ...display of your Bluetooth enabled device key in the default password 1234 if a prompt requests it Playing back via Bluetooth Downloading the SoundFreaq App We have developed an App to give you full co...

Страница 14: ...remove it And then select Setup New Device again 3 Select Sound Pla and the type should be Audio in the latest SFQ 03 unit Click the Continue to proceed pairing process 4 Once completed the pairing su...

Страница 15: ...mpleted through the Soundfreaq App in either iPod or Bluetooth mode 1 Select tuner mode with the SOURCE button on the remote App 2 Switch to the frequency display if the display is channel number 3 Tu...

Страница 16: ...ia Digital Optical Listening to an External Audio Device You can enjoy the sound from an optional component such as a portable digital music player through the speakers of this unit Be sure to turn of...

Страница 17: ...l preference Note Some custom EQ settings when combined with UQ3 enhancement may cause distortion Tip For playback via Bluetooth or Aux mode the output volume is set by both the volume control on Soun...

Страница 18: ...nnector plug of the unit firmly inserted into the connector port of the iPad iPhone iPod Is the iPad iPhone iPod properly functioning Test the iPad iPhone iPod functions in stand alone condition Is th...

Страница 19: ...udio Sink and Remote Control boxes d Press the Apply button and the exclamation mark of the Sound Stack driver icon will be cleared Bluetooth connection cannot be established between the system and yo...

Страница 20: ...Save this manual...

Отзывы: