Service Manual: FUSION EQUINE DR® |
75
4. Configuring the FUSION EQUINE DR
®
X-ray
System
Procedure
After the PC is powered up, it logs in to the Sound account and starts the software
automatically. In the menu ribbon at the top of the
Clinical
screen, click the
Hamburger
icon:
.
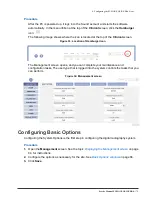
The following image shows where the icon is located at the top of the
Clinical
screen.
Figure 33: Location of Hamburger icon
The Management screen opens, and you can complete your maintenance and
configuration tasks. The user type that is logged into the system controls the tasks that you
can perform.
Figure 34: Management screen
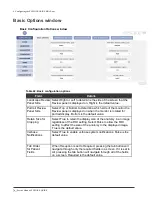
Configuring Basic Options
Configuring the System Options is the first step in configuring the digital radiography system.
Procedure
1.
Open the
Management
Displaying the Management screen
on page
64, for instructions.
2.
Configure the options as necessary for the site. See
on page 66.
3.
Click
Save
.
Содержание FUSION Equine DR II
Страница 2: ... 2022 Sound company All rights reserved This page left blank intentionally ...
Страница 10: ......
Страница 28: ...10 Service Manual FUSION EQUINE DR II 1 System Overview Table 9 AX B2735W technical specifications ...
Страница 30: ...12 Service Manual FUSION EQUINE DR II 1 System Overview Table 11 Canon AX B2735W Wireless Communications ...
Страница 31: ...Service Manual FUSION EQUINE DR II 13 1 System Overview Table 12 Canon AX Series Panel Battery Specifications ...
Страница 35: ...Service Manual FUSION EQUINE DR II 17 1 System Overview ...
Страница 37: ...Service Manual FUSION EQUINE DR II 19 1 System Overview Table 17 Ready Indicator part names and functions ...
Страница 38: ...20 Service Manual FUSION EQUINE DR II 1 System Overview Figure 10 Ready Indicator dimensions ...
Страница 75: ...Service Manual FUSION EQUINE DR II 57 3 Installing the FUSION EQUINE DR II System ...
Страница 77: ...Service Manual FUSION EQUINE DR II 59 3 Installing the FUSION EQUINE DR II System ...
Страница 175: ...Service Manual FUSION EQUINE DR 157 ...

