Cha
p
te
r 5
Sc
en
e Sele
c
tion
64
5-2 Creating Clip Lists
Load the clip list from the disc into the unit memory
To return to the full-screen display
Press the THUMBNAIL button, turning it on.
3
Use the arrow buttons or the jog dial to select the
desired sub clip.
You can also select sub clips with the following
operations.
Press the PREV or NEXT button:
Moves to the
previous or next sub clip.
Press the PREV or NEXT button with the SHIFT
button held down:
Moves to the first or last sub
clip.
Press the
F
or
f
button with the SHIFT button held
down:
Switches to the previous or next page.
(Does not switch when there is only one page.)
4
With the SHIFT button held down, press the SET
button.
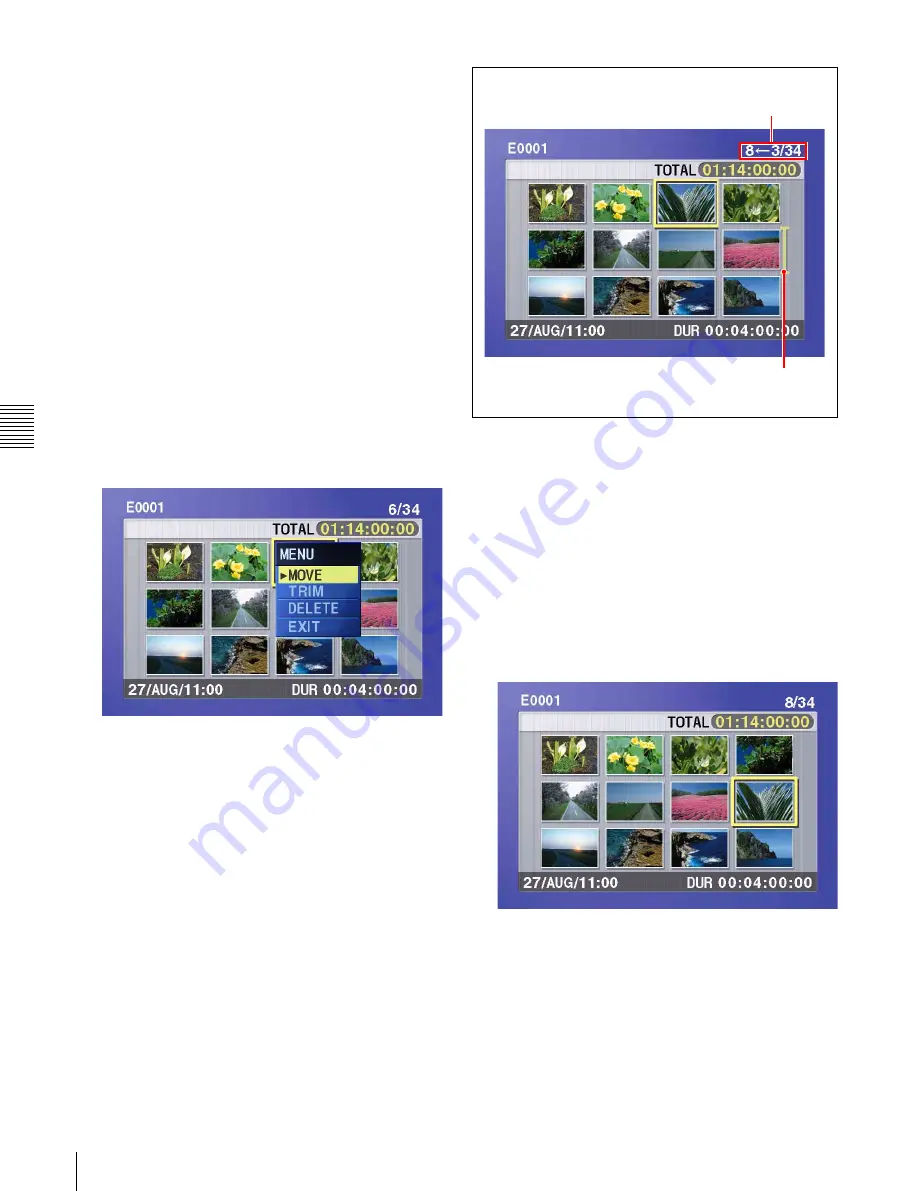
The sub clip operation menu appears.
To return to the thumbnail screen without moving
the sub clip
Do one of the following.
• Press the
F
or
f
button to select EXIT, and then
press the SET button.
• Press the RESET button.
5
Use the
F
or
f
button to select MOVE, and then press
the SET button.
The sub clip movement screen appears. The clip
selected in step
3
appears surrounded by a frame.
To return to the previous screen
Press the RESET button.
6
Use the arrow buttons or the jog dial to move the
cursor to the position where you want to move the
selected sub clip.
To return to the previous screen
Press the THUMBNAIL button.
7
Press the SET button.
The sub clip thumbnail screen appears, allowing you
to check the results of the sub clip movement.
8
Save the current clip list to disc.
See 5-2-6 “Saving the Current Clip List to Disc” (page
66).
Indicates that the third sub clip will be
moved to the position of the eighth sub clip.
Cursor indicating the move destination
for the selected sub clip
Содержание XDCAM PDW-R1
Страница 1: ...PROFESSIONAL DISC RECORDER PDW R1 OPERATION MANUAL English 1st Edition Revised 1 ...
Страница 119: ...Chapter 7 Menus 119 7 5 System Menu To set the date and time See 3 4 Setting the Date and Time page 34 ...
Страница 155: ...Sony Corporation 2006 PDW R1 SY 3 991 786 02 1 http www sony net ...


