background image

6

5

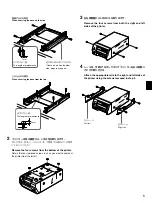
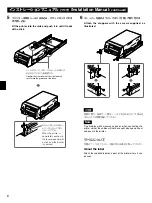
プリンター本体をレールにはめ込み、カチッとロックされる

まで押し込む。

Fit the printer into the rails and push it in until it locks
with a click.

ご注意

接続の際に、接続コード類をハーネスで止めるなどして挟み込

まないような処理を施してください。

Note

Tie all cables with harnesses and so on when connecting the
printer so that the cables will not be caught when you pull out
and push in the printer.

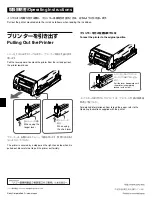
ラベルについて

付属のラベルをプリンター本体の見える場所に貼ってください。

About the label

Attach the supplied label on a post of the printer where it can
be seen.

レールのローラーがベースのレールの溝には
め込まれていることを確認する。

Confirm that the rollers of the right and left
rails fit into the grooves of the base.

きちんと押し込まれると、
レバーが上がってカチッ
とロックされる。

When the printer is
completely pushed in,
the lever pops up with
a click and the printer
is secured.

インストレーションマニュアル

 (

つづき)

/Installation Manual

continued

6

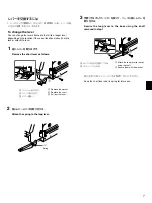
ストッパーを図のようにしてネジ(付属)で取り付ける。

Attach the stoppers with the screws supplied, as
illustrated.

Содержание UPA-21SA

Страница 1: ...P 22MD カラーエコーコピアSSZ 709 デジタルカラープリンターUP D21MDをラックなどに収納して 使用する際に ラックなどに取り付けてプリンターを容易に出し 入れするためのレールキットです The UPA 21SA is the rail kit designed for use with the Sony UP 21MD video color printer series and the UP D21MD digital color printer series Attaching the rail kit onto the rack allows you to pull out and push in the printer 2001 Sony Corporation ...

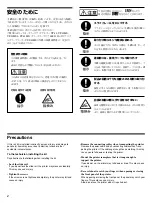
Страница 2: ...d incorrectly personal injury or damage to peripheral items may occur due to electrical shock or other accidental circumstances To the technician installing the kit Pay attention to the following when installing the kit Lock the slide rail If you do not lock the slide rail the printer may move accidentally This may cause an injury Tighten the screws If the screws are not tightened completely the p...

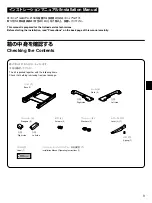
Страница 3: ... 左側 Left side ネジ 2 Screws 2 ベース 1 Base 1 左側 Left side 右側 Right side レール 2 Rails 2 本マニュアルはUPA 21SAを設置する技術者のためのマニュアルです 取り付けの際は裏表紙の 安全のために をご覧の上 設置してください This manual is prepared for the trained service technicians Before starting the installation read Precautions on the back page of this manual carefully レバー L 1 Lever L 1 バネ 1 Spring 1 ラベル 1 Label 1 ワッシャー 2 Washers 2 インストレ ションマニュアル 取扱説明書 1 Installati...

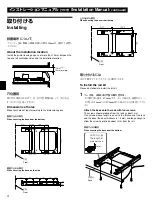
Страница 4: ...w to protrude about 1 mm from the rail ネジ飛び出し量 The length of protuberance 1mm 設置台 Rack インストレーションマニュアル つづき Installation Manual continued 取り付ける Installing 設置場所について プリ ンター上面 側面の通風孔部との間は10mm以上開けて設置し てく ださい About the installation location Install the printer leaving a space of more than 10 mm between the top and left ventilation holes and the installation location 正面 Front 正面 Front 穴位置図 取り付け場所に合わせて 以下の...

Страница 5: ...はずす 外した足は 将来 レールからはずして使用する場合のため保管 しておいてく ださい Remove the four screws from the bottom of the printer Retain the four removed screws in case you want to unmount the printer from the rail kit 3 左右両側面から4本のビスを取りはずす Remove the four screws from both the right and left sides of the printer 4 レールを 手順3ではずしたネジでプリンター左右の側面に それぞれ取り付ける Attach the appropriate rails to the right and left sides of the printer using ...

Страница 6: ...er ラベルについて 付属のラベルをプリ ンター本体の見える場所に貼ってく ださい About the label Attach the supplied label on a post of the printer where it can be seen レールのローラーがベースのレールの溝には め込まれていることを確認する Confirm that the rollers of the right and left rails fit into the grooves of the base きちんと押し込まれると レバーが上がってカチッ とロックされる When the printer is completely pushed in the lever pops up with a click and the printer is secured インストレーションマニュアル つづ...

Страница 7: ...hort lever as follows 2 長いレバーにバネを取り付ける Attach the spring to the long lever 3 手順1ではずしたシャフトを使って ベースに長いレバーを 取り付ける Secure the long lever to the base using the shaft removed in step 1 バネ Spring 1 ワッシャーをはずす 2 シャフトをはずす 3 レバーを抜く 1 Remove the washer 2 Remove the shaft 3 Pull out the lever 取り はずした短いレバーとバネは保管しておいてく ださい Keep the short lever and its spring for future use 1 シャフトを元の位置につける 2 ワッシャーでとめる 1 Attach th...

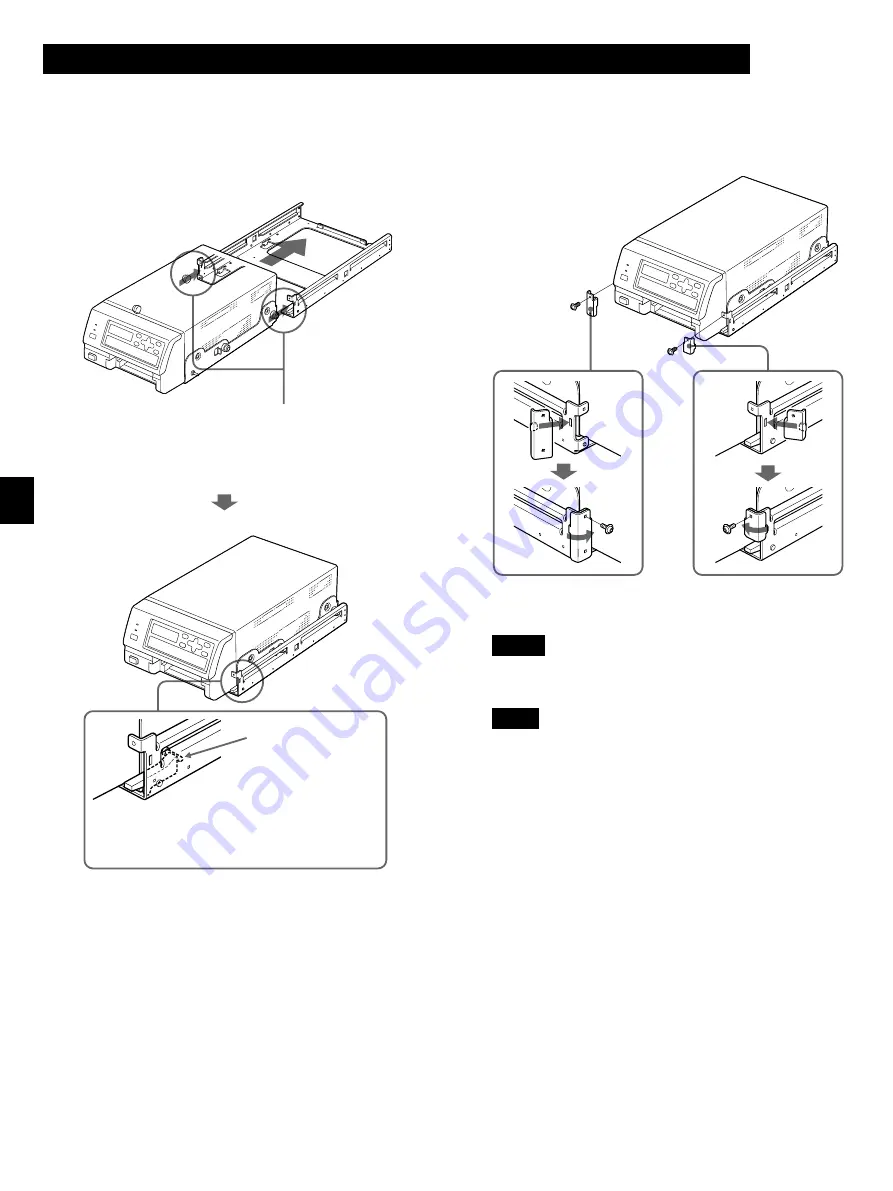
Страница 8: ... Pull the lever downward until the printer is completely locked with a click 取扱説明書 Operating Instructions プリ ンターは 右側にあるス ト ッパーで固定されます 無理に引き出さ ないよう にしてく ださい The printer is secured by a stopper on the right hand side when it is pulled out Be careful not to pull the printer out forcibly プリンターを元の位置に戻すには To reset the printer to the original position イ ンク リ ボンの取り付けかたについては プリ ンターに付属の取扱説 明書をご覧く ださい For de...

Отзывы: