5
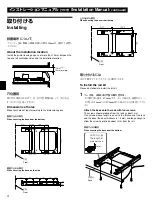
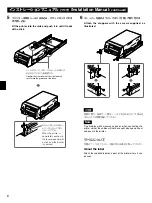
側面で止める場合
When securing the base on the side
ネジ飛び出し量
The length of protuberance
壁が無い場合はささえを作る。
If there is a wall on the other
side, prepare a support.
1mm
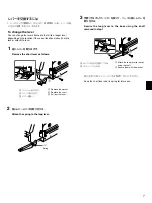
上から止める場合
When securing the base from the top
3mm
ネジ飛び出し量
The length of protuberance
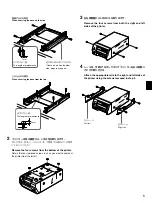
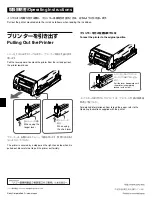
2
プリンター本体の裏側から、
4
本の足を取りはずす。
外した足は、将来、
レールからはずして使用する場合のため保管
しておいてください。
Remove the four screws from the bottom of the printer.
Retain the four removed screws in case you want to unmount
the printer from the rail kit.
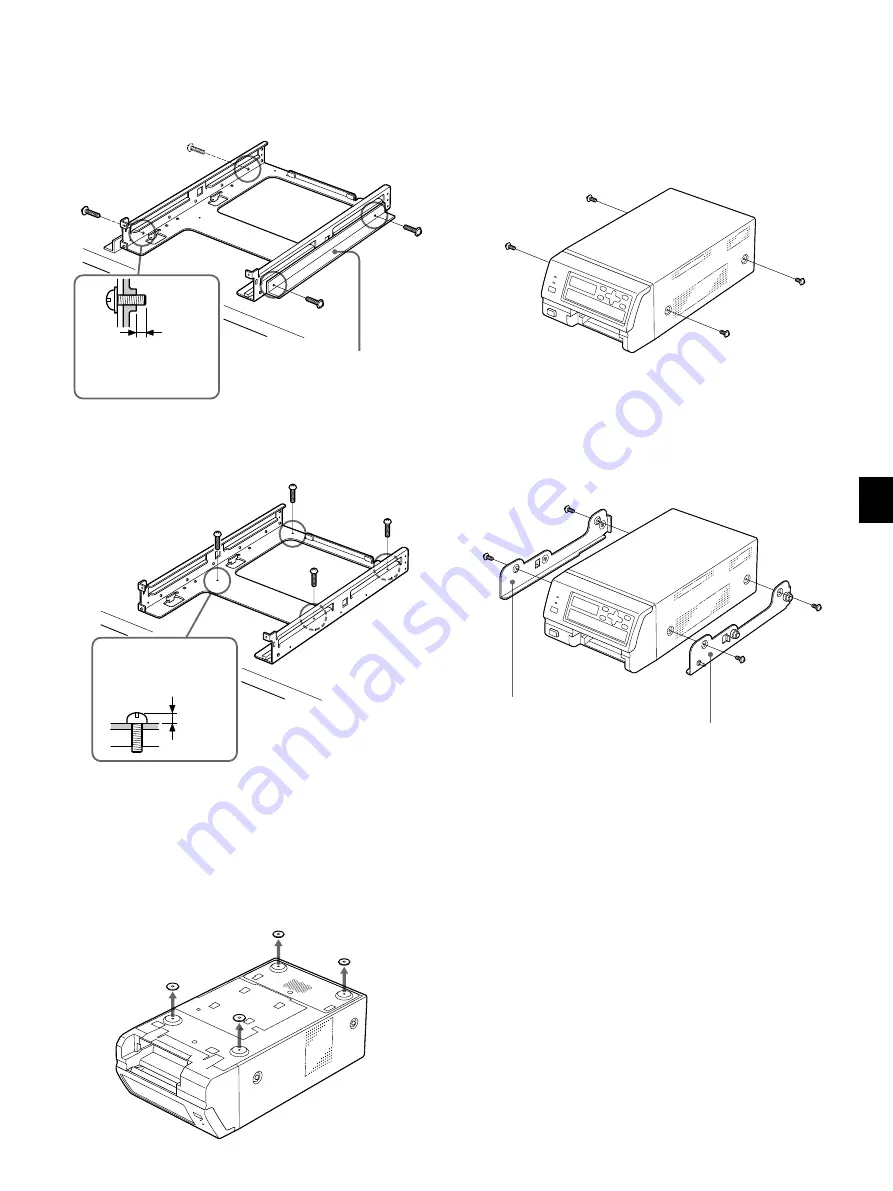
3
左右両側面から
4
本のビスを取りはずす。
Remove the four screws from both the right and left
sides of the printer.
4
レールを、手順
3
ではずしたネジでプリンター左右の側面に
それぞれ取り付ける。
Attach the appropriate rails to the right and left sides of
the printer using the screws removed in step 3.
左のレール
Left rail
右のレール
Right rail


