26
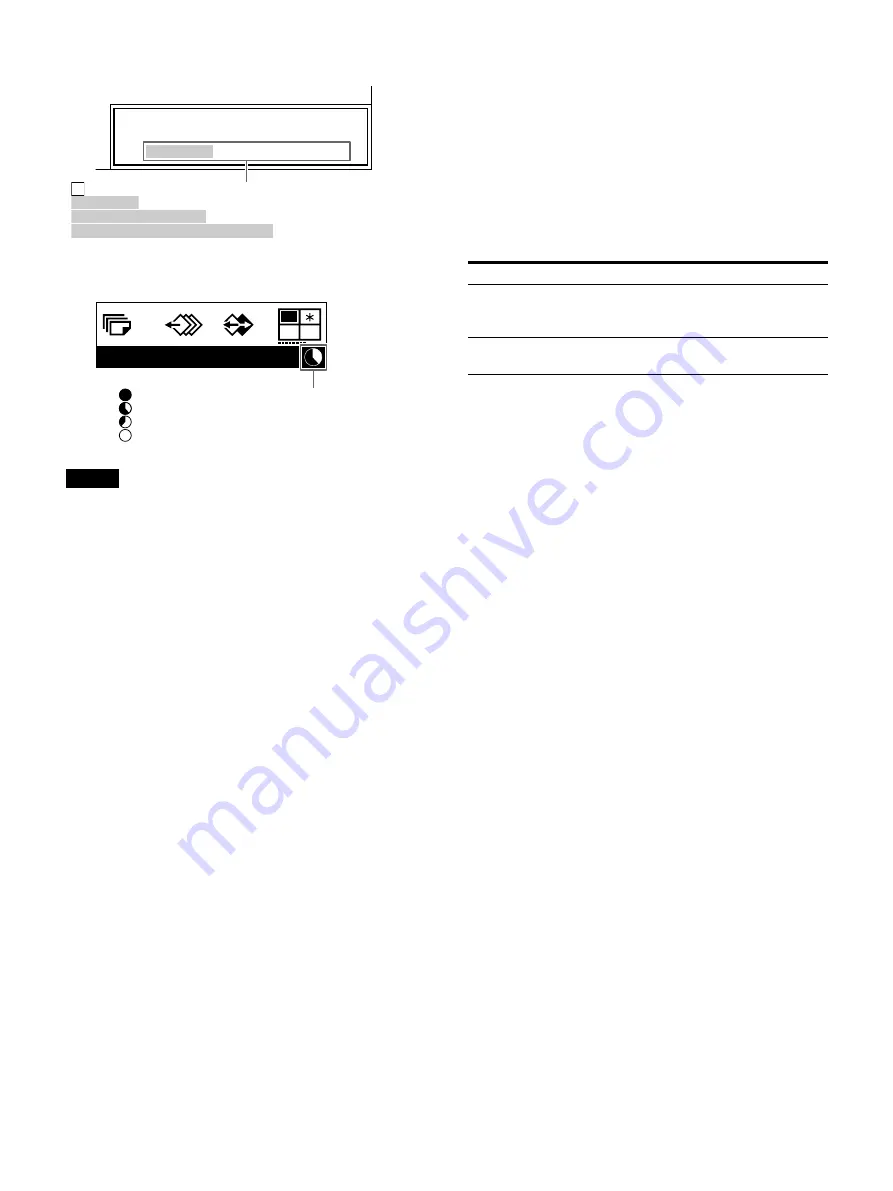
On a video monitor
On the printer window display
Notes
• Do not turn off the power during printing.
If you do so, paper may not be ejected and may
jam in the printer.
• Do not open the front door and do not remove
the paper tray during printing. If you do so,
paper may not be ejected and may jam in the
printer.
• Do not leave more than ten sheets of printouts
on the paper tray. Doing so may cause a paper
jam. Even if fewer than ten sheets of printouts
have been accumulated on the paper tray, the
printer may stop printing and “Remove Printed
Paper” appears. In such a case, remove printouts
accumulated on the paper tray. Printing will
resume automatically.
• You can not change the operation mode or the
settings in the [Print Area Setup] tab of the [User
Setup] menu during printing.
To stop printing
When making one printout:
You can not stop
printing midway.
When making multiple copies:
Press the STOP/
CLEAR button. The printer stops printing when the
page currently printing is completed. Also, any
queued printing jobs are canceled.
For detailed information on setting the print
quantity, see “Setting the printout quantity”
If the printer does not print
If you cannot print even when pressing the PRINT
button, an error message is displayed on the
video monitor and printer window display.
Proceed as described in “Error/Warning
To change the printout speed
In the [Print Setup] tab of [User Setup] menu,
configure [Print Speed].
For detailed information on how to operate the
menu, see “Basic Menu Operations” (page 52).
When you want to see an image that is hidden
under a screen
To erase information and messages displayed on
the screen so you can view a hidden image, press
the DISPLAY button. See “Hiding the Screen
Display on the Video Monitor” (page 46). You can
also erase the ink ribbon type and remaining print
information. See “Displaying the ink ribbon or
printer setting information” (page 71).
If a black frame or line appears on the printout
Sometimes, a black frame or line appears on the
printout, although it does not appear on the video
monitor. Settings can be adjusted so that this
black frame or line is eliminated from the printout.
See “When a black frame or lines show up on
If the color quality of the printouts is not
satisfactory
You can obtain satisfactory color quality of the
printouts by adjusting the input signal according
to the connected equipment and/or adjusting the
color quality of the printouts. See “Adjusting the
printout sharpness” (page 58), “Specifying colors
for adjustment” (page 64) and “Compensating for
source image brightness, etc.” (page 55).
Colors may change between each printing pack
pair. It is recommended that you adjust the color
balance each time you load a new ink ribbon and
paper. See “Adjusting the color balance” (page 61).
Storing your printouts
• Store printouts in a dark and cool place.
• Avoid using tape on printouts, leaving an eraser
on printouts, or putting the printout on objects
which contain plastic (desk mat, etc.).
1/1
Page A Printing
: Feeding paper
: Printing yellow
: Printing magenta (pink)
: Printing cyan (light blue) -
paper ejection complete
1
H
M
Page H
1 / 1
Printing
: Feeding paper
: Printing yellow
: Printing magenta (pink)
: Printing cyan (light blue) - paper ejection complete
Option
Contents
Normal
Makes a printout at normal speed.
You can create printouts with high-
density black.
High (default
value)
Makes a printout at high speed.
Содержание UP-27MD
Страница 90: ......


