


http://cxema.ru
– 18 –
KV-XA29M66
RM-953
24
Adjusting Y
our Setup (MENU)
IN
T
E
L
L
IG
E
N
PE
R
P
I
CTU
R
E
SO
N
A
L
WI
D
E
S
OF
T
PI
C
T
U
R
E
MO
D
E
MO
D
E
:
S
TA
N
D
AR
D
A
DJU
S
T
C
DYNA
M
I
FAVORITE
PIP PR
OGR
PIP PR
OGR
ENTER
MENU
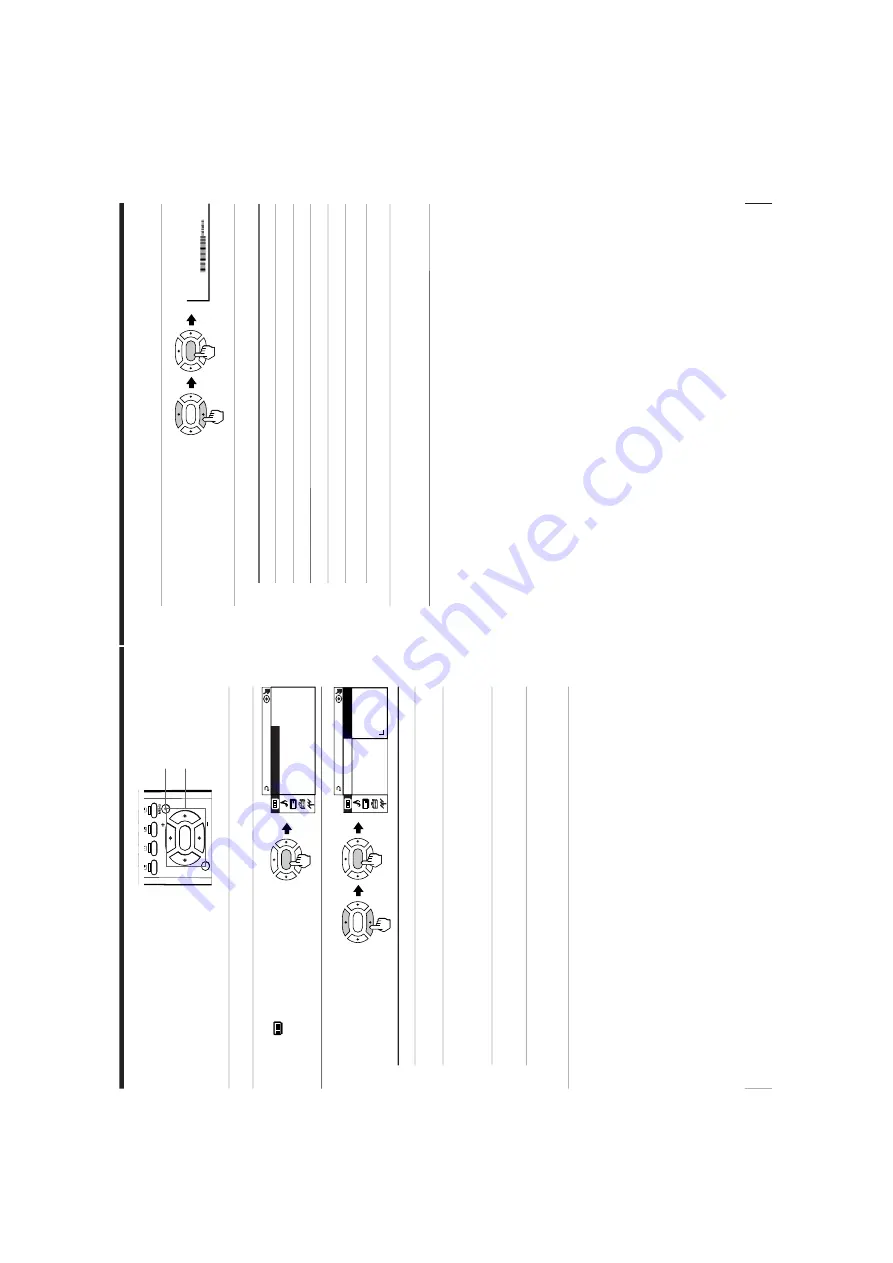
Changing the
“PICTURE” setting
The “PICTURE” menu allows you to
change the pictur
e settings.
1
Press MENU.
2
Make sure the “PICTURE”
icon (
) is selected,
then press ENTER.
3
Press
V
or
v
to select the
desired item (e.g.,
“PICTURE MODE” ),
then press ENTER.
Select
To
“PICTURE MODE”
choose either “DYNAMIC”, “ST
ANDARD”, “SOFT”
“PERSONAL”*, or “ADJUST”.
“WIDE MODE”
change the pictur
e size when r
eceiving wide-mode (16:9)
pictur
e signal.
Pr
ess
V
or
v
to select “ON”, then pr
ess ENTER.
T
o
cancel, select “OFF”, then pr
ess ENTER.
“INTELLIGENT PIC”
optimize pictur
e quality
.
Pr
ess
V
or
v
to select “ON”, then pr
ess ENTER.
T
o
cancel, select “OFF”, then pr
ess ENTER.
*
W
hen the “PERSONAL” mode is selected, you can r
eceive the last
adjusted pictur
e settings fr
om the “ADJUST” items (see page 25).
Note
•
For details on the options under “PICTURE MODE”, see page 12.
To
r
etur
n to the normal scr
een
Pr
ess MENU.
ENTER
ENTER
ENTER
V
/
b
/
v
/
B
/ENTER
P
I
CTU
R
E
M
O
C
P
I
CTU
R
E
IN
T
E
L
L
IG
E
N
T
P
IC:
O
F
F
W
I
DE
M
O
DE
:O
F
F
DE
:
DYNA
M
I
25
Adjusting Y
our Setup (MENU)
80
COLOR
Adjusting the “ADJUST” items under “PICTURE MODE”
1
Press
V
or
v
to select the
desired item (e.g.,
“COLOR”), then press
ENTER.
2
Adjust the value according to the following table, then press ENTER.
For
Pr
ess
v
/
B
to
P
ress
V
/
b
to
“PICTURE”
decr
ease pictur
e contrast
incr
ease pictur
e contrast
“COLOR”
decr
ease color intensity
incr
ease color intensity
“BRIGHT”
darken the pictur
e
brighten the pictur
e
“HUE”*
incr
ease r
ed pictur
e tones
incr
ease gr
een pictur
e tones
“SHARP”
soften the pictur
e
sharpen the pictur
e
*
Y
ou can adjust “HUE” for the NTSC color system only
.
3
Repeat the above steps to adjust other items.
The adjusted settings will be r
eceived when you select “PERSONAL”.
Tip
•
For details on the menu system and how to use the menu, r
efer to
Introducing the menu system
on page 21.
ENTER
ENTER


