Memory Stick
15
A ‘Memory Stick’ is a new recording medium with a data capacity that exceeds a
floppy disk. It is specially designed for exchanging and sharing digital data among
‘Memory Stick’ compatible products. Use the ‘Memory Stick’ to display JPEG
pictures (DCF version 1.0 format) individually or as a slideshow presentation on the
TV screen. Because it is removable, ‘Memory Stick’ can also be used for external
data storage.
Notes:
‘Memory Stick’ and the
logo are trademarks of Sony Corporation.
DCF (Design rules for Camera File systems) is a standard format for digital still cameras, DV
camcorders etc. It specifies the format used for naming JPEG files and the directories used on
the ‘Memory Stick’. This format is supported by Sony and other manufacturers.
Inserting a ‘Memory Stick’
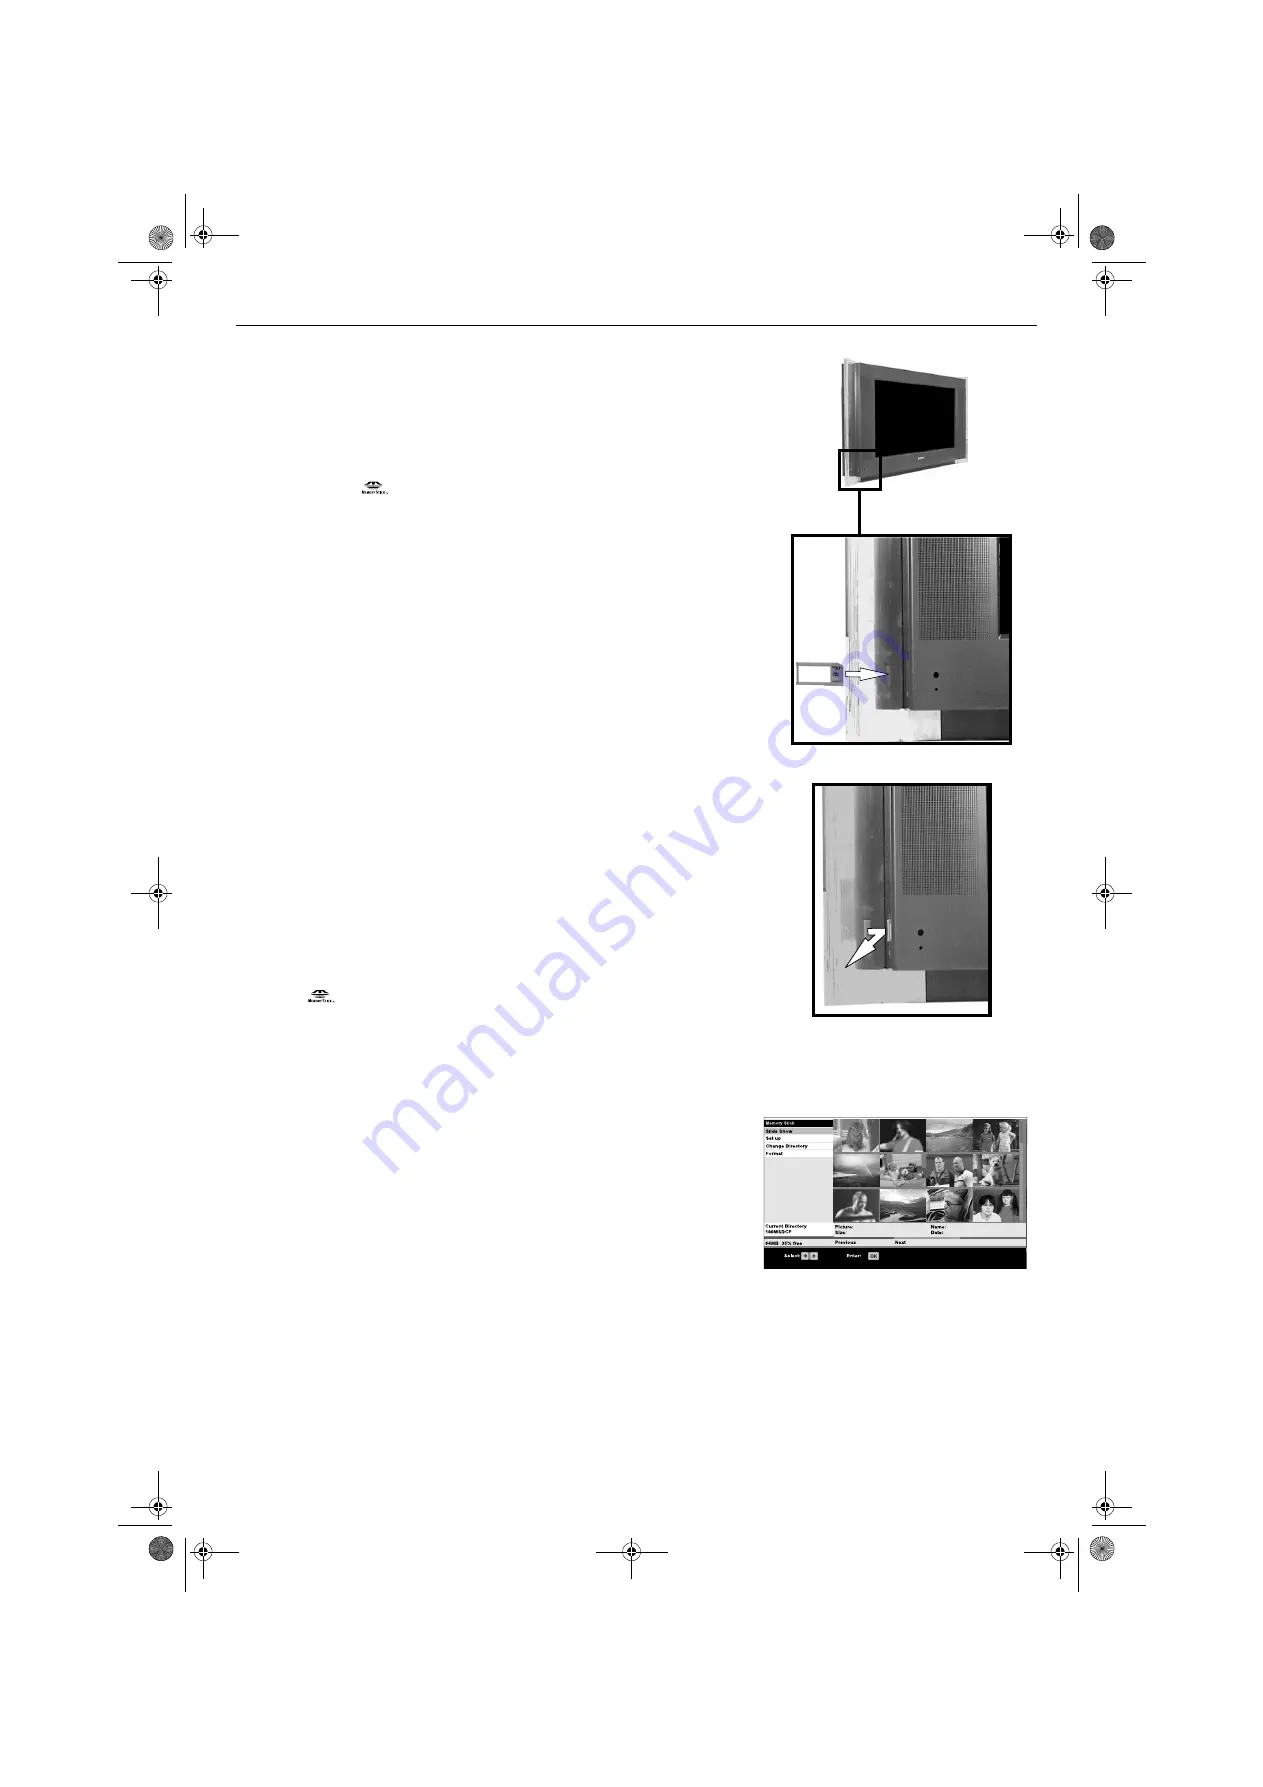
Insert a ’Memory Stick’ into the front control panel of the TV set until it clicks into the
connector. The side showing the
B
symbol must be facing you and it must be
pointing towards the ‘Memory Stick’ socket. The red light flashes indicating that the
‘Memory Stick’ contents are being read.
Removing a ‘Memory Stick’
Confirm that the red light is off.
Do not pull
the ‘Memory Stick’. You must push the
‘Memory Stick’ and then release. The ‘Memory Stick’ will spring out.
Note:
Data stored on a ‘Memory Stick’ may become damaged or erased if you remove the ‘Memory
Stick’ when it is reading or writing data.
The ‘Memory Stick’ Thumbnail menu
Press the
button to display the Thumbnail menu. This screen gives an
overview of the ’Memory Stick’ content. From this menu you can also choose to see
a slide show of the content, change the directory (if the ’Memory Stick’ contains more
than one directory), format a ‘Memory Stick’ and change settings related to the
viewing operation.
To view a picture
1.
Press the
v
,
V
,
B
or
b
buttons to highlight the picture you wish to view.
There may be more pictures available than can be shown on the Thumbnail
screen. If so, press the
GREEN
button to view the next group of pictures, or
the
RED
button to view the previous group.
2.
When you have selected the picture you want, press the
OK
button to
display the Thumbnail ‘Action List’. The picture you have selected for
viewing will be outlined.
3.
The option ‘Full Screen View’ should now be highlighted. Press the
OK
button to view the selected picture at full size.
Whilst the picture is displayed at full size, you can select the next or
previous picture for viewing by pressing the
B
or
b
buttons.
4.
To return to the Thumbnail menu, first press the
OK
button to display the full
screen ‘Action List’. Make sure ‘Exit Full Screen View’ is highlighted, then
press the
OK
button once again.
Thumbnail menu
GBpages15-22.fm Page 15 Thursday, October 30, 2003 12:06 PM
Содержание Trinitron KV-32HQ100K
Страница 3: ...1 BG BGpages1 8 fm Page 1 Thursday October 30 2003 11 15 AM ...
Страница 31: ...1 CZ CSpages1 8 fm Page 1 Thursday October 30 2003 11 44 AM ...
Страница 59: ...1 GB GBpages1 8 fm Page 1 Tuesday October 28 2003 3 23 PM ...
Страница 87: ...1 HU HUpages1 8 FM Page 1 Thursday October 30 2003 12 27 PM ...
Страница 115: ...1 PL PLpages1 8 fm Page 1 Thursday October 30 2003 1 13 PM ...
Страница 143: ...1 RU RUpages1 8 fm Page 1 Thursday October 30 2003 2 23 PM ...
Страница 171: ...K cover fm Page 3 Monday October 27 2003 3 15 PM ...


