18
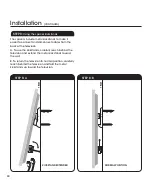
UP
UP
200mm
100mm
300mm
400mm
300mm
400mm
200mm
100mm
Installation
(cOnTInuED)
STEPS 5 & 6
STEP 6:
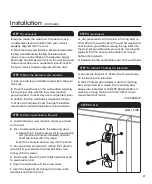
Attach spacers or self-adhesive pads
STEP 5
(continued)
cOnTInuED
➔
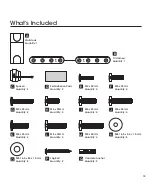
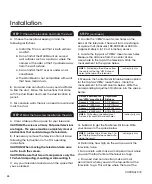
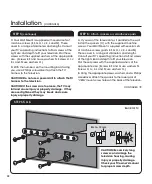
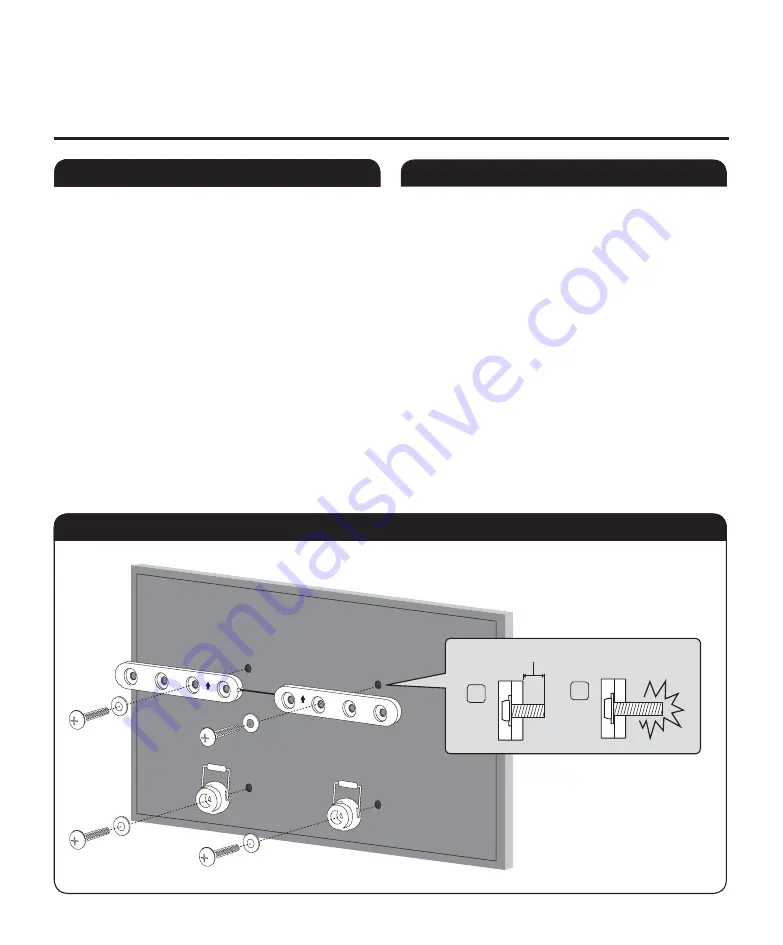
c. Your Wall Mount is supplied with several sets of
machine screws (E, F, G, H, I, J, K, L and M). These
cover in a range of diameters and lengths. consult
your TV's operating instructions to find screws of the
right size and depth to fit your television. Pair these
screws with the supplied washers of the appropriate
size. (Screws E, F and G use washers n. Screws H, I, J,
K, L and M use washers O.)
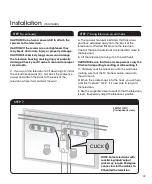
D. With the numbers on the mounting bars facing
you, use a Phillips screwdriver to attach the TV
harness to the television.
CAUTION! Do not use a power drill to attach the TV
harness to the television.
CAUTION! If the screws are too loose, the TV may
fall and cause injury or property damage. If they
are over-tightened, they may break and cause
injury or property damage.
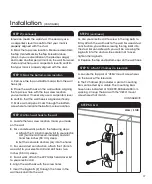
A. If you want the television to sit parallel to the wall,
install the spacers (c) with the supplied machine
screws. Your Wall Mount is supplied with several sets
of machine screws (parts E, F, G, H, I, J, K, L and M).
These cover in a range of diameters and lengths.
consult your TV's operating instructions to find screws
of the right size and depth to fit your television.
Pair these screws with the supplied washers of the
appropriate size. (Screws E, F and G use washers n.
Screws H, I, J, K, L and M use washers O.)
B. using the appropriate screws, washers, and a Phillips
screwdriver, attach the spacers to the lower pair of
“VESA” mount screw holes on the back of the television.
BACk OF TV
CAUTION! Excessively long
screws can damage the
television housing, causing
injury or property damage.
Check your TV owner's manual
for proper screw depth.
STEP 5
(continued)
STEP 5
(continued)
✓
✗
8mm – 12mm

