12
How to set/operate
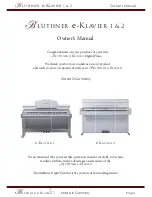
1. MENU [ DISPLAY SET ] [ ZEBRA ]
2. Select ON or OFF.
3. Select a brightness level (70, 75, 80, 85, 90, 95, 100 or 100+).
Press the SEL/PUSH EXEC dial to enter the new setting.
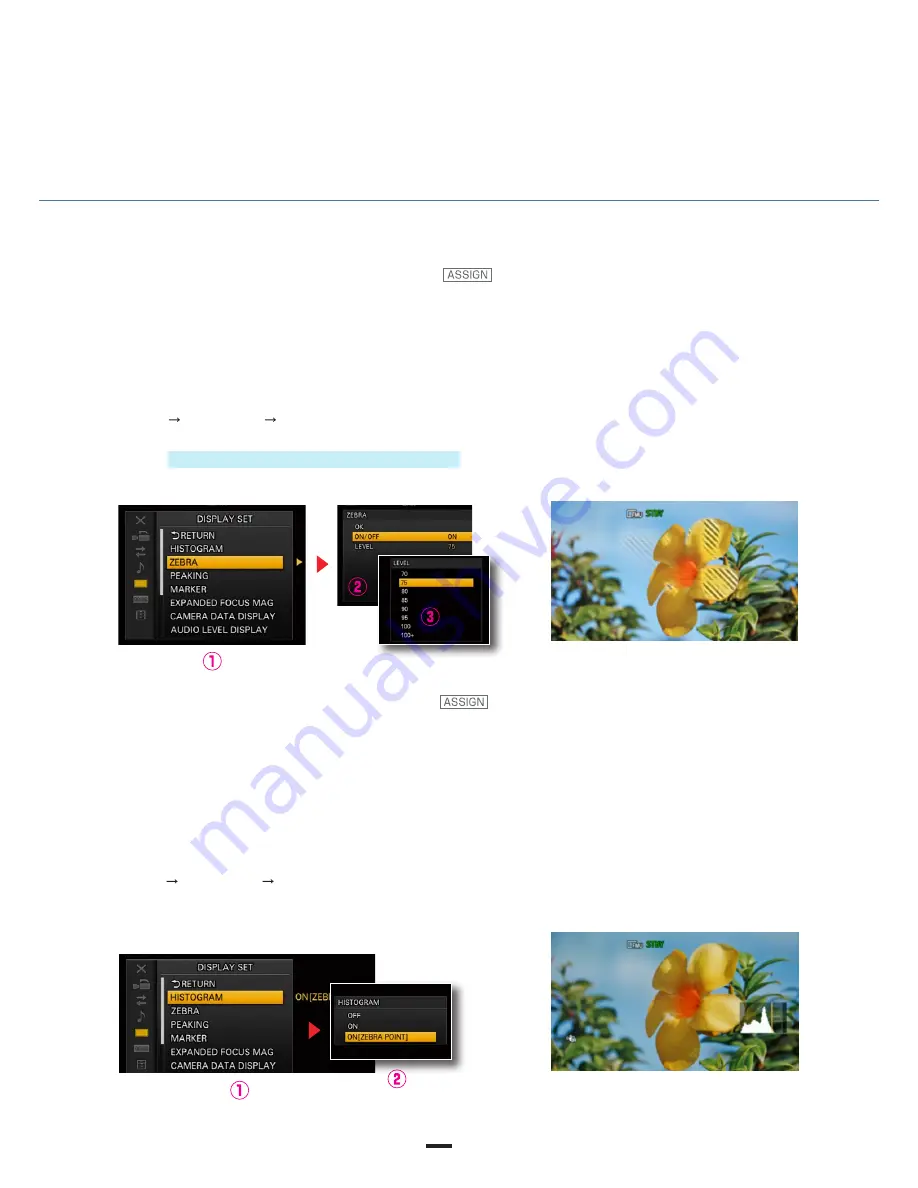
How to set/operate
1. MENU [ DISPLAY SET ] [ HISTOGRAM ]
2. Select ON or ON [ZEBRA POINT].
Press the SEL/PUSH EXEC dial to confirm.
The histogram displays brightness levels across the entire image in the form of a bar graph, with brightness on the horizontal axis
and pixel count on the vertical axis. The histogram is a useful way to assess the overall exposure balance of an image. For instance,
in an image with many bright areas, the distribution will be skewed to the right.
A vertical line denotes the 100% brightness point. Brightness levels over 100% are displayed with a different background color to
help locate areas of whiteout.
The ZEBRA POINT option also shows the selected Zebra brightness level on the histogram, providing a visual indication of brightness
levels during filming.
Histogram — for checking overall light balance
Zebra stripes are superimposed on areas of the image that correspond to the designated brightness level, to provide a guide for
brightness adjustment.
To check for whiteout, set the Zebra display to 100+ then adjust the brightness to minimize the stripes visible on the screen. For face
close-ups, where a brightness level of 62% – 65% is recommended, set the Zebra display to 75 then adjust the brightness so that
the stripes disappear from skin areas.
Zebra display — for checking subject brightness
Brightness adjustment
SENSOR AND LENS
Содержание NEX-FS700R
Страница 1: ...NEX FS700R Handbook ...
Страница 23: ...21 ...