①
②
①
②
③
12
12
SENSOR AND LENS
How to set/operate
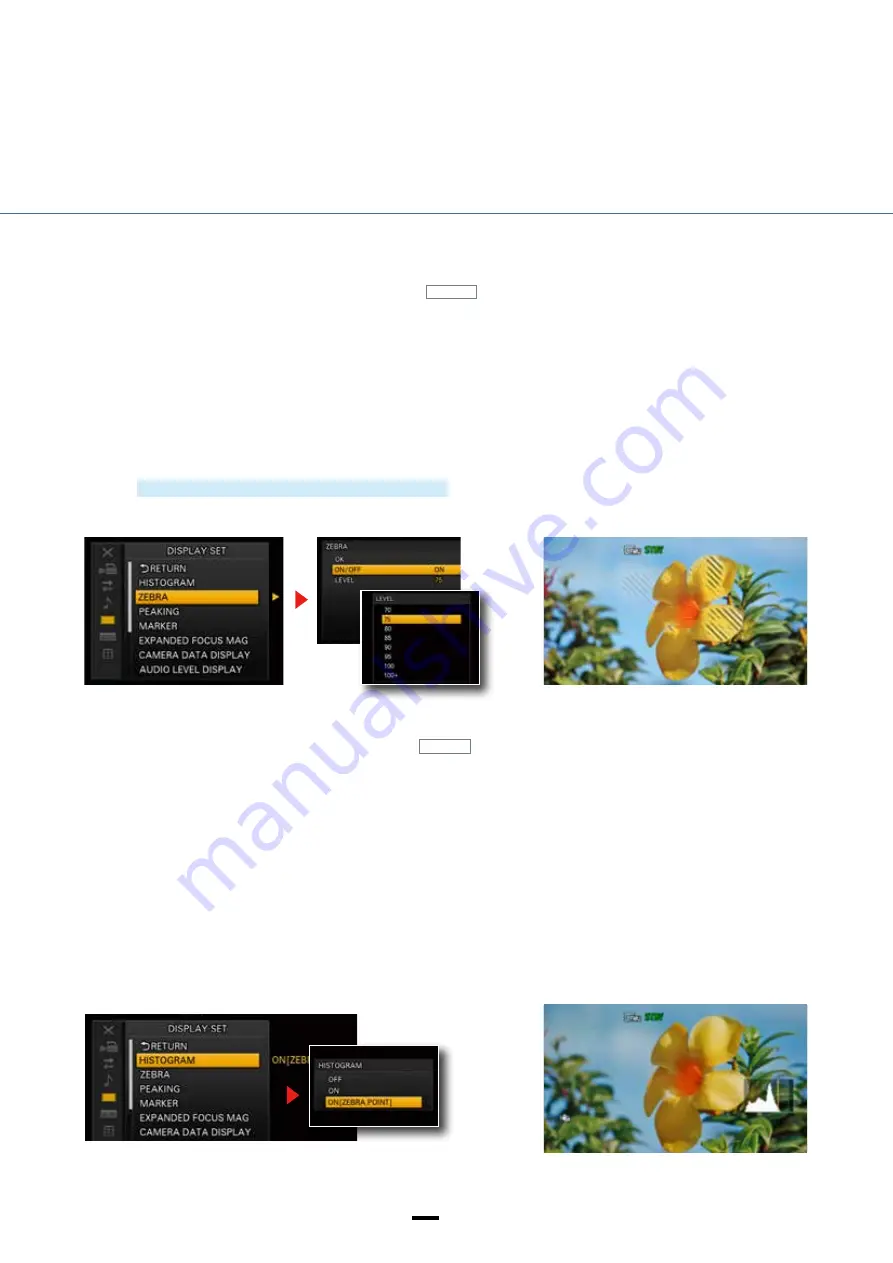
1. MENU → DISPLAY SET → ZEBRA
2. Select ON or OFF.
3. Select a brightness level (70, 75, 80, 85, 90, 95, 100 or 100+).
Press the SEL/PUSH EXEC dial to enter the new setting.
How to set/operate
1. MENU → DISPLAY SET → HISTOGRAM
2. Select ON or ON [ZEBRA POINT].
Press the SEL/PUSH EXEC dial to confirm.
The histogram displays brightness levels across the entire image in the form of a bar graph, with brightness on the horizontal axis
and pixel count on the vertical axis. The histogram is a useful way to assess the overall exposure balance of an image. For instance,
in an image with many bright areas, the distribution will be skewed to the right.
A vertical line denotes the 100% brightness point. Brightness levels over 100% are displayed with a different background color to
help locate areas of whiteout.
The ZEBRA POINT option also shows the selected Zebra brightness level on the histogram, providing a visual indication of
brightness levels during filming.
Histogram—for checking overall light balance
ASSIGN
Zebra stripes are superimposed on areas of the image that correspond to the designated brightness level, to provide a guide for
brightness adjustment.
To check for whiteout, set the Zebra display to 100+ then adjust the brightness to minimize the stripes visible on the screen. For face
close-ups, where a brightness level of 62% – 65% is recommended, set the Zebra display to 75 then adjust the brightness so that
the stripes disappear from skin areas.
Zebra display—for checking subject brightness
Brightness adjustment
ASSIGN
Содержание NEX-EA50 NXCAM
Страница 1: ...NEX EA50 Handbook ...


