– 16 –
27
-EN
Operations
EN
Watching a video input picture
Press TV/VIDEO repeatedly until the desired
video input appears.
Each time you press TV/VIDEO, the display changes
as follows:
TV
n
VIDEO 1
n
VIDEO 2
n
VIDEO 3
n
VIDEO 4
To return to the TV picture, press ANT so that a
channel number appears.
N o t e
• When the video label for VIDEO 4 is set to SKIP, the display
changes skipping the VIDEO 4 connection (see page
41
).
Changing the VHF/UHF input to the
AUX input
Press ANT.
“AUX” appears beside the channel number.
Pressing ANT again switches back to the VHF/UHF
input.
Displaying on-screen information
Press DISPLAY repeatedly until the desired
display appears.
Each time you press DISPLAY, the display changes as
follows:
Status display*
n
XDS ON**
n
cc 1 ON***
DISPLAY OFF
N
*
Channel number, the current time, channel caption
(if set), and MTS mode (if SAP is selected) are
displayed. SAP indication disappears after three
seconds.
** Some programs are broadcast with XDS (Extended
Data Service) which shows a network name,
program name, program type, program length, call
letters, and time of the show. When you select XDS
with the DISPLAY button, this information will be
displayed on the screen if the broadcaster offers this
service.
*** Some programs are broadcast with Caption Vision.
When you select Caption Vision with the DISPLAY
button, Caption Vision will be displayed on the
screen if the broadcaster offers this service. (See
page
42
for selecting Caption Vision.)
To cancel the display, press DISPLAY repeatedly until
“DISPLAY OFF” appears. “DISPLAY OFF” goes off
after three seconds.
Setting the Sleep Timer
The projection TV stays on for the length of time you
specify and then shuts off automatically.
Press SLEEP repeatedly until the time (minutes)
you want appears.
Each time you press SLEEP, the time changes as
follows:
30
n
60
n
90
n
SLEEP OFF
TV/VIDEO
SLEEP
DISPLAY
N
To cancel the Sleep Timer, press SLEEP repeatedly
until “SLEEP OFF” appears, or turn off the projection
TV.
N
N
ANT
28
-EN
Operations
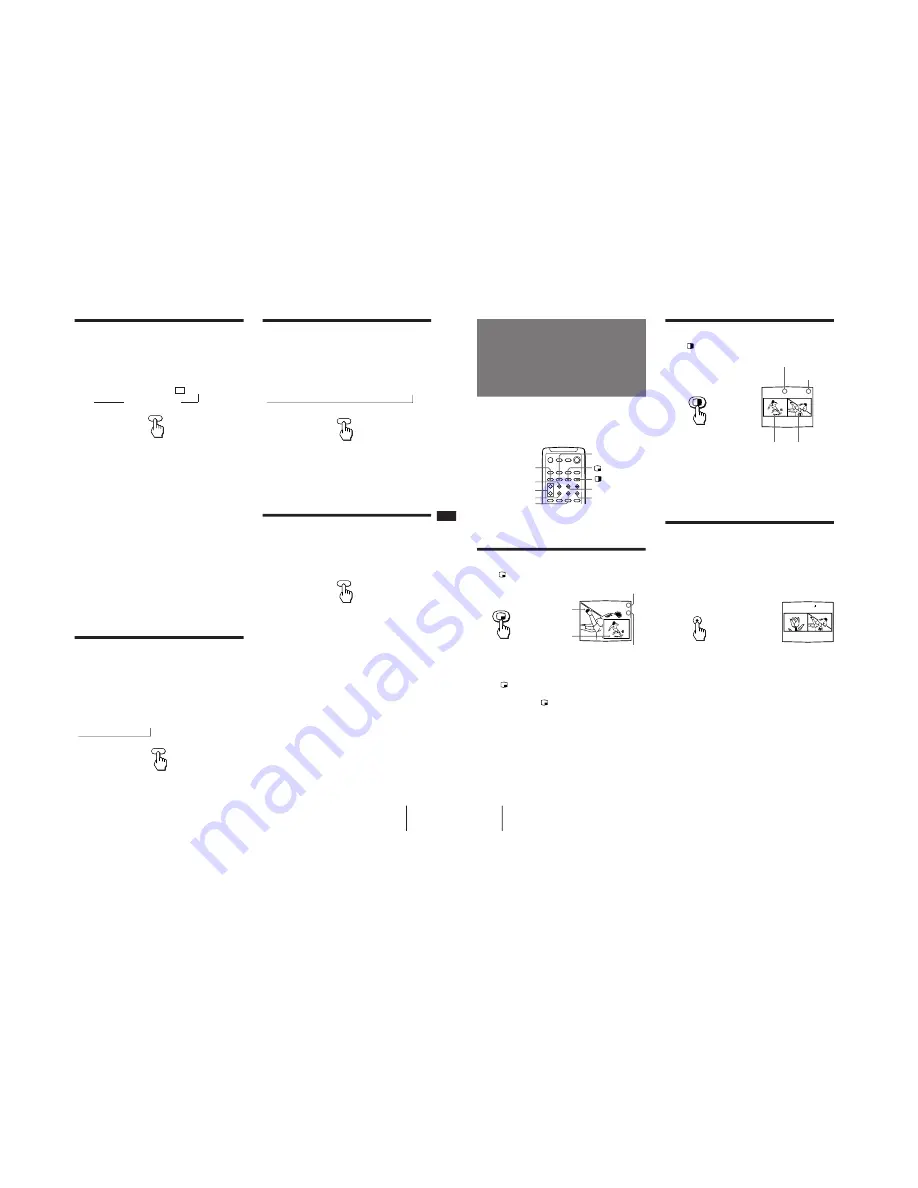
You can watch both the main/right picture and a
window/left picture simultaneously using the Picture-
in-Picture (PIP) or the Picture-and-Picture (Twin
View™) feature.
Use the yellow labelled buttons for PIP operations.
Displaying a window picture (PIP)
Press
.
Press
repeatedly to display a smaller
window picture.
Each time you press
, the size of the window picture
changes as follows: 1/4 size
n
1/9 size
n
1/16 size.
To remove the window picture, press PIP OFF.
1
2
3
Displaying a left picture (P&P)
Press
.
To restore the normal picture, press PIP OFF.
Notes
• If the main/right picture is not receiving an image, the
window/left picture may become a noisy picture.
•
The window/left picture sound is also output from the
AUDIO (VAR/FIX) OUT jacks when you listen to it.
Changing the window/left picture
input mode
Press TV/VIDEO (yellow labelled button) in PIP
or P&P mode to select the input mode.
Each time you press TV/VIDEO (yellow labelled
button), “TV”, “VIDEO 1”, “VIDEO 2”, “VIDEO 3”,
and “VIDEO 4” appear in sequence.
A window/left picture will appear in the same input
mode as the last time you used PIP.
Notes
• If you connect your VCR without a cable box, your PIP input
source is a VCR. If you connect your VCR with a cable box,
your PIP input source is a VCR or cable box.
• When the video label for VIDEO 4 is set to SKIP, “VIDEO
4”does not appear on the display.
TV/VIDEO
1
6
6
7
Watching two
programs at one
time — PIP/P&P
(Twin View™)
/CH INDEX
SWAP
TV/VIDEO (yellow
labelled button)
PIP OFF
FREEZE
Left picture Right picture
Input-source mode or TV
channel for the left picture
Input-source mode
or TV channel for
the right picture
Input-source mode or TV
channel for the window picture
Input-source mode or TV
channel for the main picture
Main picture
Window picture
(1/4 size)
CH +/– (yellow
labelled button)
POSITION
AUDIO
6
7
CH INDEX
Содержание KP-48V75 - 48" Color Rear Video Projector
Страница 64: ... 97 VM DY Z Board Z ...


