


XIS-10DC
P
repa
ra
tions
Connecting the Camera to Network
10
2
Double-click the
WODs_Administrator
icon to
start Administrator Tool.
The main window of Administrator Tool opens.
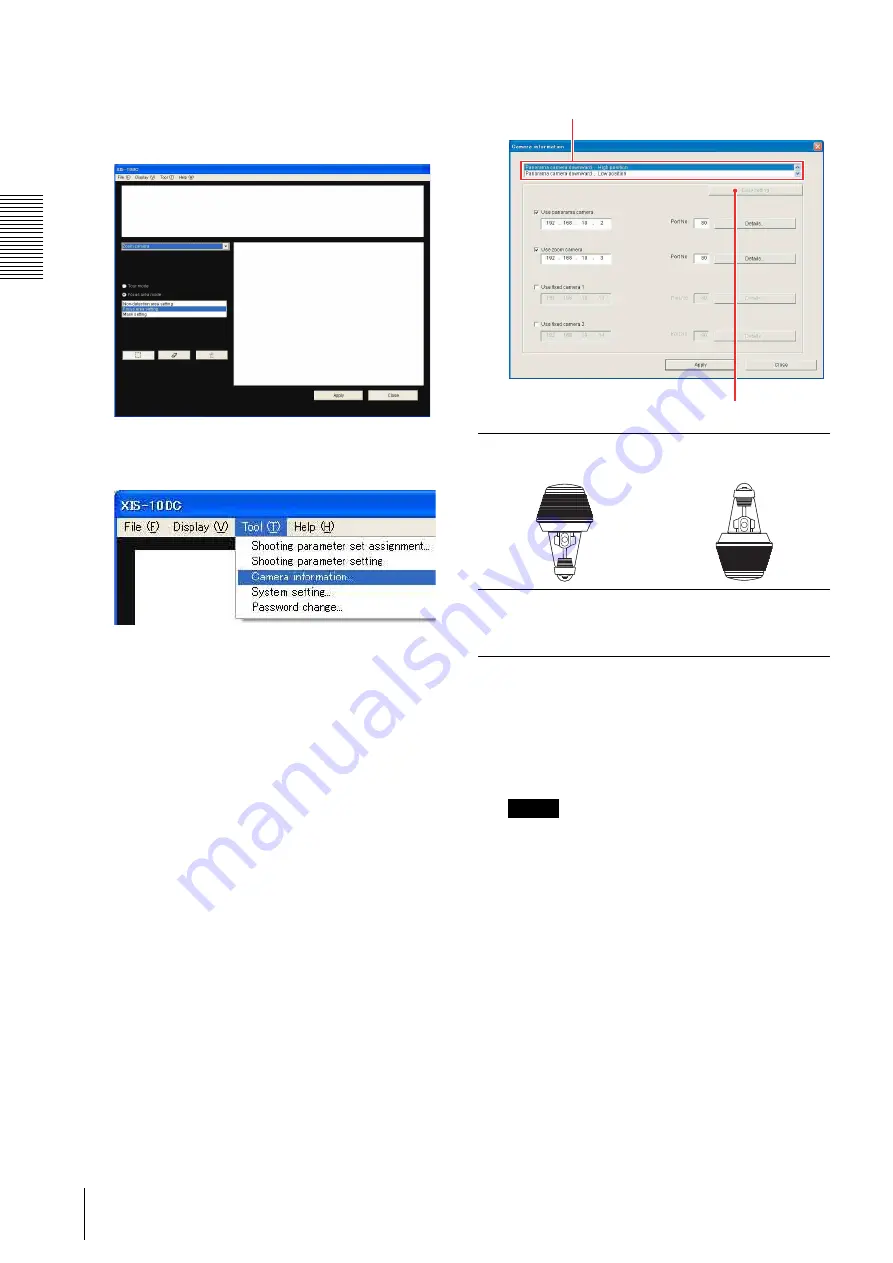
3
Select
Camera information
under
Tool
on the
menu bar.
The
Camera information
dialog opens.
4
According to the camera installation position,
select the appropriate option from among
Panorama camera downward, High position
,
Panorama camera downward, Low position
,
Panorama camera upward, High position
and
Panorama camera upward, Low position
.
Then click
Easy setting
.
The IP addresses are assigned to the cameras and
displayed.
The
Use panorama camera
and
Use zoom
camera
checkboxes are selected to show the
cameras are available.
IP address assignment is now completed.
Note
If the
Easy setting
button is disabled (in gray),
clear the
Use panorama camera
and
Use zoom
camera
checkboxes to enable it.
5
Click the
Close
button to close the
Camera
information
dialog.
6
To exit the Administrator Tool, click the
Close
button or select
Exit the application
under
File
on
the menu bar.
Default network setting of the camera
The factory network setting of the camera is as follows:
XIS-NT10
IP address: 192.168.10.11
SNC-RZ30N/P
IP address: 192.168.10.12
Panorama camera
downward
Panorama camera
upward
High position:
The panorama camera is installed more than 3
m above ground.
Low position:
The panorama camera is installed less than 3 m
above ground.
1
Select according to the camera installation position.
2
Click.
Содержание Ipela XI's XIS-10DC
Страница 53: ...XIS 10DC Sony Corporation ...


