
29
GB
GB
Adv
a
nc
e
d
S
e
tu
p
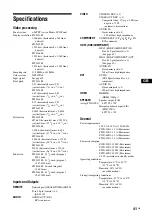
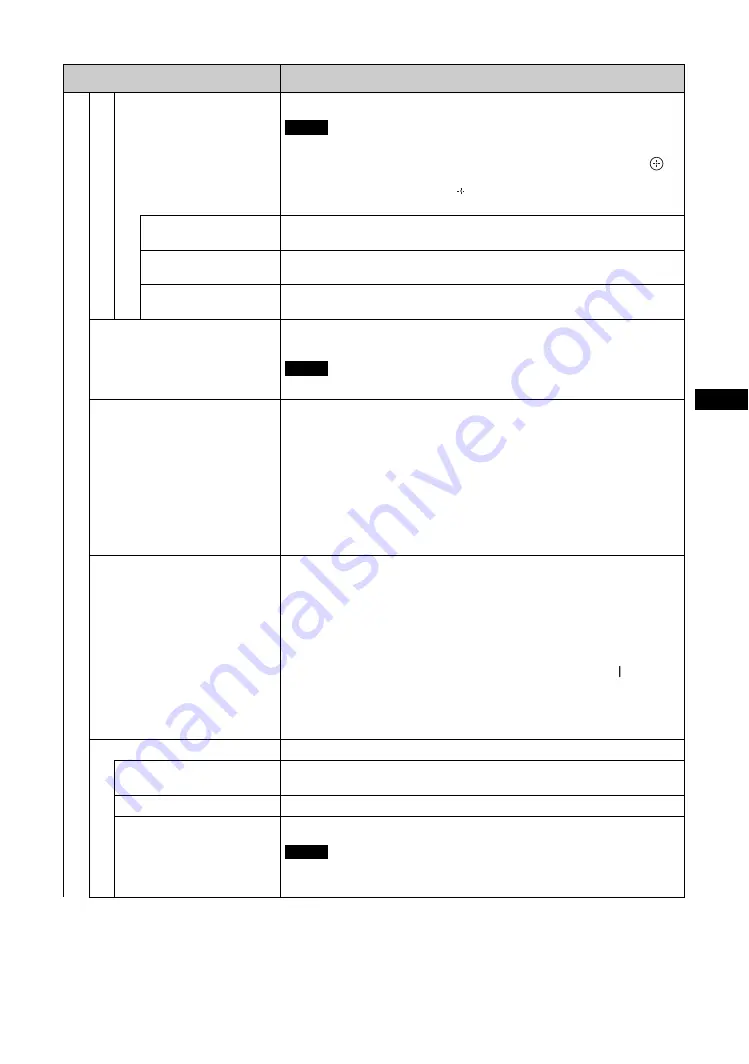
Control Mode
Set to control the display from the remote control or from the display.
When this item is operated, the available modes will differ depending on whether
you select by the remote control or the display. When setting this item with
button on the remote control, you can select only “Remote” or “Remote
Only”. When setting this item with button on the display, you can select only
“Remote” or “Display Only”.
Remote
Enables operation of the display with the control buttons on the display and the
remote control.
Display Only
Enables operation of the display with the control buttons on the display. You can
only use buttons on the display to enter this setting.
Remote Only
Enables operation of the display with the remote control. You can only use the
remote control to enter this setting.
Auto Screen Adjust
Select “On” or “Off”. If you select “On”, it saves settings such as picture size and
position for each input signal, and the last settings are automatically applied.
The “Auto Screen Adjust” function only works during RGB input.
Auto Shut Off
Select “On” or “Off”. When “On” is selected, the display automatically goes into
standby mode or power saving mode if no signal is input from the DVI, the HDMI,
the HD15 (RGB/COMPONENT) or the COMPONENT input connectors for about
30 seconds.
If no signal is input from the VIDEO connector for about 5 minutes, the display
automatically goes into standby mode.
Tips
• This function is available when “Screen Saver” is set to “Off”.
• If “DPMS” is set to “On”, you can select the settings for activating the power
saving mode.
DPMS
Select “On” or “Off”. When “On” is selected, the display automatically goes into
power saving mode if no signal is input from the DVI, the HDMI or the HD15
(RGB) input connectors for about 30 seconds.
When “Off” is selected, the display automatically goes into standby mode if no
signal is input from the DVI, the HDMI or the HD15 (RGB) input connectors for
about 30 seconds.
Tips
• While in the standby mode, press the
1
button on the display or the ON button
on the remote control to turn the display on. In the power saving mode, the
display is turned on automatically when a signal is input.
• This function is available when “Screen Saver” is set to “Off”.
• This function is available when “Auto Shut Off” is set to “On”.
Overscan
Selects whether to display images with overscan or justscan.
Auto
Automatically determines whether it is a DTV signal, then overscans and displays
the image.
On
Displays image with overscan.
Off
Displays image with justscan.
During DTV signal input, it may display a screen like when a PC signal is input.
Example: 480P
→
720 × 480/60
Menu
Function and operation
Note
Note
Note
Содержание FWD-32B1
Страница 13: ...13JP JP 後面 FWD 55B2 46B2 42B2 FWD 32B1 2 ...
Страница 47: ......
Страница 53: ...7GB GB ...
Страница 57: ...11GB GB Rear FWD 55B2 46B2 42B2 FWD 32B1 2 ...
Страница 97: ...9FR FR Arrière FWD 55B2 46B2 42B2 FWD 32B1 2 ...
Страница 137: ...9DE DE Rückseite FWD 55B2 46B2 42B2 FWD 32B1 2 ...
Страница 177: ...9ES ES Parte posterior FWD 55B2 46B2 42B2 FWD 32B1 2 ...
Страница 217: ...9 IT IT Parte posteriore FWD 55B2 46B2 42B2 FWD 32B1 2 ...
Страница 253: ...5CS CS ...
Страница 255: ...7CS CS 水平安装显示器 垂直安装显示器 前视图 侧视图 25 10 10 25 5 单位 cm 前视图 侧视图 必须使 1 电源 开关位于 左下方 20 25 25 10 单位 cm 5 ...
Страница 257: ...9CS CS 后视图 FWD 55B2 46B2 42B2 FWD 32B1 2 ...
Страница 267: ...19CS CS 电缆布置 使用电缆夹 可用附送的电缆夹 6 FWD 32B1 3 整齐地捆扎电缆 请按下图所示的方法安装电缆夹 2 1 后视图 FWD 55B2 46B2 42B2 FWD 32B1 ...