background image

11

US

Adjusting the color of the picture 
(COLOR)

The COLOR settings allow you to adjust the picture’s color 
temperature by changing the color level of the white color field. 
Colors appear reddish if the temperature is low, and bluish if the 
temperature is high. This adjustment is useful for matching the 
monitor’s colors to a printed picture’s colors.
This setting is stored in memory for all input signals.

1

Press the center of the control button.

The main MENU appears on the screen.

2

Move the control button 

m

/

M

 to highlight 

 COLOR 

and press the center of the control button again.

The COLOR menu appears on the screen.

3

Move the control button 

<

/

,

 to select a color 

temperature.

The preset color temperatures are 5000K, 6500K, and 9300K. 
Since the default setting is 9300K, the whites will change 
from a bluish hue to a reddish hue as the temperature is 
lowered to 6500K and 5000K.

4

If necessary, fine tune the color temperature.

First move the control button 

<

/

,

 to select USER. Then 

move the control button 

m

/

M

 to select R (red), G (green), or 

B (blue) and move the control button 

<

/

,

 to make the 

adjustment.

If you fine tune the color temperature, the new color settings 
are stored in memory and recalled whenever you select 
USER.

Additional settings (SCREEN)

You can manually degauss (demagnetize) the screen, and adjust 
the moire cancellation level.

1

Press the center of the control button.

The main MENU appears on the screen.

2

Move the control button 

m

/

M

 to highlight 


SCREEN and press the center of the control button 
again.

The SCREEN menu appears on the screen.

3

Move the control button 

m

/

M

 to select the desired 

adjustment item.

Adjust the selected item according to the following 
instructions.

x

Degaussing the screen

The monitor is automatically demagnetized when the power is 
turned on.

To manually degauss the monitor, first move the 
control button 

m

/

M

 to select 

 (DEGAUSS). Then move 

the control button 

,

.

The screen is degaussed for about 5 seconds. If a second degauss 
cycle is needed, allow a minimum interval of 20 minutes for the 
best result.

x

Adjusting the moire

*

If elliptical or wavy patterns appear on the screen, adjust the 
moire cancellation level.

To adjust the amount of moire cancellation, first move 
the control button 

m

/

M

 to select 

 (CANCEL MOIRE). 

Then move the control button 

<

/

,

 until the moire 

effect is at a minimum. 

* Moire is a type of natural interference which produces soft, wavy lines 

on your screen. It may appear due to interference between the pattern 
of the picture on the screen and the phosphor pitch pattern of the 
monitor.

Resetting the adjustments (RESET)

This monitor has the following two reset methods. Use the 
RESET menu to reset the adjustments.

1

Press the center of the control button.

The main MENU appears on the screen.

2

Move the control button 

m

/

M

 to highlight 

0

 RESET 

and press the center fo the control button again.

The RESET menu appears on the screen.
Reset the settings according to the following instructions.

Resetting all of the adjustment data for the 
current input signal (MODE)

Move the control button 

<

The MODE item is selected. All of the adjustment data for the 
current input signal is reset. 
Note that the following items are not reset by this method.
• on-screen menu language (page 7)
• picture’s rotation (page 10)

Resetting all of the adjustment data to factory 
preset levels (ALL)

Move the control button 

,

The ALL item is selected. All of the adjustment data for the 
current input signal is reset. All of the adjustment data (except for 
the USER settings in the COLOR menu) is reset to the factory 
preset levels.

Note

The monitor

s buttons will not operate for about 5 seconds when ALL is 

selected.

K

K

K

R

5 0

G

5 0

B

5 0

SE L ECT

EX I T

COLOR

5000

6500

9300

USER

MENU

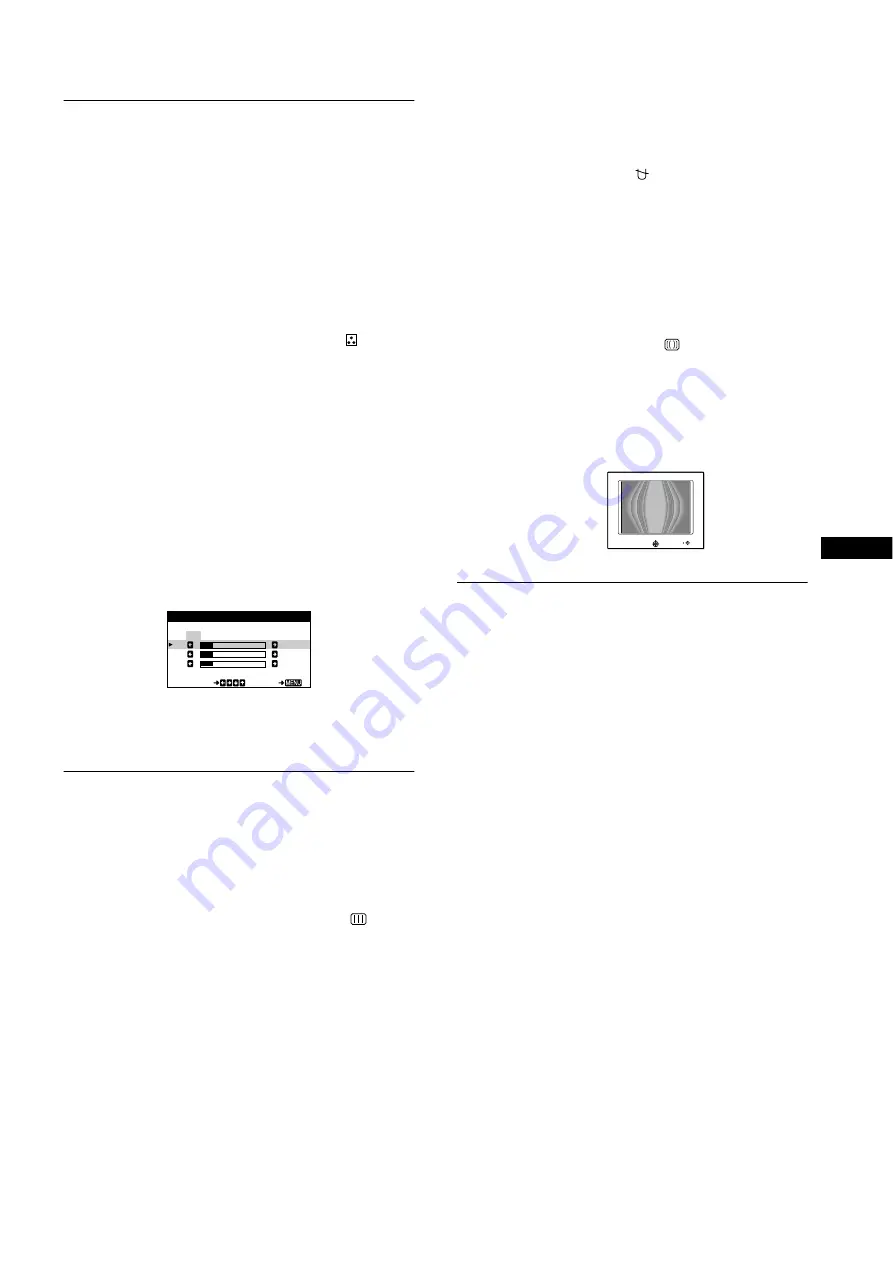
Example of moire

Содержание Flat Trinitron HMD-A400/L

Страница 1: ...4 079 363 21 1 2000 Sony Corporation Trinitron Color Computer Display â Operating Instructions Mode d emploi Manual de instrucciones US FR ES HMD A400 ...

Страница 2: ...ember 1990 MPR II for very low frequency VLF and extremely low frequency ELF INFORMATION Ce produit est conforme aux normes du Swedish National Council for Metrology de décembre 1990 MPR II en ce qui concerne les fréquences très basses VLF et extrêmement basses ELF INFORMACIÓN Este producto cumple las normas del Consejo Nacional Sueco para Metrología MPR emitidas en diciembre de 1990 MPR II para f...

Страница 3: ...r computer 6 Step 2 Connect the power cord 6 Step 3 Turn on the monitor and computer 6 Connecting Universal Serial Bus USB compliant peripherals 7 Selecting the on screen menu language LANGUAGE INFORMATION 7 Customizing Your Monitor 8 Navigating the menu 8 Adjusting the brightness and contrast 9 Adjusting the picture quality PICTURE EFFECT 9 Adjusting the centering of the picture CENTER 10 Adjusti...

Страница 4: ... in a place subject to mechanical vibration or shock on an unstable surface near equipment which generates magnetism such as a transformer or high voltage power lines near or on an electrically charged metal surface Maintenance Clean the screen with a soft cloth If you use a glass cleaning liquid do not use any type of cleaner containing an anti static solution or similar additive as this may scra...

Страница 5: ...or page 6 This connector provides AC power to the monitor 4 Video input connector HD15 page 6 This connector inputs RGB video signals 0 700 Vp p positive and sync signals DDC Display Data Channel is a standard of VESA 5 USB universal serial bus downstream connectors page 7 Use these connectors to link USB peripheral devices to the monitor 6 USB universal serial bus upstream connector page 7 Use th...

Страница 6: ... are replacing an old monitor with this model and OUT OF SCAN RANGE appears on the screen reconnect the old monitor Then adjust the computer s graphic board so that the horizontal frequency is between 30 86 kHz and the vertical frequency is between 48 120 Hz For more information about the on screen messages see Trouble symptoms and remedies on page 13 Setup on various OS Operating System This moni...

Страница 7: ...me the peripheral devices may not function First connect the keyboard and mouse directly to the computer and set up the USB compliant devices Then connect them to this monitor Do not lean on the monitor when plugging in the USB cables The monitor may suddenly shift and cause injury Selecting the on screen menu language LANGUAGE INFORMATION English French German Italian Spanish Dutch Swedish Russia...

Страница 8: ... vertical convergence MENU EX I T P I CTURE EFFECT S I ZE CENTER GEOMETRY SCREEN CONVERGENCE COLOR RESET SELECT LANGUAGE I NFORMAT N O I MENU SELECT EX I T DYNAM I C STANDARD P I CTURE EFFECT H CENT ER 2 6 SELECT EX I T S I ZE CENTER SELECT EX I T ROT A T I ON 2 6 GEOMETRY SELECT EX I T 2 6 CONVERGENCE 6 SCREEN page 11 Select the SCREEN menu to degauss the screen and adjust the moire cancellation ...

Страница 9: ...direction The BRIGHTNESS CONTRAST menu appears on the screen 2 Move the control button m M to adjust the brightness and to adjust the contrast 6 The menu automatically disappears after about 3 seconds Adjusting the picture quality PICTURE EFFECT The PICTURE EFFECT feature allows you to select the most appropriate picture mode from among two preset modes maximum performance 1 Press the center of th...

Страница 10: ...of the picture GEOMETRY The GEOMETRY settings allow you to adjust the rotation and shape of the picture The ROTATION setting is stored in memory for all input signals All other settings are stored in memory for the current input signal 1 Press the center of the control button The main MENU appears on the screen 2 Move the control button m M to highlight GEOMETRY and press the center of the control...

Страница 11: ... the power is turned on To manually degauss the monitor first move the control button m M to select DEGAUSS Then move the control button The screen is degaussed for about 5 seconds If a second degauss cycle is needed allow a minimum interval of 20 minutes for the best result x Adjusting the moire If elliptical or wavy patterns appear on the screen adjust the moire cancellation level To adjust the ...

Страница 12: ...flect power consumption when no USB compatible peripherals are connected to the monitor When your computer enters the active off mode the input signal is cut and NO INPUT SIGNAL appears on the screen After 20 seconds the monitor enters the power saving mode Troubleshooting Before contacting technical support refer to this section If thin lines appear on your screen damper wires The visible lines o...

Страница 13: ...ntosh adapter not supplied and the video signal cable are properly connected page 6 Picture flickers bounces oscillates or is scrambled Isolate and eliminate any potential sources of electric or magnetic fields such as other monitors laser printers electric fans fluorescent lighting or televisions Move the monitor away from power lines or place a magnetic shield near the monitor Try plugging the m...

Страница 14: ...d computer or other equipment Check that the power of any self powered USB compliant peripheral devices is on Install the latest version of the device driver on your computer Contact your device s manufacturer for information about the appropriate device driver If your USB compliant keyboard or mouse does not function connect them directly to your computer reboot your computer and make any necessa...

Страница 15: ...l flashing there is a potential monitor failure Count the number of seconds between orange flashes of the power indicator and inform your authorized Sony dealer of the monitor s condition Be sure to note the model name and serial number of your monitor Also note the make and model of your computer and video board Specifications CRT 0 24 mm aperture grille pitch center 19 inches measured diagonally...

Страница 16: ......

Страница 17: ... étape Raccordez le moniteur à votre ordinateur 6 2éme étape Branchez le cordon d alimentation 6 3éme étape Mettez le moniteur et l ordinateur sous tension 6 Raccordement de périphériques compatibles USB Universal Serial Bus 7 Sélection de la langue d affichage des menus LANGUAGE INFORMATIONS 7 Personnalisation de votre moniteur 8 Pilotage par menus 8 Réglage de la luminosité et du contraste 9 Rég...

Страница 18: ...tes variations de température soumis à des vibrations ou à des chocs mécaniques sur une surface instable à proximité d appareils générant un champ magnétique comme un transformateur ou des lignes à haute tension à proximité de ou sur une surface métallique chargée électriquement Entretien Nettoyez l écran à l aide d un chiffon doux Si vous utilisez un produit nettoyant pour vitres n utilisez aucun...

Страница 19: ...nnecteur AC IN page 6 Ce connecteur assure l alimentation du moniteur 4 Connecteur d entrée vidéo HD15 page 6 Ce connecteur assure l entrée des signaux vidéo RVB 0 700 Vp p positifs et des signaux de synchronisation DDC Display Data Channel est une norme de VESA 5 Connecteurs d aval USB bus sériel universel page 7 Utilisez ces connecteurs pour relier des appareils périphériques USB au moniteur 6 C...

Страница 20: ...eur par ce modèle et si l indication HORS PLAGE DE BALAYAGE apparaît à l écran rebranchez l ancien moniteur Ajustez ensuite la carte graphique de l ordinateur de façon à ce que la fréquence horizontale soit comprise entre 30 et 86 kHz et la fréquence verticale entre 48 et 120 Hz Pour plus d informations sur les messages affichés à l écran reportez vous à la section Symptômes et remèdes à la page 1...

Страница 21: ...phériques ne fonctionnent pas Raccordez d abord le clavier et la souris directement à l ordinateur et installez les appareils compatibles USB Raccordez les ensuite à ce moniteur Ne vous appuyez pas sur le moniteur lorsque vous branchez les câbles USB Le moniteur risque de pivoter et de vous blesser Sélection de la langue d affichage des menus LANGUAGE INFORMATIONS Les écrans de menu peuvent être a...

Страница 22: ... SELECT LANGUAGE I NFORMAT S N O I MENU SELECT EX I T DYNAM I QUE STANDARD P I CTURE EFFECT POS I T I ON H 2 6 SELECT EX I T TA I LLE CENTRAGE SELECT EX I T ROT A T I ON 2 6 GEOMETR I E 5 CONVERGENCE page 10 Sélectionnez le menu CONVERGENCE pour ajuster la convergence horizontale ou verticale de l image 6 ECRAN page 11 Sélectionnez le menu ECRAN pour démagnétiser l écran et ajuster le niveau de su...

Страница 23: ... quel sens Le menu LUMINOSITÉ CONTRASTE apparaît à l écran 2 Déplacez la manette de commande vers le haut ou le bas m M pour régler la luminosité et vers la gauche ou la droite pour régler le contraste 6 Le menu disparaît automatiquement au bout d environ 3 secondes Réglage de la qualité de l image PICTURE EFFECT La fonction PICTURE EFFECT vous permet de sélectionner le mode d image le mieux appro...

Страница 24: ...ge Réglage de la forme de l image GEOMETRIE Les réglages GEOMETRIE vous permettent de régler la rotation et la forme de l image Le paramètre ROTATION est conservé en mémoire pour l ensemble des signaux d entrée Tous les autres réglages sont enregistrés dans la mémoire pour le signal d entrée en cours 1 Appuyez au centre de la manette de commande Le MENU principal apparaît à l écran 2 Déplacez la m...

Страница 25: ...r démagnétiser manuellement l écran déplacez d abord la manette de commande vers le haut ou le bas m M afin de sélectionner DÉMAGNÉTISÉ Déplacez ensuite la manette de commande vers la droite L écran est démagnétisé pendant environ 5 secondes Si un second cycle de démagnétisation s avère nécessaire laissez s écouler un intervalle d au moins 20 minutes de manière à obtenir les meilleurs résultats x ...

Страница 26: ...s Les chiffres indiquent la consommation d énergie lorsqu aucun périphérique compatible USB n est raccordé au moniteur Lorsque votre ordinateur passe en mode inactif le signal d entrée est coupé et l indication PAS ENTREE VIDEO apparaît à l écran Au bout de 20 secondes le moniteur passe en mode d économie d énergie Dépannage Consultez cette section avant de faire appel au service d assistance tech...

Страница 27: ...ez un système Macintosh Vérifiez si l adaptateur Macintosh non fourni et le câble de signal vidéo sont correctement raccordés page 6 L image scintille sautille oscille ou est brouillée Isolez et éliminez les sources potentielles de champs électriques ou magnétiques tels que d autres moniteurs des imprimantes laser des ventilateurs électriques des lampes fluorescentes ou des téléviseurs Éloignez le...

Страница 28: ...s page 7 Vérifiez si le commutateur alimentation est réglé sur la position on xProblèmes causés par l ordinateur ou tout autre appareil raccordé Vérifiez si l un des périphériques auto alimentés compatibles USB est sous tension on Installez la dernière version du gestionnaire de périphérique sur votre ordinateur Consultez le fabricant de votre appareil pour déterminer le gestionnaire de périphériq...

Страница 29: ...ement Si l indicateur alimentation clignote toujours c est probablement parce qu il y a une anomalie au niveau du moniteur Comptez le nombre de secondes entre les clignotements oranges de l indicateur alimentation et informez votre revendeur Sony agréé de l état du moniteur Notez également la désignation du modèle et le numéro de série de votre moniteur Notez également la marque et le modèle de vo...

Страница 30: ......

Страница 31: ...r 6 Paso 2 Conexión del cable de alimentación 6 Paso 3 Encendido del monitor y del ordenador 6 Conexión de periféricos conformes con USB Bus serie universal 7 Selección del idioma de los menús en pantalla LANGUAGE INFORMACIÓN 7 Personalización del monitor 8 Navegación por el menú 8 Ajuste del brillo y del contraste 9 Ajuste de la calidad de imagen PICTURE EFFECT 9 Ajuste del centrado de la imagen ...

Страница 32: ...mbios bruscos de temperatura en lugares sujetos a golpes o vibraciones mecánicas sobre superficies inestables cerca de equipos que generen magnetismo como transformadores o líneas eléctricas de alta tensión cerca o sobre una superficie metálica con carga eléctrica Mantenimiento Limpie la pantalla con un paño suave Si utiliza algún líquido limpiador de cristales no emplee ningún tipo de producto de...

Страница 33: ...porciona alimentación de CA al monitor 4 Conector de entrada de vídeo HD15 página 6 Este conector introduce las señales de vídeo RGB 0 700 Vp p positivas y de sincronización DDC Display Data Channel es un estándar de VESA 5 Conectores de flujo de entrada USB bus serie universal página 7 Utilice estos conectores para conectar los dispositivos periféricos USB al monitor 6 Conector de flujo de salida...

Страница 34: ... este modelo y el mensaje FUERA DE RANGO EXPLORACION aparece en pantalla vuelva a conectar el monitor antiguo A continuación ajuste la tarjeta gráfica del ordenador de forma que la frecuencia horizontal se encuentre entre 30 86 kHz y la vertical entre 48 120 Hz Para obtener más información sobre los mensajes en pantalla consulte Problemas y soluciones en la página 13 Instalación en distintos siste...

Страница 35: ...itivos periféricos pueden no funcionar Primero conecte el teclado y el ratón directamente al ordenador e instale los dispositivos conformes con USB Después conéctelos a este monitor No se apoye en el monitor cuando enchufe los cables USB ya que puede moverse repentinamente y causar daños Selección del idioma de los menús en pantalla LANGUAGE INFORMACIÓN Los idiomas disponibles para los menús en pa...

Страница 36: ...ELECT LANGUAGE I NFORMAC N Ó I MENÚ SELECT EX I T D I NÁM I CO ESTANDAR P I CTURE EFFECT POS I C I ÓN H 2 6 SELECT EX I T TAMAÑO CENTRO SELECT EX I T ROT AC I ÓN 2 6 GEOMETR I A 5 CONVERGENCIA página 10 Seleccione el menú CONVERGENCIA para ajustar la convergencia horizontal y vertical de la imagen 6 PANTALLA página 11 Seleccione el menú PANTALLA para desmagnetizar la pantalla y ajustar elnivel de ...

Страница 37: ... en cualquier dirección El menú de BRILLO CONTRASTE aparece en pantalla 2 Desplace el botón de control m M para ajustar el brillo y para ajustar el contraste 6 El menú desaparece automáticamente transcurridos unos 3 segundos Ajuste de la calidad de imagen PICTURE EFFECT La función PICTURE EFFECT permite seleccionar el modo de imagen más apropiado entre dos modos predefinidos de máximo rendimiento ...

Страница 38: ... la rotación y la forma de la imagen El ajuste ROTACIÓN se almacena en la memoria para todas las señales de entrada El resto de ajustes se almacenan en la memoria para la señal de entrada actual 1 Pulse el centro del botón de control El MENÚ principal aparece en pantalla 2 Desplace el botón de control m M para resaltar GEOMETRIA y pulse de nuevo el centro del botón de control El menú GEOMETRIA apa...

Страница 39: ...imero desplace el botón de control m M para seleccionar DESMAGNET A continuación desplace el botón La pantalla se desmagnetiza durante unos 5 segundos Si es necesario aplicar un segundo ciclo de desmagnetización deje que transcurra un intervalo mínimo de 20 minutos para obtener el mejor resultado posible x Cancelación del muaré Si aparecen en pantalla patrones elípticos u ondulados ajuste el nivel...

Страница 40: ...lejan el consumo de energía cuando no hay ningún periférico compatible con USB conectado al monitor Cuando el ordenador entra en el modo activo inactivo la señal de entrada se interrumpe y la pantalla muestra NO SEÑAL Transcurridos 20 segundos el monitor entra en el modo de ahorro de energía Solución de problemas Antes de ponerse en contacto con personal de servicio técnico consulte esta sección S...

Страница 41: ...ice la función de autodiagnóstico página 15 Si utiliza un sistema Macintosh Compruebe que el adaptador Macintosh no suministrado y el cable de señale de vídeo estén correctamente conectados página 6 La imagen parpadea se ondula oscila o aparece codificada Aísle y elimine las fuentes potenciales de campos eléctricos o magnéticos como otros monitores impresoras láser ventiladores eléctricos lámparas...

Страница 42: ...ación se encuentre en la posición de activación xProblemas causados por el ordenador u otro equipo conectado Compruebe que se hayan encendido los dispositivos periféricos USB que tengan fuentes de alimentación independientes Instale la última versión del controlador de dispositivo en el ordenador Póngase en contacto con el fabricante del dispositivo para obtener más información sobre el controlado...

Страница 43: ...iona correctamente Si el indicador alimentación sigue parpadeando significa que hay un fallo potencial del monitor Cuente el número de segundos entre los parpadeos en naranja del indicador alimentación e informe al proveedor Sony autorizado sobre el estado del monitor Asegúrese de anotar el nombre del modelo y el número de serie de dicho monitor Tome nota también del fabricante y del modelo del or...

Страница 44: ......

Страница 45: ... Mode 1 640 480 31 5 kHz 60 Hz VGA G 2 640 480 43 3 kHz 85 Hz VESA 3 720 400 31 5 kHz 70 Hz VGA Text 4 800 600 53 7 kHz 85 Hz VESA 5 832 624 49 7 kHz 75 Hz Macintosh16 Color 6 1024 768 68 7 kHz 85 Hz VESA 7 1152 870 68 7 kHz 75 Hz Macintosh 21 Color 8 1280 1024 80 0 kHz 75 Hz VESA 9 1600 1200 75 kHz 60 Hz VESA ...

Страница 46: ......

Страница 47: ......

Страница 48: ...Sony Corporation Printed in Thailand ...

Отзывы: