background image

37

Using V

arious Functions with the Contr

ol Menu

1 8 ( 3 4 )

1 2 ( 2 7 )

C    0 1 : 3 2 : 5 5

DVD        

 ( 9 )

Number buttons                   Cancel:                 

ANGLE

ENTER

RETURN

With DVDs on which various angles (multi-angles) for a
scene are recorded, you can change the angles.  For
example, while playing a scene of a train in motion, you
can display the view from either the front of the train, the
left window of the train or from the right window without
having the train’s movement interrupted.

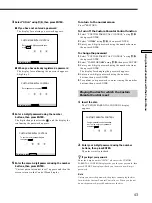
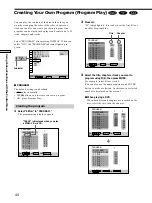
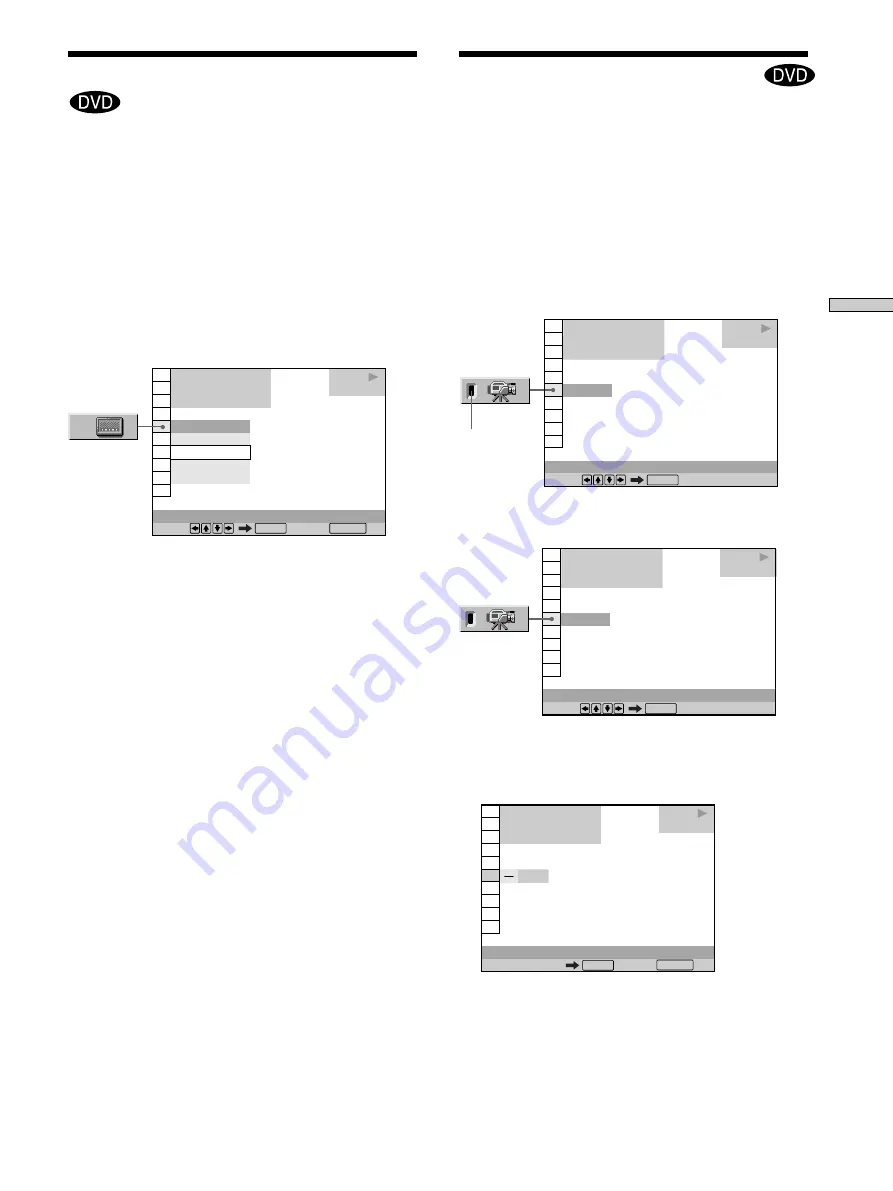
Select “ANGLE” after pressing DISPLAY.  When the
angles can be changed, the “ANGLE” indicator  lights up
in green.

1

Select “ANGLE.”

2

Press 

,

.

The number of the angle changes to “–”.  The number
in parentheses indicates the total number of angles.

1 8 ( 3 4 )

1 ( 9 )

1 2 ( 2 7 )

C    0 1 : 3 2 : 5 5

DVD        

Select:                 

ANGLE


ENTER

Changing the Angles 

Z


1 8 ( 3 4 )

1 2 ( 2 7 )

C    0 1 : 3 2 : 5 5

DVD        

1 ( 9 )

Select:                 

ANGLE

ENTER

Indicator

Displaying the Subtitles

With DVDs on which subtitles are recorded, you can turn
the subtitles on and off whenever you want while playing
the DVD.
With DVDs on which multilingual subtitles are recorded,
you can change the subtitle language whenever you want
while playing the DVD, and turn it on or off whenever
you want. For example, you can select the language you
want to practice and turn the subtitles on for better
understanding.

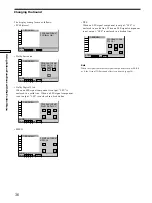
Select “SUBTITLE” after pressing DISPLAY.

x

 SUBTITLE

Select the language.  The languages you can select are
different depending on the DVD.  When 4 digits are
displayed, they indicate the language code. Select the
language code from the list on page 78.

z

You can select “SUBTITLE” directly

Press SUBTITLE on the remote.  Each time you press the button,
the item changes.

Notes

• When playing a DVD on which no subtitles are recorded, no

subtitles appear.

• Depending on the DVD, you may not be able to turn the

subtitles on even if they are recorded on the DVD.

• Depending on the DVD, you may not be able to turn the

subtitles off.

• The type and number of languages for subtitles vary from disc

to disc.

• Depending on the DVD, you may not be able to change the

subtitles even if multilingual subtitles are recorded on it.

• While playing the DVD, the subtitle may change when:

– you open or close the disc tray
– you change the title

1 8 ( 3 4 )

1 2 ( 2 7 )

C    0 1 : 3 2 : 5 5

OFF
1: ENGLISH
2: FRENCH
3: SPANISH

1: ENGLISH

DVD        

Select:                                  Cancel: 

SUBTITLE

ENTER

RETURN

Содержание DVP-S735D

Страница 1: ...CD DVD Player CD DVD Player 2000 Sony Corporation DVP S735D 3 061 775 32 1 Operating Instructions ...

Страница 2: ...fuse cover please contact your nearest Sony service station Precautions Safety This unit operates on 220 240 V AC 50 60 Hz Check that the unit s operating voltage is identical with your local power supply If anything falls into the cabinet unplug the unit and have it checked by qualified personnel before operating it any further The unit is not disconnected from the mains as long as it is connecte...

Страница 3: ...abeling the Disc 33 Changing the Sound 34 Displaying the Subtitles 37 Changing the Angles 37 Digital Cinema Sound Settings 38 Checking the Play Information 41 Locking Discs Custom Parental Control 42 Creating Your Own Program Program Play 44 Playing in Random Order Shuffle Play 46 Playing Repeatedly Repeat Play 47 Repeating a Specific Portion A B Repeat 48 Adjusting the Playback Picture Video Equa...

Страница 4: ...this player plays DVDs and VIDEO CDs according to the disc contents the software producers designed some playback features may not be available Also refer to the instructions supplied with the DVDs or VIDEO CDs About This Manual Conventions Instructions in this manual describe the controls on the player You can also use the controls on the remote if they have the same or similar names as those on ...

Страница 5: ...tputs To avoid possible damage to the audio system the consumer should take proper precautions when the analog stereo outputs of the DVD player are connected to an amplification system To enjoy DTS Digital Surround playback an external 5 1 channel DTS Digital Surround decoder system must be connected to the digital output of the DVD player This product incorporates copyright protection technology ...

Страница 6: ... volume Do not turn up the volume while listening to a section with very low level inputs or no audio signals If you do the speakers may be damaged when a peak level section is played On cleaning Clean the cabinet panel and controls with a soft cloth slightly moistened with a mild detergent solution Do not use any type of abrasive pad scouring powder or solvent such as alcohol or benzine If you ha...

Страница 7: ... page 69 Notes Do not leave the remote in an extremely hot or humid place Do not drop any foreign object into the remote casing particularly when replacing the batteries Do not expose the remote sensor to direct sunlight or lighting apparatuses Doing so may cause a malfunction If you do not use the remote for an extended period of time remove the batteries to avoid possible damage from battery lea...

Страница 8: ...ound imaging to create virtual rear speakers from the sound of built in TV speakers without using actual rear speakers VES TV Virtual Enhanced Surround TV For details see page 38 Required cords SCART EURO AV connecting cord not supplied 2 Be sure to make connections firmly to avoid hum and noise Refer to the instructions supplied with the TV to be connected Notes When you set LINE to S VIDEO or RG...

Страница 9: ...onnecting cord You will get a better picture When connecting the cords be sure to match the color coded cord to the appropriate jacks on the components Yellow video to Yellow Red right to Red and White left to White Audio Video connecting cord supplied 1 x To listen to the sound through TV speakers x If your TV has an S video input connector S video cord supplied 1 If your TV has two SCART EURO AV...

Страница 10: ... the setup display For details see page 64 If you cannot view the pictures from a VCR through this player which is connected to a TV with RGB component connectors set to t Audio Video on your TV When you select RGB the TV cannot receive the signal from the VCR If you want to use your VCR s SmartLink function connect the VCR to your TV s SmartLink connector and connect the CD DVD player to the TV w...

Страница 11: ...ct the player to a TV or VCR via a SCART EURO AV connector that conforms to the S video signals or RGB signals In the setup display set LINE in CUSTOM SETUP to S VIDEO or RGB For details see page 60 To connect the player to a monitor or projector with component video input connectors that conform to the output signals from the COMPONENT VIDEO OUT Y CB B Y CR R Y connectors on the player In the set...

Страница 12: ... cord to the appropriate jacks on the components Red right to Red and White left to White Be sure to make connections firmly to avoid hum and noise White L Red R White L Red R CD DVD player To AUDIO OUT R L TV To audio input Signal flow Receiver Amplifier To an AC outlet To S VIDEO OUT To S VIDEO input To DIGITAL OUT OPTICAL Take off the cap To DIGITAL OUT COAXIAL or or To optical digital input To...

Страница 13: ...CM to 96kHz 24bit If you do a loud noise will suddenly come out from the speakers affecting your ears or causing the speakers to be damaged Note You cannot make direct digital audio recordings of discs recorded in multichannel surround format using an MD deck or DAT deck If you have an audio component with a built in Dolby Digital decoder MPEG decoder or DTS decoder When you connect an audio compo...

Страница 14: ...ening position than the front speakers Required cords Audio cords not supplied 2 For the 5 1CH OUTPUT FRONT and REAR jacks Monaural audio cords not supplied 2 For 5 1CH OUTPUT CENTER and WOOFER jacks S video cord supplied 1 For the S VIDEO OUT jack White L Red R White L Red R When connecting the cords be sure to match the color coded cord to the appropriate jacks on the components Red right to Red...

Страница 15: ...OUT AUDIO IN FRONT REAR WOOFER CENTER TAPE VIDEO 2 DVD VIDEO 1 MONITOR PRE OUT IN CD IN REC OUT MD DAT IN TUNER IN PHONO DVD IN OPT DVD IN COAX TV LDIN AC 3RF SIGNAL GND DIGITAL TV LD IN OPT CD IN OPT MD DAT OUT OPT MD DAT IN OPT CTRL A1 AC OUTLET L R WOOFER FRONT B REAR A FRONT REAR 5 1 INPUT CENTER TV LD S VIDEO IN VIDEO AUDIO IN S LINK SPEAKERS INPUT Front speaker L Front speaker R Rear speaker...

Страница 16: ...player model 5 Select the desired language using M m then press ENTER 6 Press DISPLAY The setup display disappears 7 Press DISPLAY repeatedly to turn off the on screen menu LANGUAGE SETUP OSD DVD MENU AUDIO SUBTITLE To set press then ENGLISH ENGLISH ORIGINAL AUDIO FOLLOW ENTER To quit press DISPLAY LANGUAGE SETUP OSD DVD MENU AUDIO SUBTITLE To set press then ENGLISH FRANÇAIS DEUTSCH ITALIANO NEDER...

Страница 17: ...ts up in green When there is a disc in the player press A and remove the disc Then press A again to close the disc tray 2 Press and hold X on the player for more than two seconds You will hear one beep and the Sound Feedback function is turned on To turn off the Sound Feedback Function When there is no disc in the player press and hold X on the player for more than two seconds You will hear two be...

Страница 18: ...nd the power indicator lights up in red 3 Press A on the player and place a disc on the disc tray The player automatically turns on and the power indicator lights up in green 4 Press H The disc tray closes and the player starts playback continuous play Adjust the volume on the TV or the receiver amplifier Playing Discs With the playback side facing down Playing Discs This chapter describes how to ...

Страница 19: ... DTS sound tracks without first connecting the player to an audio component having a built in DTS decoder The player outputs the DTS signal via the DIGITAL OUT OPTICAL and COAXIAL connectors even if DTS in AUDIO SETUP is set to D PCM in the setup display and may affect your ears or cause your speakers to be damaged Set the sound to STEREO when you play DTS sound tracks on a CD See Changing the Sou...

Страница 20: ...When you play back a DVD During playback 2M Fast forward about 30 times the normal speed Y 1M Fast forward about 10 times the normal speed Y 2B about twice the normal speed Y N normal speed Y 2b about twice the normal speed Y 1m Fast rewind about 10 times the normal speed Y 2m Fast rewind about 30 times the normal speed If you turn the click shuttle quickly the playback speed goes to 2M or 2m at o...

Страница 21: ...able to do some of the operations described To play the disc frame by frame Jog mode 1 Press JOG JOG lights up during jog mode When you press JOG on the player it pauses 2 Turn the click shuttle Depending on the turning speed playback goes to frame by frame playback in the direction that the click shuttle is turned If you turn the click shuttle at a constant speed for a while the playback speed go...

Страница 22: ...embers the point where you stopped the disc and when RESUME appears on the front panel display you can resume playback from that point As long as you do not open the disc tray Resume Play will work even if the player enters standby mode by pressing 1 on the remote 1 While playing a disc press x to stop playback RESUME appears on the front panel display and Disc will restart from current point To s...

Страница 23: ...instructions supplied with the disc Press ENTER may also be expressed as Press SELECT Using the DVD s Menu TITLE M m ENTER Using the DVD menu Some DVDs allow you to select the disc contents using a menu When you play these DVDs you can select the language for the subtitles the language for the sound etc using the DVD menu 1 Press DVD MENU The DVD menu appears on the TV screen The contents of the m...

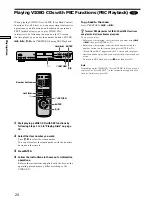
Страница 24: ...n playing VIDEO CDs with PBC Play Back Control functions Ver 2 0 discs you can enjoy simple interactive operations search functions and other such operations PBC Playback allows you to play VIDEO CDs interactively by following the menu on the TV screen On this player you can use the number buttons ENTER M m and ORETURN during PBC Playback 1 Start playing a VIDEO CD with PBC functions by following ...

Страница 25: ...er outputs the signal in NTSC format DVD TITLE CHAP HOUR MIN SEC DVD TITLE HOUR MIN SEC DVD TITLE HOUR MIN SEC DVD DVD TITLE CHAP HOUR MIN SEC Remaining time of the current title Playing time and number of the current title Remaining time of the current chapter Press TIME TEXT Press TIME TEXT Press TIME TEXT Press TIME TEXT Press TIME TEXT Checking the remaining time Press TIME TEXT Each time you ...

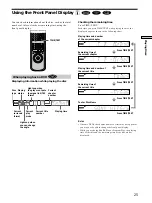
Страница 26: ...lay does not change when you press TIME TEXT If TEXT is recorded on the disc the front panel display changes to the Text display when you press TIME TEXT see page 33 VIDEOCD CD PBC PGM SHUFFLE NTSC TRACK INDEX MIN SEC REPEAT1 A B Playing time Playing status Current play mode Current track number Current index number Disc type Lights up during PBC playback VIDEO CD only Lights up when the player ou...

Страница 27: ...u display you can select the starting point play scenes in any order you like change the viewing angles make Digital Cinema Sound settings and other such operations The possible operations are different depending on the kind of disc For details on each Control Menu display item see pages 30 to 53 1 Press DISPLAY to show the Control Menu display on the TV screen 1 8 3 4 1 2 2 7 C 0 1 3 2 5 5 DVD Se...

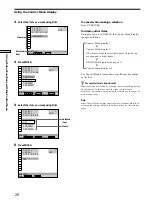
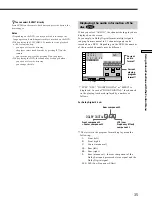
Страница 28: ...ay items are different depending on the disc zYou can select some items directly Some items can be selected by pressing the corresponding button on the remote In this case only the item you selected is displayed For instructions on using the remote see the pages of each relevant item Note Some Control Menu display items require operations other than selecting the setting For details on these items...

Страница 29: ...urn it on or off whenever you want ANGLE DVD only page 37 With DVDs on which various angles multi angles are recorded you can change the angle of the scene VIRTUAL 3D SURROUND page 38 Select one of the surround modes to enjoy multichannel Dolby Digital and MPEG audio DVDs with only 2 or 4 speakers When you connect only 2 front speakers Virtual Enhanced Surround VES and VIRTUAL SEMI MULTI DIMENSION...

Страница 30: ... 7 C 0 1 3 2 5 5 DVD Select TITLE ENTER SHUFFLE page 46 You can have the player shuffle titles chapters or tracks and play them in a random order Subsequent shuffling may produce a different playing order REPEAT page 47 You can play all the titles tracks on a disc or a single title chapter track repeatedly A B REPEAT page 48 You can play a specific portion of a title chapter or track repeatedly VI...

Страница 31: ...ck and the total playing time or remaining time of the disc Press DISPLAY Then press TIME TEXT on the remote to change the time information You can also check the DVD TEXT CD TEXT or Disc Memo and label the disc See page 33 When playing a DVD x TIME MEMO or TIME TEXT C Playing time of the current chapter C Remaining time of the current chapter T Playing time of the current title T Remaining time o...

Страница 32: ...s or ENTER Time code changes to T 3 Input the time code using the number buttons then press ENTER The player starts playback at the selected time code To cancel the number press CLEAR before pressing ENTER To cancel while making a selection Press ORETURN Note When you input the time code input the playing time of the title not the chapter or track time Selecting a Starting Point Using the Time Cod...

Страница 33: ...nstead Press DISPLAY TIME MEMO appears Press TIME TEXT on the remote until the Disc Memo appears at the bottom of the display If the disc does not contain a label NO TEXT is displayed Follow the steps below to label a disc If the disc has DVD TEXT or CD TEXT already recorded on it TIME TEXT appears instead Press TIME TEXT on the remote until the information is displayed at the bottom of the displa...

Страница 34: ...d stereo sound 1 L The sound of the left channel monaural 2 R The sound of the right channel monaural Changing the Sound DVD AUDIO 2 ENGLISH 3 FRENCH 1 ENGLISH 1 8 3 4 1 2 2 7 C 0 1 3 2 5 5 L R C DOLBY DIGITAL 3 2 1 PROGRAM FORMAT LFE LS RS 1 ENGLISH Select Cancel ENTER RETURN Labeling the Disc 5 Repeat steps 3 and 4 to input other characters 6 When you have entered all the characters for the Disc...

Страница 35: ...rround processed stereo signal and the Dolby Digital signal LFE LFE Low Frequency Effect Front component 2 Center component 1 Rear component 2 LFE Low Frequency Effect component 1 Current audio format Current playing program format DOLBY DIGITAL 3 2 1 DVD AUDIO 1 ENGLISH 1 8 3 4 1 2 2 7 C 0 1 3 2 5 5 L R C DOLBY DIGITAL 3 2 1 PROGRAM FORMAT LFE LS RS Select ENTER zYou can select AUDIO directly Pre...

Страница 36: ...ollows PCM stereo Dolby Surround Dolby Digital 5 1ch When an LFE signal component is output LFE is enclosed in a solid line When an LFE signal component is not output LFE is enclosed in a broken line MPEG 1 ENGLISH AUDIO Select ENTER L R C DTS 3 2 1 PROGRAM FORMAT LFE LS RS DTS When an LFE signal component is output LFE is enclosed in a solid line When an LFE signal component is not output LFE is ...

Страница 37: ...ange the subtitle language whenever you want while playing the DVD and turn it on or off whenever you want For example you can select the language you want to practice and turn the subtitles on for better understanding Select SUBTITLE after pressing DISPLAY x SUBTITLE Select the language The languages you can select are different depending on the DVD When 4 digits are displayed they indicate the l...

Страница 38: ...by Digital MPEG audio and DTS DVDs even if you only have 2 or 4 speakers Select the surround mode that best suits your speaker setup You can also experience virtual 3D surround sound effects through your headphones Select VIRTUAL 3D SURROUND after pressing DISPLAY When you select any item except OFF the VIRTUAL 3D SURROUND indicator lights up in green x VIRTUAL 3D SURROUND The default setting is u...

Страница 39: ...g to create virtual rear speakers from the sound of the front speakers L R without using actual rear speakers The virtual speakers are reproduced as shown in the illustration below VES Virtual Enhanced Surround B Uses 3D sound imaging to create virtual rear speakers from the sound of the front speakers L R without using actual rear speakers The virtual speakers are reproduced as shown in the illus...

Страница 40: ...y a 30 angle of elevation The effect differs according to the setting of the rear speaker position page 66 SIDE REAR L Front speaker left R Front speaker right LS Rear speaker left RS Rear speaker right Virtual speaker zYou can select VIRTUAL 3D SURROUND directly Press VIRTUAL 3D SURROUND on the player Each time you press the button the mode changes Notes When you select an item the sound cuts off...

Страница 41: ...IRTUAL SURROUND HEADPHONES on the player the VIRTUAL 3D SURROUND mode turns off and vice versa If the player is set up to output the signal from DIGITAL OUT OPTICAL or COAXIAL and you are using your receiver s headphones the surround effect will be heard only when you set DOLBY DIGITAL to D PCM MPEG to PCM and DTS to D PCM in AUDIO SETUP You can check information such as the bit rate or the disc l...

Страница 42: ...RENTAL CONTROL 1 8 3 4 1 2 2 7 C 0 1 3 2 5 5 Select Cancel ENTER RETURN Locking Discs Custom Parental Control Z Displays of each item By pressing DISPLAY repeatedly you can display either BIT RATE or LAYER whichever was selected in ADVANCED BIT RATE When you play MPEG audio sound tracks Bit rate refers to the amount of video audio data per second in a disc The higher the bit rate the larger the am...

Страница 43: ...2 Select OFF using M m then press ENTER 3 Enter your 4 digit password using the number buttons then press ENTER To change the password 1 Select CUSTOM PARENTAL CONTROL using M m then press ENTER 2 Select PASSWORD using M m then press ENTER 3 Enter your 4 digit password using the number buttons then press ENTER The display for changing the password appears 4 Enter a new 4 digit password using the n...

Страница 44: ...1 TITLE 0 1 0 2 ALL CLEAR 2 TITLE 3 TITLE 4 TITLE 5 TITLE 6 TITLE 7 TITLE 01 Set Quit ENTER Start PLAY Set Quit ENTER Start PLAY DISPLAY DISPLAY Creating Your Own Program Program Play TRACK is displayed when you play a VIDEO CD or a CD PROGRAM 1 TITLE ALL CLEAR 2 TITLE 3 TITLE 4 TITLE 5 TITLE 6 TITLE 7 TITLE T 01 02 03 04 05 Set Quit ENTER Start PLAY DISPLAY You can play the contents of the disc i...

Страница 45: ...s even after Program Play ends When you press H you can play the same program again zYou can do Repeat Play or Shuffle Play of the programmed titles chapters or tracks During Program Play press REPEAT or SHUFFLE on the remote Or set REPEAT or SHUFFLE to ON in the Control Menu display zYou can select PROGRAM directly Press PROGRAM on the remote zYou can select discs titles chapters and tracks for t...

Страница 46: ...t playing order Select SHUFFLE after pressing DISPLAY When you select a shuffle mode other than OFF the SHUFFLE indicator lights up in green x SHUFFLE Selects the Shuffle Play setting The default settings are underlined When playing a DVD and when Program Play is set to OFF OFF does not play a disc in random order TITLE has the player shuffle titles and play them in a random order CHAPTER has the ...

Страница 47: ... the current chapter When playing a VIDEO CD CD and when Program Play and Shuffle Play are set to OFF OFF does not play repeatedly DISC repeats all of the tracks on a disc TRACK repeats the current track When Program Play or Shuffle Play is on OFF does not play repeatedly ON repeats Program Play or Shuffle Play To stop Repeat Play Press CLEAR on the remote zYou can set Repeat Play while the disc i...

Страница 48: ... A B REPEAT Repeating a Specific Portion A B Repeat You can play a specific portion of a title chapter or track repeatedly This function is useful when you want to do such things as memorize lyrics During PBC Playback of VIDEO CDs page 24 this function is available only while playing moving pictures Select A B REPEAT after pressing DISPLAY During A B Repeat Play the A B REPEAT indicator lights up ...

Страница 49: ...s etc Select VIDEO EQUALIZER after pressing DISPLAY When you select a setting other than STANDARD the VIDEO EQUALIZER indicator lights up in green x VIDEO EQUALIZER Selects the video control setting The default setting is underlined STANDARD displays a standard picture DYNAMIC 1 produces a bold dynamic picture by increasing the picture contrast and the color intensity DYNAMIC 2 produces a more dyn...

Страница 50: ...is stored in memory 1 8 3 4 1 2 2 7 C 0 1 3 2 5 5 DVD DYNAMIC 1 DYNAMIC 2 STANDARD STANDARD Select Cancel ENTER RETURN VIDEO EQUALIZER Adjust Cancel C 0 1 3 2 5 5 PICTURE ENTER RETURN C 0 1 3 2 5 5 VIDEO EQUALIZER PICTURE BRIGHTNESS COLOR HUE RESET Cancel Select ENTER RETURN PICTURE C 0 1 3 2 5 5 VIDEO EQUALIZER Select Cancel ENTER BRIGHTNESS COLOR HUE RESET RETURN 5 To adjust other items repeat S...

Страница 51: ...that best suits the image on your TV screen The default setting is underlined OFF turns off the Digital Video Enhancer function 1 enhances the outline 2 enhances the outline more than 1 3 enhances the outline more than 2 zYou can select DIGITAL VIDEO ENHANCER directly Press DVE on the player or the remote Each time you press the button the level changes Note Depending on the DVD VIDEO CD disc or t...

Страница 52: ...YBACK BOOKMARK ANGLE VIEWER CHAPTER VIEWER TITLE VIEWER STROBE PLAYBACK Select Cancel ENTER RETURN VIEWER Indicator Scanning the title and chapter You can check the first picture of titles chapters or tracks of the disc and start playback from the chosen title chapter or track When playing a DVD select TITLE VIEWER or CHAPTER VIEWER in VIEWER and press ENTER When playing a VIDEO CD select TRACK VI...

Страница 53: ... memory and play them immediately whenever you want Bookmark Up to 9 bookmarks per disc for up to 200 discs can be stored in memory Select BOOKMARK in VIEWER The bookmarks appear on the screen To start playback from the selected picture Select the picture using M m then press ENTER Playback starts from the selected picture To cancel scanning the bookmark pictures Press ORETURN To reset the bookmar...

Страница 54: ...t the various outputs You can also set a language for the subtitles and the setup display limit playback by children and so on For details on each setup display item see pages 57 to 68 Note You can display the setup display only when the player is in stop mode 1 Press DISPLAY and select SETUP using M m 2 Press ENTER The setup display appears Select SETUP ENTER 1 8 3 4 1 2 1 C 0 0 0 0 0 0 DVD ENTER...

Страница 55: ...SUBTITLE To set press then To quit press ENGLISH ENGLISH ORIGINAL AUDIO FOLLOW ENTER DISPLAY SCREEN SETUP TV TYPE SCREEN SAVER BACKGROUND To set press then To quit press 16 9 ON JACKET PICTURE STARTUP SCREEN STANDARD ENTER DISPLAY SCREEN SETUP TV TYPE SCREEN SAVER BACKGROUND STARTUP SCREEN To set press then To quit press ENTER 16 9 4 3 LETTER BOX 16 9 4 3 PAN SCAN DISPLAY SCREEN SETUP TV TYPE SCRE...

Страница 56: ...PLAY OFF TIMER DEMO1 DEMO2 DIMMER BRIGHT DARK OFF PAUSE MODE AUTO FRAME PARENTAL CONTROL BOOKMARK RESET COMPONENT OUT OFF ON LINE VIDEO S VIDEO RGB OSD DVD MENU OTHERS FRANÇAIS DEUTSCH NEDERLANDS ESPAÑOL DANSK ITALIANO SVENSKA SUOMI NORSK PORTUGUÊS CHINESE JAPANESE ESPAÑOL DANSK SVENSKA SUOMI NORSK PORTUGUÊS FRANÇAIS ITALIANO NEDERLANDS DEUTSCH ENGLISH ENGLISH ENGLISH ENGLISH 4 3 LETTER BOX 4 3 PA...

Страница 57: ...et press then To quit press ENGLISH ENGLISH ORIGINAL AUDIO FOLLOW ENTER DISPLAY x DVD MENU Selects the language for the DVD menu The language order is different depending on the player model The default setting is either ENGLISH or ENGLISH English FRANÇAIS French DEUTSCH German ITALIANO Italian ESPAÑOL Spanish NEDERLANDS Dutch DANSK Danish SVENSKA Swedish SUOMI Finnish NORSK Norwegian PORTUGUÊS Po...

Страница 58: ...te Depending on the DVD 4 3 LETTER BOX may be selected automatically instead of 4 3 PAN SCAN and vice versa SCREEN SETUP TV TYPE SCREEN SAVER BACKGROUND To set press then To quit press 16 9 ON JACKET PICTURE STARTUP SCREEN STANDARD ENTER DISPLAY 4 3 LETTER BOX 4 3 PAN SCAN 16 9 x SUBTITLE Selects the language for the subtitles The language order is different depending on the player model AUDIO FOL...

Страница 59: ...disc which does not contain the jacket picture is played while BACKGROUND is set to JACKET PICTURE the picture stored in the player will automatically appear in the background x STARTUP SCREEN Selects the startup screen The startup screen image you selected appears when you turn on the player STANDARD The standard startup screen in the player s memory appears PICTURE MEMORY Your favorite picture a...

Страница 60: ...layback by Children Parental Control CUSTOM SETUP allows you to set the playback conditions The default settings are underlined Select CUSTOM SETUP in the setup display x COMPONENT OUT Selects the methods of outputting video signals from the COMPONENT VIDEO OUT Y CB B Y CR R Y connectors on the rear panel of the player In order to set COMPONENT OUT to ON you must first connect the player to a proj...

Страница 61: ...USTOM SETUP PARENTAL CONTROL Enter password then press To cancel press ENTER To return press DISPLAY RETURN CUSTOM SETUP LINE AUTO PLAY DIMMER PAUSE MODE To set press then To quit press VIDEO COMPONENT OUT OFF OFF BRIGHT AUTO TRACK SELECTION OFF ON ENTER PARENTAL CONTROL DISPLAY PLAYBACK MEMORY BOOKMARK RESET 2 Enter a password in 4 digits using the number buttons then press ENTER The digits chang...

Страница 62: ...l control level while playing the disc In this case enter your password then change the level When you stop playing the DVD the level returns to the original level The same password is used for both Parental Control and Custom Parental Control page 42 Custom Settings CUSTOM SETUP 5 Select a geographic area as the playback limitation level standard using M m then press When you select OTHERS select...

Страница 63: ...he DVD the information stored in the disc takes priority over the Playback Memory settings and the function does not work Do not turn off the player by pressing Doing so may cancel the settings When you turn off the player press x first to stop playback and then press 1 on the remote After the power indicator lights up in red and the player enters standby mode press on the player x TRACK SELECTION...

Страница 64: ...nnot set DOLBY DIGITAL MPEG DTS and 48kHz 96kHz PCM AUDIO SETUP AUDIO ATT AUDIO DRC DOWNMIX DIGITAL OUT To set press then To quit press OFF STANDARD DOLBY SURROUND ON ENTER DOLBY DIGITAL MPEG D PCM PCM DTS D PCM CENTER SPEAKER EQ FLAT DISPLAY 48kHz 96kHz PCM 48kHz 16bit Settings for the Sound AUDIO SETUP AUDIO SETUP allows you to set the sound according to the playback conditions The default setti...

Страница 65: ...kers to be damaged AUDIO SETUP AUDIO ATT AUDIO DRC DOWNMIX DIGITAL OUT DOLBY DIGITAL MPEG To set press then To quit press OFF STANDARD DOLBY SURROUND CENTER SPEAKER EQ FLAT ON D PCM PCM 48kHz 96kHz PCM 48kHz 16bit DTS D PCM ENTER DISPLAY x MPEG Selects the MPEG audio signals to be output via the DIGITAL OUT OPTICAL and COAXIAL connectors PCM when the player is connected to an audio component lacki...

Страница 66: ...REAR SIDE When the sound cracks or the surround sound effects are difficult to hear select either of these according to the rear speaker s position This activates the Dolby Digital bass redirection circuitry and outputs the bass frequencies of the rear speaker from other speakers Settings for the Speakers SPEAKER SETUP SPEAKER SETUP SIZE DISTANCE BALANCE LEVEL OFF TEST TONE FRONT CENTER YES LARGE ...

Страница 67: ...ency sound 90 20 A B 45 B A x DISTANCE The default distance setting for the speakers in relation to the listening position is shown below You can vary the distance of each speaker as follows The default adjustments are in parentheses Be sure to change the value in the setup display when you move the speakers FRONT 3 6m Front speaker distance can be set in 0 2 meter increments from 1 to 15 meters D...

Страница 68: ... the balance between the rear left and right speakers 6dB L to 6dB R 0 5dB increments To return to the default setting Select the item then press CLEAR x LEVEL You can vary the level of each speaker as follows The front speaker level becomes the criterion for adjusting the other speakers Be sure to set TEST TONE to ON for easy adjustment see x TEST TONE below The default adjustments are in parenth...

Страница 69: ...ntrol your TV using the buttons below When you set the TV DVD switch to TV you can also control the number 1 u and ENTER buttons By pressing 1 TV VIDEO TV DVD VOL PROG WIDE MODE Number buttons and ENTER If you connect the player to the TV via the SCART EURO AV connectors the input source for the TV is set to the player automatically when you start playback or press any button except for 1 In this ...

Страница 70: ...TV DVD switch to DVD 2 Hold down 1 and enter your AV receiver s manufacturer s code see the table using the number buttons Then release 1 Code numbers of controllable AV receivers amplifier If more than one code number is listed try entering them one at a time until you find the one that works with your AV receiver amplifier Manufacturer Code number Sony 91 89 Denon 84 85 86 Kenwood 92 93 Onkyo 81...

Страница 71: ...the video input on the TV so that you can view the pictures from the player In the setup display set LINE and COMPONENT OUT in CUSTOM SETUP to the appropriate item conforms to your system page 60 OFF in COMPONENT OUT under CUSTOM SETUP is selected when you have connected the player to a monitor or projector via only the COMPONENT VIDEO OUT connectors To view the picture connect the monitor via LIN...

Страница 72: ...me from any connector other than the DIGITAL OUT OPTICAL or COAXIAL connector page 19 Sound distortion occurs In the setup display set AUDIO ATT in AUDIO SETUP to ON page 64 The sound loses its stereo effect when you play a VIDEO CD or a CD Set AUDIO to STEREO in the Control Menu display page 34 Make sure you connect the player correctly pages 8 12 15 The surround effect is difficult to hear when ...

Страница 73: ... OSD under LANGUAGE SETUP page 57 The language for the sound track cannot be changed when you play a DVD Multilingual tracks are not recorded on the DVD Changing the language for the track is prohibited on the DVD The subtitle language cannot be changed when you play a DVD Multilingual subtitles are not recorded on the DVD Changing the language for the subtitles is prohibited on the DVD The subtit...

Страница 74: ... check the following table First three characters C13 C31 Exx xx is any number Cause and or Corrective Action The disc is dirty Clean the disc with a cleaning cloth page 6 The disc is not inserted correctly Open the disc tray and insert the disc correctly To prevent a malfunction the player has performed the self diagnosis function When you contact your Sony dealer or local authorized Sony service...

Страница 75: ...S General Power requirements 220 240V AC 50 60 Hz Power consumption 17 W Dimensions approx 430 74 260 mm 17 3 10 1 4 in w h d incl projecting parts Mass approx 3 1 kg 6 lb 13 oz Operating temperature 5 C to 35 C Operating humidity 25 to 80 Supplied accessories See page 7 Design and specifications are subject to change without notice Jack type Phono jacks Optical output connector Phono jack Phono j...

Страница 76: ... a discrete subwoofer channel in this format DTS provides the same 5 1 discrete channels of high quality digital audio Good channel separation is realized because all of the channel data is recorded discretely and processed in digital DVD page 4 A disc that contains up to 8 hours of moving pictures even though its diameter is the same as a CD The data capacity of a single layer and single sided DV...

Страница 77: ...ctures The picture data uses the MPEG 1 format one of the worldwide standards of digital compression technology The picture data is compressed to about 1 140 of its original size Consequently a 12 cm VIDEO CD can contain up to 74 minutes of moving pictures VIDEO CDs also contain compact audio data Sounds outside the range of human hearing are compressed while the sounds we can hear are not compres...

Страница 78: ...h 1150 Estonian 1151 Basque 1157 Persian 1165 Finnish 1166 Fiji 1171 Faroese 1174 French 1181 Frisian 1183 Irish 1186 Scots Gaelic 1194 Galician 1196 Guarani 1203 Gujarati 1209 Hausa 1217 Hindi 1226 Croatian 1229 Hungarian 1233 Armenian 1235 Interlingua 1239 Interlingue 1245 Inupiak 1248 Indonesian 1253 Icelandic 1254 Italian 1257 Hebrew 1261 Japanese 1269 Yiddish 1283 Javanese 1287 Georgian 1297 ...

Страница 79: ...o this connector qa PHONES LEVEL control 18 Adjusts the headphone volume qs VIRTUAL SURROUND HEADPHONES button and indicator 41 Press to turn on the VIRTUAL SURROUND HEADPHONES function The indicator lights up when it is on qd g remote sensor 7 Accepts the remote control signals qf SHUFFLE button 46 Displays the SHUFFLE display on the TV screen qg REPEAT button 47 Displays the REPEAT display on th...

Страница 80: ...mplifier 5 DIGITAL OUT COAXIAL connector 12 Connect to an audio component using a coaxial digital connecting cord 6 DIGITAL OUT OPTICAL connector 12 Connect to an audio component using an optical digital connecting cord Take off the cap 7 VIDEO OUT connector 9 Connect to the video input connector on your TV or monitor 8 S VIDEO OUT connector 9 12 Connect to the S video input connector on your TV o...

Страница 81: ...splays the title menu on the TV screen qh DVD MENU button 23 Displays the DVD menu on the TV screen qj Click shuttle 20 Changes the playback speed qk M m ENTER buttons Selects and executes the items or settings ql TV DVD button 10 69 Press to return the TV s input from the CD DVD player to the TV when you connect the player to your TV via the SCART EURO AV connectors w 1 on standby button 18 Press...

Страница 82: ...t Rewind 20 Front panel display 25 H Handling discs 6 Hooking up 8 12 15 I J K Index 5 30 INDEX 30 L LANGUAGE SETUP 57 LETTER BOX 58 LEVEL 68 LINE 60 Locating a specific point 20 by watching the TV screen 20 M N MPEG 65 O On screen display Control Menu display 27 Setup display 54 OSD 57 P Q PAN SCAN 58 PARENTAL CONTROL 60 PAUSE MODE 60 PBC functions 24 PBC Playback 24 76 PICTURE MEMORY 59 PLAYBACK...

Страница 83: ...83 Additional Information ...

Страница 84: ...Sony Corporation Printed in Japan ...

Отзывы: