


1-7
31
Hookups
M
Press ENTER.
Quick Setup is finished. All connections and setup operations are complete.
You can directly start Quick Setup only when you run it for the first time.
To run Quick Setup a second time, select “QUICK” under SETUP in the Control Menu (page 62).
To enjoy the surround sound effects of this player or your amplifier (receiver), the following
items must be set as described below for the audio connection you selected in pages 22 to 26
(
through
). Each of these are the default settings and do not need to be adjusted when
you first connect the player. Refer to page 62 for using the Setup Display.
Audio Connection (pages 21 to 26)
No additional settings are needed.
• If the sound distorts even when the volume is turned down, set “AUDIO ATT” to “ON” (page
66).
Note
Enjoying the surround sound effects
Item
You select
Page
DOWNMIX
DOLBY SURROUND
67
Item
You select
Page
DOWNMIX
DOLBY SURROUND
67
DIGITAL OUT
ON
67
B
D
A
B-1
C-1
B-2
C-2
D
32
Playing Discs
Playing Discs
Depending on the DVD or VIDEO CD, some
operations may be different or restricted.
Refer to the operating instructions supplied
with your disc.
1
Turn on your TV.
2
Switch the input selector on the TV
to the player.
When using an amplifier (receiver)
Turn on the amplifier (receiver) and
select the appropriate channel.
3
Press POWER on the player.
The player enters standby mode and the
power indicator lights up in red.
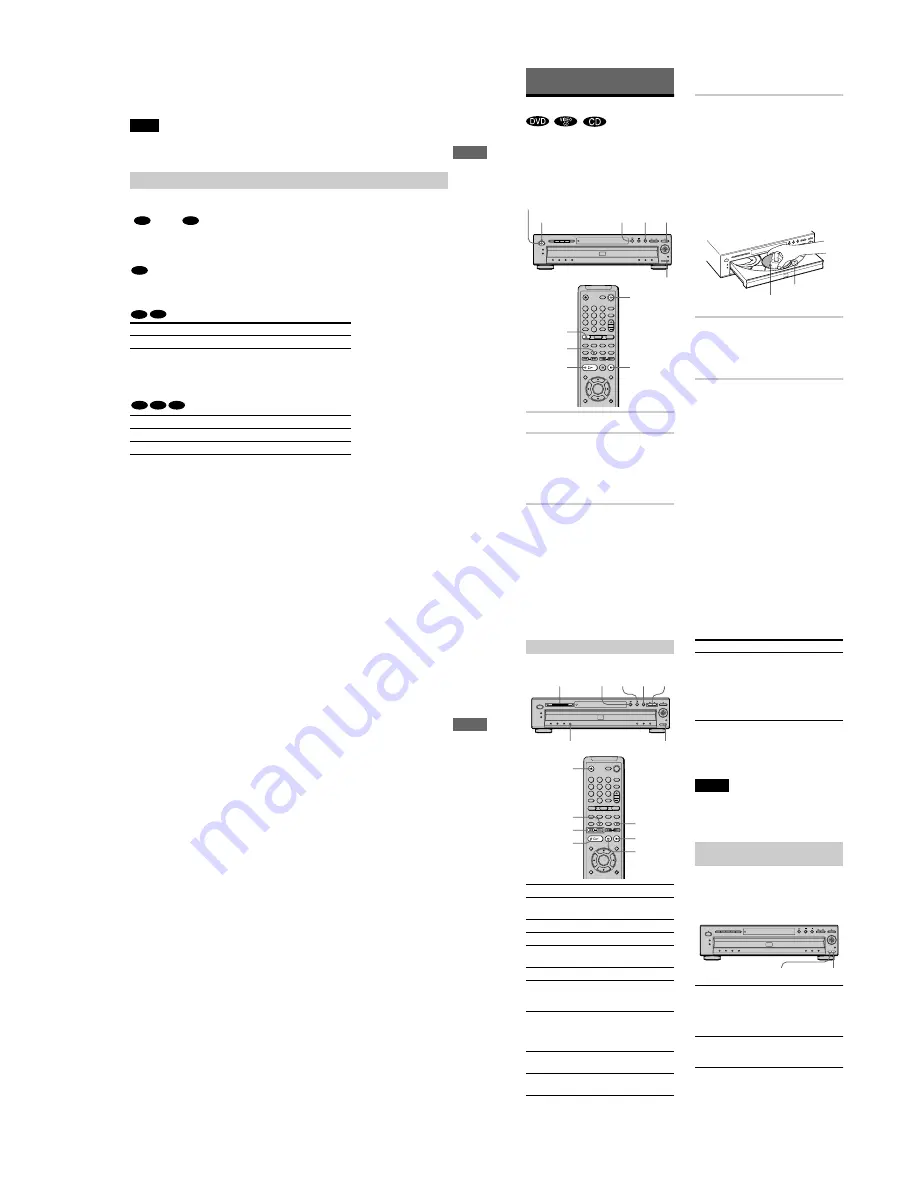
4
Press
A
on the player, and place a
disc on the disc tray.
The player automatically turns on and the
power indicator lights up in green.
To place other discs on the tray, press
DISC SKIP and place the discs in the
order you want to play them.
Each time you press DISC SKIP, the disc
tray turns so you can place the discs on
the empty compartments. The player
plays from the last disc placed on the
tray.
5
Press
H
.
The disc tray closes, and the player starts
playback (continuous play). Adjust the
volume on the TV or the amplifier
(receiver).
After following Step 5
Depending on the disc, a menu may appear
on the TV screen. You can play the disc
interactively by following the instructions on
the menu. DVD (page 36), VIDEO CD (page
37).
To turn on the player
Press POWER on the player. The player
enters standby mode and the power indicator
lights up in red. Press
?/1
on the remote. The
player turns on and the power indicator lights
up in green. In standby mode, the player also
turns on by pressing
A
on the player or by
pressing
H
.
1
4
7
2
5
8
0
3
6
9
POWER
A
H
Power indicator
x
AUDIO
x
?/1
DISC SKIP
H
DISC SKIP
With the playback
side facing down
Disc
compartment
number
33
P
lay
ing Disc
s
To turn off the player
Press
?/1
on the remote. The player enters
standby mode and the power indicator lights
up in red. To turn off the player completely,
press POWER on the player. While playing a
disc, do not turn off the player by pressing
POWER. Doing so may cancel the menu
settings. When you turn off the player, first
press
x
to stop playback and then press
?/1
on the remote.
Notes on playing DTS sound tracks on
a CD
• When playing DTS-encoded CDs,
excessive noise will be heard from the
analog stereo jacks. To avoid possible
damage to the audio system, the consumer
should take proper precautions when the
analog stereo jacks of the player are
connected to an amplification system. To
enjoy DTS Digital Surround™ playback, an
external 5.1-channel decoder system must
be connected to the digital jacks of the
player.
• Set the sound to “STEREO” using the
AUDIO button when you play DTS sound
tracks on a CD (page 49).
• Do not play DTS sound tracks without first
connecting the player to an audio
component having a built-in DTS decoder.
The player outputs the DTS signal via the
DIGITAL OUT (COAXIAL or OPTICAL)
jack even if “DTS” in “AUDIO SETUP” is
set to “OFF” in the Setup Display (page 68),
and may affect your ears or cause your
speakers to be damaged.
Notes on playing DVDs with a DTS
sound track
• DTS audio signals are output only through
the DIGITAL OUT (COAXIAL or
OPTICAL) jack.
• If you connect the player to audio
equipment without a DTS decoder, do not
set “DTS” to “ON” in “AUDIO SETUP”
(page 68). A loud noise may come out from
the speakers, affecting your ears or causing
the speakers to be damaged.
• When you play a DVD with DTS sound
tracks, set “DTS” to “ON” in “AUDIO
SETUP” (page 68).
34
z
The Instant Replay function is useful when you
want to review a scene or dialog that you missed.
z
Before loading the discs, a DISC SELECT
indicator of an empty compartment may be lit.
• You may not be able to use the Instant Replay
function with some scenes.
• If you turn the power off by pressing POWER on the
player, the loading information will be reset.
You can open the disc tray while playing a
disc so that you can check which discs are to
be played next and replace discs without
interrupting playback of the current disc.
1
Press EXCHANGE.
The disc tray opens and two disc
compartments appear. Even if the player
is playing a disc, it doesn’t stop playing.
2
Replace the discs in the compartments
with new ones.
3
Press DISC SKIP.
The disc tray turns and another two disc
compartments appear.
Additional operations
To
Operation
Select a disc
Press DISC SELECT 1
- 5 on the player
Stop
Press
x
Pause
Press
X
Resume play after
pause
Press
X
or
H
Go to the next disc
Press DISC SKIP
Go to the next chapter,
track, or scene in
continuous play mode
Press
>
Go back to the
preceding chapter,
track, or scene in
continuous play mode
Press
.
Stop play and remove
the disc
Press
Z
Replay a previous
scene (DVD only)
Press INSTANT
REPLAY
1
4
7
2
5
8
0
3
6
9
H
./>
Z
x
X
DISC SELECT 1 - 5
H
X
x
./>
INSTANT
REPLAY
DISC SKIP
LOAD
DISC SKIP
Check if a disc is in the
disc compartment
Press LOAD on the
player.
The DISC SELECT
indicator for each
compartment (1 - 5)
containing a disc lights
up.
Notes
Replacing discs while playing a disc
(EXCHANGE)
To
Operation
EXCHANGE
DISC SKIP


