Using the menu system
15
Using the menu system
DST-HD500 2-663-710-
11
(2)
Setup menu
The
Setup
menu allows you change various settings.
1
Press the
MENU
button to display the menu system.
2
Press the
v
button to highlight the
symbol. Press the
b
or
OK
button to display the
Setup
menu.
Video/Audio Setup
This option enables you to enjoy video and audio in various
environments.
With the
Video/Audio Setup
option highlighted, press the
b
or
OK
button to adjust. Press the
V
or
v
buttons to highlight the required
setting (refer to table below). Press the
OK
button to adjust.
Video Format
This option allows you to set the picture quality.
With the
Video Format
option highlighted, press
the
b
or
OK
button to adjust. Press the
V
or
v
buttons to ‘1080i’, ‘720p’, ‘576p’ or ‘576i’. Press
the
OK
button to confirm.
Note:
If you have a high definition screen we
recommend that you select the ‘1080i’ setting. If you
have a standard definition screen it is likely that the
‘576i’ setting is the only setting suitable for your display.
Please check the specification of your TV or display
screen by referring to the manufacturer’s instruction
manual.
Alternatively, in normal operation, press the
button on the remote control to cycle through all
the settings until the best quality display is seen.
Note:
When the video format is changed, the picture
might be slightly disturbed during the transition between
video formats. This does not indicate a malfunction.
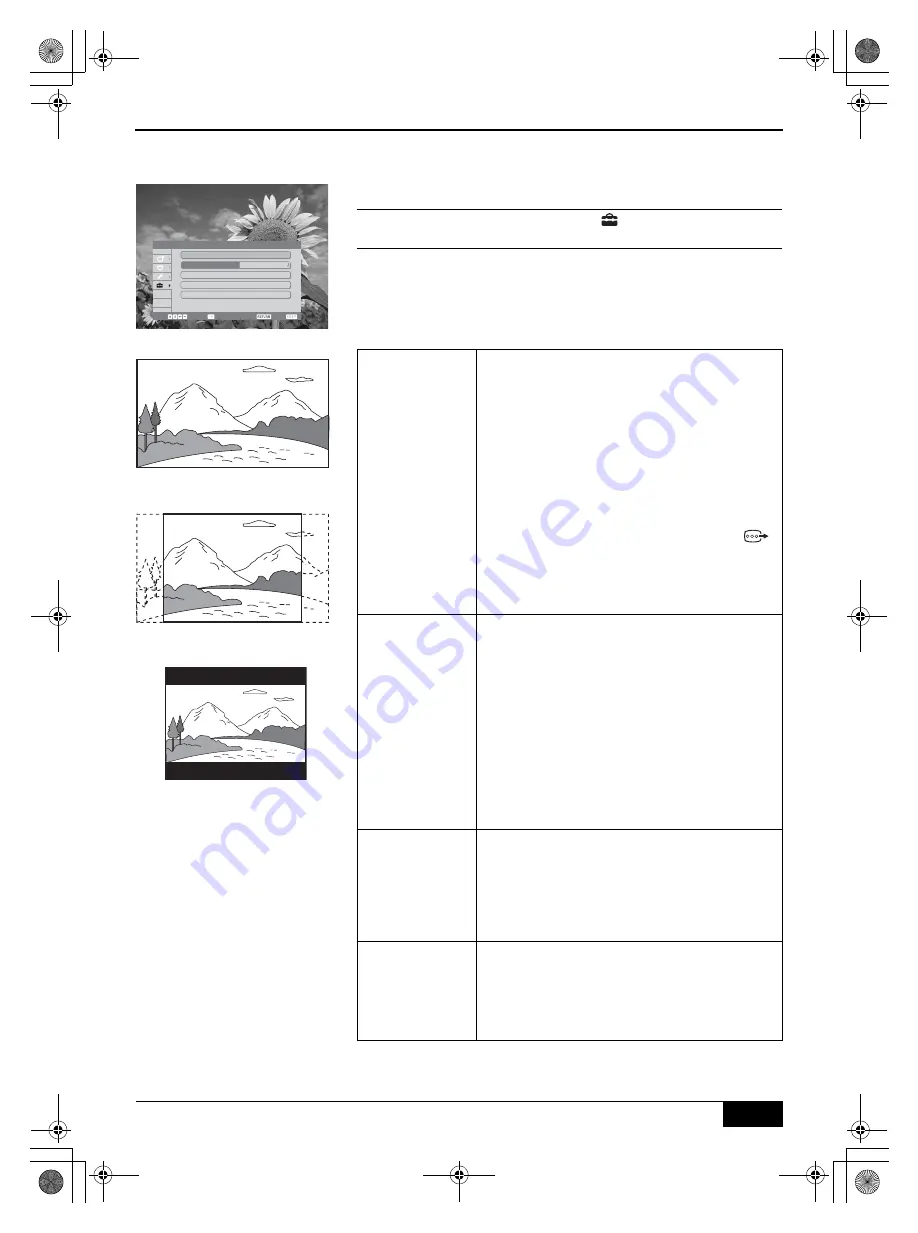
Aspect Ratio
This option allows you to set the aspect ratio.
With the
Aspect Ratio
option highlighted, press
the
b
or
OK
button to adjust. Press the
V
or
v
buttons to ‘16:9 (Full Screen)’, ‘4:3 (Full Screen
Crop)’, or ‘4:3 (Letter Box)’. Press the
OK
button
to confirm.
Note:
‘16:9 (Full Screen)’ is for use with a widescreen
TV/display screen.
‘4:3 (Full Screen Crop) is for use with a non-widescreen
TV/display screen. The picture is stretched to fill the
screen. As a result, some of the picture may not be
visible.
‘4:3 (Letter Box) is for use with a non-widescreen TV/
display screen. The full picture is shown with black bars
at the top and bottom of the picture.
Audio Output
Control
This option allows you to set the priority for audio
output (when Dolby Digital and MPEG audio are
available).
With the
Audio Output Control
option
highlighted, press the
b
or
OK
button to adjust.
Press the
V
or
v
buttons to ‘Dolby Digital’, or
‘MPEG’. Press the
OK
button to confirm.
MPEG Volume
Control
This option allows you to adjust MPEG audio
level to Dolby Digital audio level.
With the
MPEG Volume Control
option
highlighted, press the
b
or
OK
button. Press the
B
or
b
buttons to adjust the audio level. Press the
OK
button to confirm.
16:9 (Full Screen)
4:3 (Full Screen Crop)
4:3 (Letter Box)
Setup menu
Setup
Select :
Confirm :
EXIT :
BACK :
Video / Audio Setup
Time Setup
Restore to Default
S/W Update
Information
NSW/ACT
continued...
DST-HD100A.book Page 15 Saturday, September 17, 2005 5:36 AM


