background image

16

GB

x

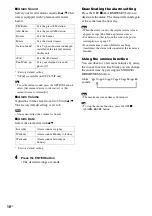
Alarm Sound

Select your favorite alarm sound with 

v

/

V

. This 

unit is equipped with 7 alarm modes listed 
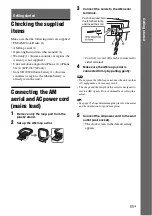
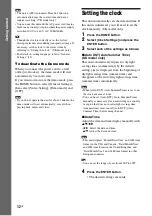
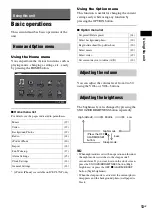
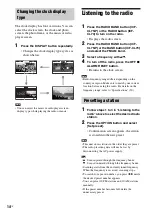
below.

* Factory default setting

** [iPod] is available on ICF-CL75iP only.

Tip

• To set the current sound, press the OPTION button to 

select [Set current device to Alarm (A)] or [Set 
current device to Alarm (B)].

x

Alarm Volume

Adjust the volume level from 0 to 30 with 

v

/

V

The factory default setting is set to 8.

Note

• You cannot adjust the volume for buzzer.

x

Alarm Date

Select the alarm date with 

v

/

V

.

* Factory default setting

4

Press the ENTER button.

• The desired settings are made.

Deactivating the alarm setting

Press the OFF 

x

 ALARM RESET button to 

deactivate the alarm. The alarm will sound again 
at the same time the next day.

Note

• When the alarm sounds, the original alarm screen 

appears except [Fun Wake-up] alarm screen.

• For details on what to do in the event of a power 

interruption, see page 29.

• If an alarm time comes while files are being 

transferred, the alarm will sound after the transfer is 
finished.

Using the snooze function

You can doze for a few more minutes by using 
the snooze function. Each time you can change 
the snooze time by pressing the SNOOZE/
BRIGHTNESS button.

Note

• The maximum snooze time is 60 minutes.

Tip

• To stop the snooze function, press the OFF 

x


ALARM RESET button.

FM Radio

Sets the preset FM station.

AM Radio

Sets the preset AM station.

Buzzer

Sets the buzzer.

Music

Sets the desired music.

Nature Sound

*

Sets 5 types of nature sounds pre-
installed in the internal memory 
on this unit.

iPod

**

Sets the iPod music.

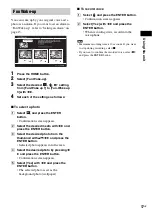
Fun Wake-up

Sets your original voice and 
photo (17). 

Everyday

Alarm sounds everyday.

Weekday

*

Alarm sounds Monday to Friday.

Weekend

Alarm sounds Saturday or 
Sunday.

Alarm 
sounds

10

60

20

30

40

50

Содержание DREAM MACHINE 4-154-584-35(1)

Страница 1: ...4 154 584 35 1 FM AM Clock Radio Operating Instructions ICF CL75iP ICF CL70 2009 Sony Corporation GB ...

Страница 2: ...te collection systems This symbol on the product or on its packaging indicates that this product shall not be treated as household waste Instead it shall be handed over to the applicable collection point for the recycling of electrical and electronic equipment By ensuring this product is disposed of correctly you will help prevent potential negative consequences for the environment and human healt...

Страница 3: ...n the LCD screen in a cold location This is not a malfunction Duplication edition or printing of a CD TV programs copyrighted materials such as pictures or publications or any other materials except for your own recording or creation is limited to private or domestic use only Unless you hold copyright or have permission of copyright holders for the materials to be duplicated use of those materials...

Страница 4: ...ation that is useful to know The figures in parentheses indicate the reference page for details on operation The language used for on screen displays are English for all countries and regions In this Operating Instructions iPod is used as a general reference to iPod functions on iPod or iPhone unless otherwise specified by the text or illustrations ICF CL75iP only Design and specifications of this...

Страница 5: ... display type 14 Listening to the radio 14 Presetting a station 14 Using the timer function 15 Setting an alarm 15 Fun Wake up 17 Using the sleep timer 18 Enjoying music video and photos 18 Importing files 18 Playing back music video and setting the background photo wallpaper 19 Using iPod iPhone functions For ICF CL75iP only 20 Compatible iPod models 20 Operating iPod 21 Additional information Ge...

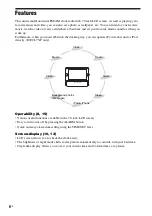
Страница 6: ...n operate iPod via this unit or iPod directly ICF CL75iP only Operability 8 15 Various useful functions available in the 7 0 inch LCD screen Easy to turn on or off by pressing the ALARM button Quick and easy alarm time setting using the TIME SET lever Screen display 10 13 LCD screen allows you to check the clock easily The brightness of night mode shifts to sleep mode automatically to coincide wit...

Страница 7: ...t You cannot display the cover photo for WMA content Background photos 19 Photos can be displayed as wallpaper on the screen similar to a photo frame Photo images can be played back as a slideshow Alarm Sleep timer function 15 Using Fun Wake up you can wake up to your favorite recorded voice and photo Nature Sound for relaxed listening and a good night s sleep iPod iPhone function ICF CL75iP only ...

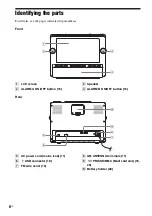
Страница 8: ...cated in parentheses Front A LCD screen B ALARM A ON OFF button 15 C Speaker D ALARM B ON OFF button 15 Rear E AC power cord mains lead 11 F USB connector 18 G FM wire aerial 15 H AM ANTENNA terminals 11 I PRO SD MMC Multi card slot 18 25 J Battery holder 28 ...

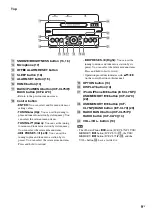
Страница 9: ...T b Left You can set the tuning to plus and tune into a station by its preset You can select the relevant menu items Press and hold to rewind PRESET B Right You can set the tuning to minus and tune into a station by its preset You can select the relevant menu items Press and hold to fast forward Operation procedure indicates with v V b B on the control button in this manual S OPTION button 13 T DI...

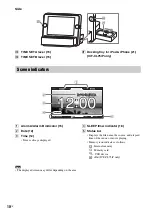
Страница 10: ... B Date 12 C Time 12 Time is always displayed D SLEEP timer indicator 18 E Status bar Displays the file name the source and elapsed time of the music or movie playing Memory icon indicates as follows Internal memory Memory card USB device iPod ICF CL75iP only Note The displayed screen may differ depending on the area Screen indicators ...

Страница 11: ...the plastic stand 2 Set up the AM loop aerial 3 Connect the cords to the AM aerial terminals Cord A or cord B can be connected to either terminal 4 Make sure the AM loop aerial is connected firmly by pulling gently Note Do not place the AM loop aerial near the unit or other AV equipment as noise may result The shape and the length of the aerial is designed to receive AM signals Do not dismantle or...

Страница 12: ...ate and time If this unit is initialized you will need to set the clock manually UK model only 1 Press the HOME button 2 Select Clock Settings and press the ENTER button 3 Select each of the settings as follows xAuto DST Auto Summer Time UK model only This unit automatically adjusts for daylight savings time summer time by the default setting is displayed from the beginning of daylight savings tim...

Страница 13: ...epeatedly Tip When night mode is set with no operation on this unit the night mode is switches to the sleep mode 5 seconds later If you want to return the clock screen press the SNOOZE BRIGHTNESS button High brightness or press the OFF x ALARM RESET button Night brightness When the sleep mode is activated the current photo disappears and the background photo wallpaper is black Using this unit Home...

Страница 14: ...the country or region Make sure to match your current location before using the radio For details on the frequency range refer to Specifications 30 1 Follow steps 1 to 3 in Listening to the radio above to select the desired radio station 2 Press the OPTION button and select Set preset Confirmation screen appears the station is stored into the new preset Note This unit stores stations in the order ...

Страница 15: ...r although the sound becomes monaural Using the timer function The dual alarm function allows you to use two individually set alarms For each alarm you can set a favorite sound or use an originally recorded sound with a selected photo display 1 Press the ALARM SET button Displays Alarm Settings screen 2 Select Alarm A or Alarm B and press the ENTER button 3 Set each of the settings as follows Note...

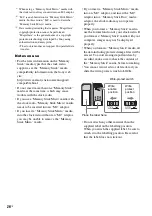
Страница 16: ...al alarm screen appears except Fun Wake up alarm screen For details on what to do in the event of a power interruption see page 29 If an alarm time comes while files are being transferred the alarm will sound after the transfer is finished Using the snooze function You can doze for a few more minutes by using the snooze function Each time you can change the snooze time by pressing the SNOOZE BRIGH...

Страница 17: ...sired photo from the thumbnail with v V b B and press the ENTER button Selected photo appears in full screen D Select the desired photo by pressing b B and press the ENTER button Confirmation screen appears E Select Yes with b B and press the ENTER button The selected photo is set as the background photo wallpaper xTo record voice A Select and press the ENTER button Confirmation screen appears B S...

Страница 18: ...e desired nature sound files and press the ENTER button 5 Press the SLEEP button Enjoying music video and photos 1 Insert a memory card firmly into the slot with its label side facing toward you or connect a USB device to the rear of this unit 2 Press the HOME button 3 Select Import and press the ENTER button 4 Select the desired media and press the ENTER button 5 Tick the desired multiple files w...

Страница 19: ...or a password Refer also to the connected device s manual Compatibility with all external devices are not guaranteed While playing or pausing music or video you cannot copy or delete files 1 Press the HOME button 2 Select Music or Video and Background Photos and press the ENTER button 3 Select the desired media and press the ENTER button 4 Select the desired file and press the ENTER button Plays t...

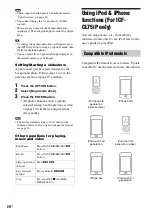
Страница 20: ... from the device media selected in step 3 in the previous section on page 19 will then be displayed one after another Note The factory default setting is 10 seconds for the slideshow interval If you want to change the interval see page 23 Other operations for playing music and video Using iPod iPhone functions For ICF CL75iP only You can enjoy music etc from iPod by connected to this unit To use i...

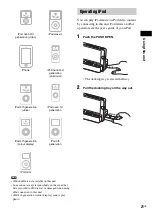
Страница 21: ...to You can play iPod music or iPod video content by connecting to this unit For details on iPod operation see the user s guide of your iPod 1 Push the PUSH OPEN The docking tray is ejected halfway 2 Pull the docking tray all the way out iPod nano 3rd generation video iPod classic iPhone iPod nano 2nd generation aluminum iPod 5th generation video iPod nano 1st generation iPod 4th generation colour ...

Страница 22: ...nit select Video in iPod iPhone menu while playing iPod Basic operation of this unit Tip Another way to play iPod is by pressing the HOME button to select iPod iPhone You can operate the menu for iPod Touch and iPhone when Music or Video is already selected Charging iPod You can use the unit as an iPod battery charger Charging begins when iPod is connected Setting iPod alarm You can set an alarm s...

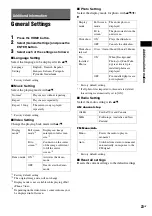
Страница 23: ...ts the current settings to the default settings Additional information Language Setting English Deutsch Español Français Italiano Português Русский Nederlands Normal Plays music without repeating Repeat Plays music repeatedly Repeat 1 Song The current song is played repeatedly Display mode 3 Full screen mode 4 Displays an image enlarged to full screen size 2 Fit to screen 1 Zooms in on the center ...

Страница 24: ...ow Replace the battery Remove the old battery and install a new one When daylight savings time begins the clock does not employ the daylight savings time automatically UK model only Make sure the clock is set correctly The alarm settings do not sound at the preset alarm time Check that Alarm A or Alarm B is properly displayed The alarm settings are activated but there is no sounds at the preset al...

Страница 25: ...s of all the Memory Stick media 2 The clock radio is equipped with a slot compatible with both standard size and Duo size media Without a Memory Stick Duo media adaptor you can use both a standard size Memory Stick media and the compact size Memory Stick Duo media There is no sound from iPod ICF CL75iP only Make sure iPod is securely connected Adjust the volume iPod cannot be operated with this un...

Страница 26: ...needs to be inserted into an M2 adaptor If you insert a Memory Stick Micro media into the clock radio without an M2 adaptor you may be unable to remove the Memory Stick Micro media If you insert a Memory Stick Micro media into an M2 adaptor and insert the M2 adaptor into a Memory Stick Duo media adaptor the clock radio may not operate properly When you format a Memory Stick media use the format fu...

Страница 27: ...e to check the correct insertion direction of the card and the correct insertion slot When inserting the memory card it will only insert the portion of the way so do not try to force it as this could damage the memory card and or clock radio Do not remove a card while the clock radio is reading or writing data Otherwise data may be rendered unreadable or erased We recommend that you save a backup ...

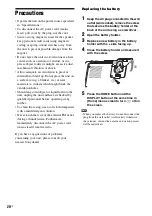
Страница 28: ... by qualified personnel before operating it any further To clean the casing use a soft cloth dampened with a mild detergent solution Never touch the wire of the external FM aerial during a thunderstorm Furthermore immediately disconnect the AC power cord mains lead from the radio If you have any questions or problems concerning your unit please consult your nearest Sony dealer Replacing the batter...

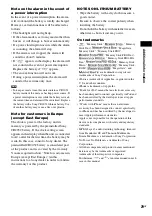
Страница 29: ...uct and is covered by the warranty You are required to show Note for customers in Europe except East Europe in this instruction to a Sony dealer in order to validate the warranty for this product NOTES ON LITHIUM BATTERY Wipe the battery with a dry cloth to assure a good contact Be sure to observe the correct polarity when installing the battery Do not hold the battery with metallic tweezers other...

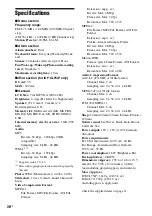
Страница 30: ...rmat MPEG 1 File Format MP4 File Format AVI File Format Extension mpg avi Bit rate Max 4 Mbps Frame rate Max 30 fps Resolution Max 720 576 MPEG 4 File Format MP4 File Format AVI File Format Extension mp4 avi Profile Advanced Simple Profile Bit rate Max 4 Mbps Frame rate Max 30 fps Resolution Max 720 576 Motion JPEG Format Quick Time Format AVI Format Extension mov avi Resolution Max 640 480 Audio ...

Страница 31: ......

Страница 32: ...Printed in China ...

Отзывы: