Connecting to a Windows computer
14
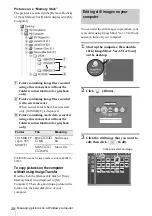
Connecting with the USB cable
(supplied)
When connecting your camcorder to your
computer with the USB cable (supplied), you
must have the proper USB driver installed on
your computer (p. 8) before following the
steps below.
b
Note
• Do not connect your camcorder to the computer
at this point.
1
Start up the computer.
Close down all applications running on the
computer.
For Windows 2000/Windows XP
Log on as Administrators.
2
Prepare the power source for your
camcorder, then slide the POWER
switch to select the CAMERA-TAPE
mode.
Use the supplied AC Adaptor as the power
source. For details, refer to the separate
Camera Operations Guide supplied with
your camcorder.
3
Touch [P-MENU], [MENU], [
(STANDARD SET)] and [USB-
CAMERA], then touch to select [USB
STREAM].
For details on using the personal menu,
refer to the separate Camera Operations
Guide supplied with your camcorder.
4
Connect the USB cable (supplied) to
the USB jack on the camcorder.
The location of the USB jack varies
depending on the model. Refer to the
separate Camera Operations Guide
supplied with your camcorder for the
location.
For the model that is supplied with the
Handycam Station, connect the USB cable
to the USB jack on the Handycam Station,
then set the USB ON/OFF switch to ON.
5
Connect the other end of the USB cable
to the USB jack on your computer.
It may take some time for the computer to
recognize the camcorder when you connect
the USB cable for the first time.
For Windows XP
If [Found New Hardware Wizard] appears,
click [Continue Anyway] and complete the
installation.
6
Turn off the power of your camcorder.
7
Disconnect the USB cable from your
camcorder.
8
Insert a recorded “Memory Stick” into
your camcorder.
9
Slide the POWER switch repeatedly to
select the PLAY/EDIT mode.
to USB jack
USB cable
(supplied)
to USB jack
Fully insert.


