background image

20

Recording moving images (DSC-
S50 only)

Moving images with audio are recorded in MPEG format. 
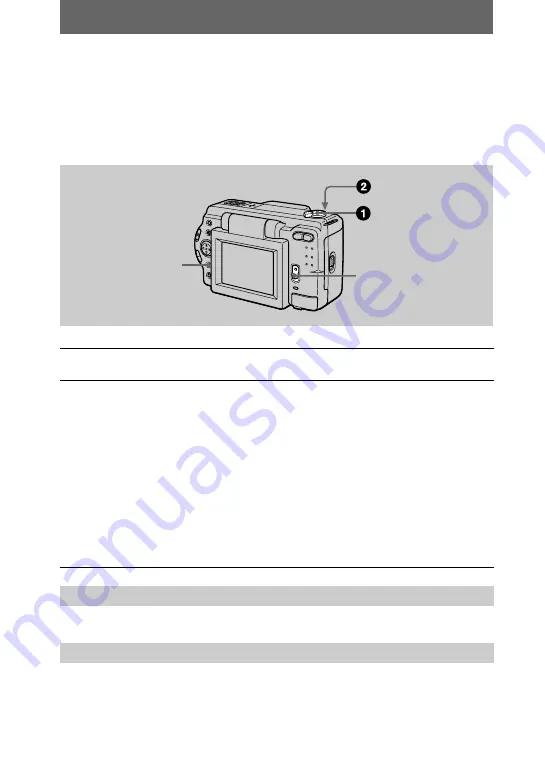
To record moving images, slide the POWER switch down to turn on the power and 
insert a “Memory Stick.”


See pages 17 and 18.

Press DISPLAY to turn on/off the indicators on the LCD screen. 
These indicators are not recorded. See page 64 for a detailed description of the 
indicators. 

1

Set the MODE selector to MOVIE. 

2

Press the shutter button fully down. 

“REC” appears on the LCD screen, and the image and sound are recorded on 
the “Memory Stick.”

If you press the shutter button momentarily 

The image and sound are recorded for five seconds. You can change the 
recording time to 10 or 15 seconds with [REC TIME SET] in the menu settings 
(page 33).

If you hold the shutter button down 

The image and sound are recorded while the shutter button is held down for up 
to 60 seconds. However, when [IMAGE SIZE] in the menu setting is set to 
[320

×

240], the maximum recording time is 15 seconds (page 33).

Zooming or using the self-timer, etc.

LCD screen indicators during recording 

DISPLAY

POWER switch

Содержание Cyber-Shot DSC-S30

Страница 1: ...r future reference Owner s Record The model and serial numbers are located on the bottom Record the serial number in the space provided below Refer to these numbers whenever you call upon your Sony dealer regarding this product Model No ________________________ Serial No ________________________ DSC S30 S50 2000 Sony Corporation DSC S50 ...

Страница 2: ...tended to alert the user to the presence of important operating and maintenance servicing instructions in the literature accompanying the appliance Declaration of Conformity Trade Name SONY Model No DSC S30 Responsible Party Sony Electronics Inc Address 1 Sony Drive Park Ridge NJ 07656 USA Telephone No 201 930 6972 This device complies with Part 15 of the FCC Rules Operation is subject to the foll...

Страница 3: ...OSE OF PROPERLY You can return your unwanted lithium ion batteries to your nearest Sony Service Center or Factory Service Center Note In some areas the disposal of lithium ion batteries in household or business trash may be prohibited For the Sony Service Center nearest you call 1 800 222 SONY United States only For the Sony Factory Service Center nearest you call 416 499 SONY Canada only Caution ...

Страница 4: ...is universal standard These models are not sold in some areas Playback of images recorded with your camera on other equipment and playback of images recorded or edited with other equipment on your camera are not guaranteed Precaution on copyright Television programs films video tapes and other materials may be copyrighted Unauthorized recording of such materials may be contrary to the provision of...

Страница 5: ...in macro 41 Setting the distance to the subject 41 Using the PROGRAM AE function 42 Adjusting the exposure EXPOSURE 43 Adjusting the white balance WHITE BALANCE 43 Recording the date and time on the still image DATE TIME 44 Enjoying picture effects P EFFECT 44 B Various playback Playing back six images at once INDEX 45 Enlarging a part of the still image Zoom and trimming 46 Rotating a still image...

Страница 6: ...ding lamp G Built in microphone DSC S50 only Do not touch while recording H Speaker DSC S50 only I Lens J A V OUT jack DSC S50 only 48 Audio output is monaural VIDEO OUT jack DSC S30 only 48 K USB jack 25 26 L Tripod receptacle bottom surface Use a tripod with a screw length of less than 9 32 inch 6 5 mm You will be unable to firmly secure the camera to tripods having longer screws and may damage ...

Страница 7: ...bright and easy to see but also uses up the battery faster D Control button E PROGRAM AE button VOLUME button F PROGRAM AE button 42 G DISPLAY button H LCD screen I Hook for lens cap strap J Zoom button K Access lamp 15 L Battery Memory Stick cover M Battery eject lever 8 N OPEN switch O POWER switch P DC IN jack 9 12 Q POWER lamp BATT CHARGE lamp 9 13 2 1 3 4 5 6 9 0 qa qh qj 7 qs qd qf qg 8 Atta...

Страница 8: ...oLITHIUM is a lithium ion battery pack which can exchange information such as battery consumption with compatible video equipment This unit is compatible with the InfoLITHIUM battery pack M series InfoLITHIUM M series battery packs have the mark InfoLITHIUM is a trademark of Sony Corporation 1 Open the battery Memory Stick cover Open the cover while sliding the OPEN switch in the direction of the ...

Страница 9: ... down the battery To use the camera again slide down the POWER switch to turn on the camera again 1 Insert the battery pack into your camera 2 Open the DC IN jack cover and connect the DC connecting cable to the DC IN jack of your camera with the v mark facing up 3 Connect the power cord mains lead to the AC power adaptor and then to a wall outlet mains The BATT CHARGE lamp lights orange when char...

Страница 10: ...MOVIE mode recording DSC S50 only Approximate time that can be recorded with a fully charged battery pack at a temperature of 77 F 25 C and 160 112 image size Numbers in parentheses indicate the time when you use a normally charged battery pack Charging time Battery pack Full charge min Normal charge min NP FM50 supplied 150 90 Battery life and number of images that can be recorded played back LCD...

Страница 11: ... Stick is limited The above figures are a guide when you continuously record play back while replacing the Memory Stick If sufficient battery remaining time is indicated but the power runs out soon fully charge the battery so that the correct battery remaining time appears Do not short the DC plug of the AC power adaptor with a metallic object as this may cause malfunction Do not expose the batter...

Страница 12: ...DC IN jack cover and connect the DC connecting cable to the DC IN jack of your camera with the v mark facing up 2 Connect the power cord mains lead to the AC power adaptor and then to a wall outlet mains AC L10 AC power adaptor DC IN jack cover To the wall outlet mains Power cord mains lead ...

Страница 13: ...er you turn on your camera for recording 1 Slide down the POWER switch to turn on the power The POWER lamp lights up 2 Press v on the control button The menu bar appears on the LCD screen 3 Select SETUP with B on the control button then press the center z 4 Select CLOCK SET with v V on the control button then press the center z Control button POWER lamp ...

Страница 14: ...6 Select the year month day hour or minute item you want to set with b B on the control button The item to be set is indicated with v V 7 Set the numeric value with v V on the control button then press the center z to enter it After entering the number v V moves to the next item If you selected D M Y in step 5 set the time on a 24 hour cycle 8 Select ENTER with B on the control button then press t...

Страница 15: ...cess lamp is lit up You cannot record or edit images on a Memory Stick if the erasure prevention switch is set to the LOCK position 1 Open the battery Memory Stick cover Open the cover while sliding the OPEN switch in the direction of the arrow 2 Insert the Memory Stick Insert the Memory Stick with the B mark facing toward the battery compartment as illustrated until it clicks 3 Close the battery ...

Страница 16: ...right subject the LCD screen color may change after AE lock but this does not affect the recorded image 1 Set the MODE selector to STILL 2 Press and hold the shutter button halfway down and check the image While the AE lock indicator z green is flashing the image freezes momentarily but is not yet recorded When the camera finishes the automatic adjustments the AE lock indicator z lights up and the...

Страница 17: ... side About 9 7 8 inches 25 cm or more T side About 23 5 8 inches 60 cm or more To record even closer subjects see page 41 Digital zoom function This camera has a digital zoom function Digital zoom enlarges the image by digital processing and it starts to function when zoom exceeds 3 Using digital zoom The maximum zoom magnification is 6 Digital zooming deteriorates the picture quality When digita...

Страница 18: ...n the subject is recorded about 10 seconds after you press the shutter button Select self timer indicator on the LCD screen with v V b B on the control button then press the center z The self timer indicator appears on the LCD screen and about 10 seconds after you press the shutter button the subject is recorded The self timer lamp flashes after you press the shutter button until the shutter is re...

Страница 19: ...nge the brightness of the flash FLASH LEVEL in the menu settings page 34 Notes The recommended shooting distance using the built in flash is 31 32 feet to 8 1 3 feet 0 3 m to 2 5 m Attaching a conversion lens not supplied may block the light from the flash or cause the lens shadow to appear Auto red eye reduction may not produce the desired red eye reduction effects depending on individual differe...

Страница 20: ...fully down REC appears on the LCD screen and the image and sound are recorded on the Memory Stick If you press the shutter button momentarily The image and sound are recorded for five seconds You can change the recording time to 10 or 15 seconds with REC TIME SET in the menu settings page 33 If you hold the shutter button down The image and sound are recorded while the shutter button is held down ...

Страница 21: ...ISPLAY to turn on off the indicators on the LCD screen See page 64 for a detailed description of the indicators 1 Set the MODE selector to PLAY The last recorded image still or moving appears on the LCD screen 2 Press v on the control button to display the menu bar on the LCD screen 3 Select the desired still image with the control button Press v V b B on the control button to select b B on the LC...

Страница 22: ...mage with the control button Moving images are displayed one size smaller than still images Press v V b B on the control button to select b B on the LCD screen then press b B on the control button b To display the preceding image B To display the next image 4 Select B playback on the LCD screen with v V b B on the control button then press the center z The moving image and sound are played back Du...

Страница 23: ...nd sound DSC S50 only by pressing the center z When you press the center z during playback playback is paused Press VOLUME to adjust the volume Press DISPLAY to turn on off the indicators on the LCD screen See page 64 for a detailed description of the indicators Adjusting the volume DSC S50 only LCD screen indicators during moving image playback ...

Страница 24: ...98SE CPU MMX Pentium 200 MHz or faster The USB connector must be provided as standard ActiveMovie Player DirectShow must be installed to play back moving pictures Recommended Macintosh environment Macintosh computer with the Mac OS 8 5 1 8 6 9 0 standard installation However note that the update to Mac OS 9 0 should be used for the following models iMac with the Mac OS 8 6 standard installation an...

Страница 25: ...B connector on your personal computer using the supplied USB cable 4 Insert a Memory Stick into your camera connect the AC power adaptor and turn on your camera PC MODE appears on the LCD screen of your camera and the camera is set to communication standby mode Your personal computer recognizes the camera and the Windows 98 Add Hardware Wizard starts 5 Follow the on screen messages to specify the ...

Страница 26: ...wer of your personal computer and allow Windows 98 to load 2 Connect one end of the USB cable to the USB jack on the camera and the other end to the USB connector on your personal computer 3 Insert a Memory Stick into your camera and connect the AC power adaptor to your camera and then to a wall outlet mains 4 Turn on the power of your camera PC MODE appears on the LCD screen of the camera 5 Open ...

Страница 27: ... Sleep Windows and ActiveMovie DirectShow are either registered trademarks or trademarks of Microsoft Corporation in the United States and or other countries Macintosh and Mac OS QuickTime are trademarks of Apple Computer Inc All other product names mentioned herein may be the trademarks or registered trademarks of their respective companies Furthermore and are not mentioned in each case in this m...

Страница 28: ...E mode and its corresponding image file Folder File Meaning 100msdcf DSC0ssss JPG Still image file recorded normally Still image file recorded in E MAIL mode page 38 Still image file recorded in TIFF mode page 40 Still image file recorded in VOICE mode page 39 TXT0ssss GIF Still image file recorded in TEXT mode page 39 Imcif100 DSC0ssss JPG Small size image file recorded in E MAIL mode page 38 DSC...

Страница 29: ...ay back and edit images Set the selector as follows before starting to operate your camera How to use the control button The control button is used to select the indicators images and menus appearing on the LCD screen of your camera The operation methods that are frequently used for Advanced operations are described below PLAY STILL MOVIE PLAY STILL PLAY To play back or edit images STILL To record...

Страница 30: ...the LCD screen Selecting items and images on the LCD screen 1 Press v V b B on the control button to select the item you want to set or the image you want to display The color of the selected item or the border of the selected image changes from blue to yellow 2 Press the center z to enter the item Repeat steps 1 and 2 to execute each function Press v to display the menu bar on the LCD screen Pres...

Страница 31: ...V again 1 Press v on the control button to display the menu bar The menu bar appears as follows according to the setting of the MODE selector 2 Select the desired item with v V b B on the control button then press the center z The color of the selected item changes from blue to yellow and when you press the center z the modes that can be set for that item are displayed 3 Select the desired mode wi...

Страница 32: ...e image page 44 STILL Item Setting Description MODE selector FORMAT OK Formats a Memory Stick MOVIE STILL PLAY CANCEL Cancels formatting of a Memory Stick POS SENSOR ON Plays back images recorded with the camera on its side vertical images as horizontal images This function does not work for images recorded in TEXT mode STILL xOFF When this camera may be subject to vibration such as when you recor...

Страница 33: ...h still image in addition to the JPEG file DSC S50 only E MAIL Records a small size 320 240 JPEG file in addition to the selected image size xNORMAL Records a JPEG file in the selected image size REC TIME SET 15 sec 10 sec x5 sec Adjusts the recording time for moving images DSC S50 only MOVIE ROTATE in single mode only Rotates the still image PLAY SLIDE SHOW in single mode only INTERVAL Sets the s...

Страница 34: ...e white balance page 43 MOVIE STILL FLASH LEVEL HIGH Makes the flash level higher than normal STILL xNORMAL Normal setting LOW Makes the flash level lower than normal EXPOSURE 2 0 EV to 2 0 EV Adjusts the exposure MOVIE STILL Item Setting Description MODE selector COPY OK Copies an image page 51 PLAY CANCEL Cancels copying of the image RESIZE in single mode only 1600 1200 1024 768 640 480 xCANCEL ...

Страница 35: ... etc MOVIE STILL PLAY PAL Sets the video output signal to PAL mode European countries etc LANGUAGE xENGLISH Displays the menu items in English MOVIE STILL PLAY JPN Displays the menu items in Japanese CLOCK SET Sets the date and time page 13 MOVIE STILL PLAY BEEP SHUTTER Turns off the beep only The shutter sound is heard when you press the shutter button MOVIE STILL PLAY xON Turns on the beep shutt...

Страница 36: ...36 3 RETURN Returns to PLAY single mode Displayed only in PLAY single mode Displayed only in PLAY INDEX mode ...

Страница 37: ... the actual subject 1 3 2 Image appearing on the LCD screen Recorded image Setting the image size IMAGE SIZE 1 Set the MODE selector to MOVIE or STILL MOVIE is for DSC S50 only 2 Select FILE and then IMAGE SIZE from the menu 3 Select the desired image size DSC S50 Still image sizes 1600 1200 1600 3 2 1024 768 640 480 The image is recorded in 3 2 size to match the printing paper size ratio of 3 2 M...

Страница 38: ...ox 169 60 sec Recording still images for e mail E MAIL E MAIL mode records a small size 320 240 image at the same time as a still image Small size images are convenient for e mail transmission etc 1 Set the MODE selector to STILL 2 Select FILE REC MODE and then E MAIL from the menu 3 Record the image The number of images that you can record on a Memory Stick 4 MB in E MAIL mode To return to normal...

Страница 39: ... is edited but the audio file is not Image size Number of images 1600 1200 Approx 3 1600 3 2 Approx 3 1024 768 Approx 8 640 480 Approx 28 2 1 3 Recording text documents TEXT Text is recorded in black and white GIF format to provide a clearer image 1 Set the MODE selector to STILL 2 Select FILE REC MODE and then TEXT from the menu 3 Record the image The number of images that you can record on a Mem...

Страница 40: ...To return to normal recording mode Select NORMAL in step 2 Image size Number of images 1600 1200 Approx 2 1600 3 2 Approx 2 1280 960 Approx 3 1280 3 2 Approx 3 2 1 3 Notes JPEG images are recorded in the image size selected by the IMAGE SIZE menu TIFF images are recorded in 1600 1200 size in DSC S50 and 1280 960 size in DSC S30 other than when 1600 3 2 or 1280 3 2 is selected Writing data takes mo...

Страница 41: ... You cannot record images in macro when appears on the LCD screen 2 1 Setting the distance to the subject Normally the focus is automatically adjusted This function is useful when the auto focus does not work well such as in dark places 1 Set the MODE selector to MOVIE or STILL 2 Press FOCUS repeatedly to achieve a sharp focus The 9 manual focus indicator appears on the LCD screen You can select f...

Страница 42: ...ubject to a distant subject Spot light metering mode Select this mode when there is backlight or when there is strong contrast between the subject and the background etc Position the point you want to record on the spot light metering cross hair To cancel PROGRAM AE Press PROGRAM AE repeatedly until the indicator on the LCD screen goes out Notes You cannot select F2 8 in aperture priority mode and...

Страница 43: ...the white balance WHITE BALANCE Normally the white balance is automatically adjusted 1 Set the MODE selector to MOVIE or STILL 2 Select CAMERA and then WHITE BALANCE from the menu 3 Select the desired white balance setting IN DOOR n Places where the lighting condition changes quickly Under bright lighting such as photography studios Under sodium or mercury lamps OUT DOOR Recording a sunrise sunset...

Страница 44: ...mage The date and time are not displayed during recording The date and time are displayed when playing back images 2 3 1 4 Enjoying picture effects P EFFECT 1 Set the MODE selector to MOVIE or STILL 2 Select EFFECT and then P EFFECT from the menu 3 Select the desired mode SOLARIZE The light contrast is clearer and the picture looks like an illustration B W The picture is monochrome black and white...

Страница 45: ...file Print mark Protect mark TEXT Text mark TIFF TIFF mark No mark Normal recording no settings 2 1 This shows the position of the currently displayed images relative to all the recorded images To display the next previous index screen Select v V at the lower left of the LCD screen To return to normal playback single image Select the desired image with the control button Select 3 RETURN Note You c...

Страница 46: ...normal size Zoom in with the zoom button until the zoom scaling indicator 1 1 disappears from the screen or simply press z To record an enlarged image trimming 1Enlarge the image 2Press the shutter button The image is recorded at 640 480 size then the display returns to the image display before enlargement 2 4 3 1 Notes You cannot trim images recorded in TEXT mode or uncompressed images The maximu...

Страница 47: ...es recorded in TEXT mode 2 3 4 1 Playing back the images in order SLIDE SHOW This function is useful for checking the recorded images or for presentations etc 1 Set the MODE selector to PLAY 2 Select FILE and then SLIDE SHOW from the menu Set the following items INTERVAL 1 min one minute 30 sec 30 seconds 10 sec 10 seconds 5 sec 5 seconds 3 sec 3 seconds REPEAT ON Plays back images in a continuous...

Страница 48: ...he A V OUT jack of your camera and to the audio video input jacks of the TV If your TV has stereo type audio input jacks connect the audio plug of the A V connecting cable to the Lch jack DSC S30 Connect the video cable to the VIDEO OUT jack of your camera and to the video input jack of the TV 2 Turn on the TV then start playback on your camera The playback image appears on the TV screen Note You ...

Страница 49: ...DE selector to PLAY then display the INDEX screen 2 Select FILE PROTECT and then ALL or SELECT from the menu 3 When you select ALL Select ON All the images recorded in Memory Stick are protected When you select SELECT Select all the images to protect with the control button then select ENTER In single mode In INDEX mode 1 2 3 1 The selected images are protected To release protection If you selecte...

Страница 50: ... When you select ALL Select ENTER All unprotected images are deleted When you select SELECT Select all the images to delete with the control button then select ENTER In single mode In INDEX mode 1 2 3 1 The delete indicator appears on the selected images and these images are deleted To cancel deleting Select CANCEL in step 2 or 3 Note If there are files on the Memory Stick with names having the sa...

Страница 51: ...ges When you change from a small size to a large size the picture quality deteriorates The original image is retained even after resizing The resized image is recorded as the newest file 1 2 3 1 Copying images COPY You can copy images to another Memory Stick 1 Set the MODE selector to PLAY then display the image to copy 2 Select TOOL COPY and then OK from the menu FILE ACCESS appears 3 When CHANGE...

Страница 52: ...en copying is completed COMPLETE appears To end copying select EXIT To copy the image to another Memory Stick Select CONTINUE and repeat steps 5 and 6 To cancel copying part way Change the MODE selector setting or turn off the power In INDEX mode 1 2 3 4 1 Notes You cannot copy uncompressed images You cannot copy images that are bigger than 1 4 MB at once If NOT ENOUGH MEMORY appears or flashes on...

Страница 53: ...PLAY then display the INDEX screen 2 Select FILE PRINT MARK and then SELECT from the menu 3 Select the images to mark with the control button In single mode In INDEX mode 1 2 3 4 1 4 Select ENTER of the selected images change from green to white To unmark selected print marks Select the images to unmark in step 3 with the control button then select ENTER To unmark all the print marks Select FILE P...

Страница 54: ...the camera from a cold place to a warm place seal the camera in a plastic bag and allow it to adapt to conditions at the new location over a period of time about an hour If moisture condensation occurs Turn off the camera and wait about an hour for the moisture to evaporate Note that if you attempt to record with moisture remaining inside the lens you will be unable to record clear images Unplug t...

Страница 55: ...all a charged battery pack and leave the camera for 24 hours or more with the POWER switch set to OFF On Memory Sticks Memory Stick is a new compact portable and versatile IC recording medium with a data capacity that exceeds a floppy disk Memory Stick is specially designed for exchanging and sharing digital data among Memory Stick compatible products Because it is removable Memory Stick can also ...

Страница 56: ...e color system of the TV must be the same as that of your digital still camera TV color systems differ from country to country Check the following list NTSC system countries Bahama Islands Bolivia Canada Central America Chile Columbia Ecuador Jamaica Japan Korea Mexico Peru Surinam Taiwan the Philippines the U S A Venezuela etc PAL system countries Australia Austria Belgium China Denmark Finland G...

Страница 57: ...connect and then reconnect all power sources after one minute Then turn the power on by sliding the POWER switch down and check that the camera works properly Your camera cannot record images The MODE selector is set to PLAY tSet it to MOVIE or STILL pages 16 20 No Memory Stick has been inserted into your camera tInsert a Memory Stick page 15 The write protect tab on the Memory Stick is set to LOC...

Страница 58: ... is not a malfunction The battery life is short You are recording playing back images under extremely cold temperatures The battery pack is not charged enough tCharge the battery pack fully The battery pack is dead tReplace the battery pack with a new one The battery remaining indicator is incorrect You have used the camera for a long time in an extremely hot or an extremely cold location The batt...

Страница 59: ...IE if you do not operate the camera for about three minutes while the power is on the camera turns off automatically to prevent wearing down the battery tTurn on the camera The battery is discharged tReplace it with a charged battery The image does not appear on the TV screen The video output signal setting of your camera is incorrect tChange the setting page 48 A file error occurs when you play b...

Страница 60: ...cted firmly tDisconnect the USB cable and connect it again firmly Make sure that PC MODE is displayed on the LCD screen page 26 The USB connectors on your personal computer are connected to other equipment besides the keyboard the mouse and your camera tDisconnect the USB cables except for the ones connected to the keyboard the mouse and your camera page 24 Symptom Cause and or Solution ...

Страница 61: ...he capacity of the Memory Stick is full and you cannot record or copy images NO FILE No image has been recorded on the Memory Stick FILE ERROR An error occurred while playing back the image FILE PROTECT The image is protected against erasure for InfoLITHIUM battery only The battery is not the InfoLITHIUM type NOT ENOUGH MEMORY The images you want to copy are too big to copy with your camera DIRECT...

Страница 62: ...ized Sony service facility First three digits Cause and or Corrective Action C 32 ss There is trouble with your camera s hardware tTurn the power off and on again C 13 ss An unformatted Memory Stick is inserted tFormat the Memory Stick page 32 The inserted Memory Stick cannot be used with your camera or is damaged tInsert a new Memory Stick page 15 E 61 ss E 91 ss A camera malfunction that you can...

Страница 63: ... 2 9 W Operation temperature 32 F to 104 F 0 C to 40 C Storage temperature 4 F to 140 F 20 C to 60 C Maximum dimensions 4 1 2 2 3 4 2 3 4 inches 113 68 69 mm w h d Mass Approx 13 oz 370 g including battery pack NP FM50 Memory Stick wrist strap and lens cap etc Built in microphone DSC S50 only Electret condenser microphone Built in speaker DSC S50 only Dynamic speaker AC L10 AC power adaptor Power ...

Страница 64: ...icator H Recording mode indicator I Image size indicator J Self diagnosis function recording time indicator K Number of recorded images L Remaining memory capacity indicator M Moving image VOICE recording time indicator DSC S50 only N Self timer indicator O Spot light metering indicator P Focus macro mode indicator Q Menu bar and guide menu They appear by pressing v on the control button and disap...

Страница 65: ...ar and guide menu A VOL Volume indicator DSC S50 only B Playback pause buttons B during pause X during playback C Fast forward rewind buttons D Recording mode indicator E Image size indicator F Image number number of stored images in Memory Stick G Remaining memory capacity indicator H Counter I Playback image J Play bar K Menu bar and guide menu When playing back still images When playing back mo...

Страница 66: ...E selector 29 Moisture condensation 54 Moving images playing back 22 recording 20 MPEG 20 N Normal charge 9 NTSC system 56 Number of images that you can record by image size 38 in E MAIL mode 38 in VOICE mode 39 P P EFFECT 44 PAL system 56 Playing back moving images 22 still images 21 Playing back multiple images at once 45 Power supply AC power adaptor 12 battery pack 9 Preventing accidental eras...

Страница 67: ......

Страница 68: ...Sony Corporation Printed in Japan ...

Отзывы: