background image

3

EN

Installation

Prevent internal heat build-up by allowing adequate air
circulation. Do not place the unit on surfaces (rugs,
blankets, etc.) or near materials (curtains, draperies) that
may block the ventilation holes.

Do not install the unit near heat sources such as radiators
or air ducts, nor in a place subject to direct sunlight,
excessive dust, mechanical vibration or shock.

Do not place the unit near equipment which generates
magnetism, such as a converter or high voltage power
lines.

Introduction .............................................................................. 3
Precautions ............................................................................... 3
Getting Started ......................................................................... 4
Using Your Monitor ................................................................ 4
Adjustments .............................................................................. 5
Entering New Timings ............................................................ 8

Power Saving Function ........................................................... 8
Plug and Play ........................................................................... 8
Use of the Tilt-Swivel .............................................................. 8
Damper Wire ............................................................................ 8
Specifications ............................................................................ 9
Troubleshooting ..................................................................... 10
TCO’95 Eco-document .......................................................... 43

Table of Contents

Introduction

Congratulations on your purchase of a Sony Multiscan
100ES/200ES!
This monitor incorporates over 25 years of Sony experience
with Trinitron display technology, ensuring excellent
performance and outstanding reliability. The Multiscan
100ES/200ES’s wide scan range (30 – 70 kHz), together with
Digital Multiscan Technology, allows it to sync to any video
mode from standard VGA through VESA 1024 

×

 768 at 85

Hz.

In addition, its two factory preset color modes and one user
adjustable color mode give you unprecedented flexibility in
matching on-screen colors to hard copy printouts.
Furthermore, the Multiscan 100ES/200ES feature digital
controls, raster rotation, power saving, low emissions, and
much more. All together, it delivers incredible performance
with the quality and support you can expect from Sony.

Precautions

Maintenance

Clean the cabinet, glass panel and controls with a soft cloth
lightly moistened with a mild detergent solution. Do not
use any type of abrasive pad, scouring powder or solvent,
such as alcohol or benzine.

Do not rub, touch, or tap the surface of the screen with
sharp or abrasive items, like a ball point pen or a screw
driver. This type of contact may result in a scratched
picture tube.

Clean the screen with a soft cloth. If you use a glass
cleaning liquid, do not use any type of cleaner containing
an anti-static solution or similar additive as this may
scratch the screen's coating.

Warning on Power Connection

Before disconnecting the power cord, wait for at least
30 seconds after turning off the power switch to allow for
the discharging of static electricity on the CRT display
surface.

After the power has been turned on, the CRT is
demagnetized for approximately 5 seconds. This generates
a strong magnetic field around the bezel which may affect
the data stored on magnetic tape or disks near the bezel.
Place such magnetic recording equipment and tapes/disks
at a distance from this unit.

The socket-outlet shall be installed near the equipment
and shall be easily accessible.

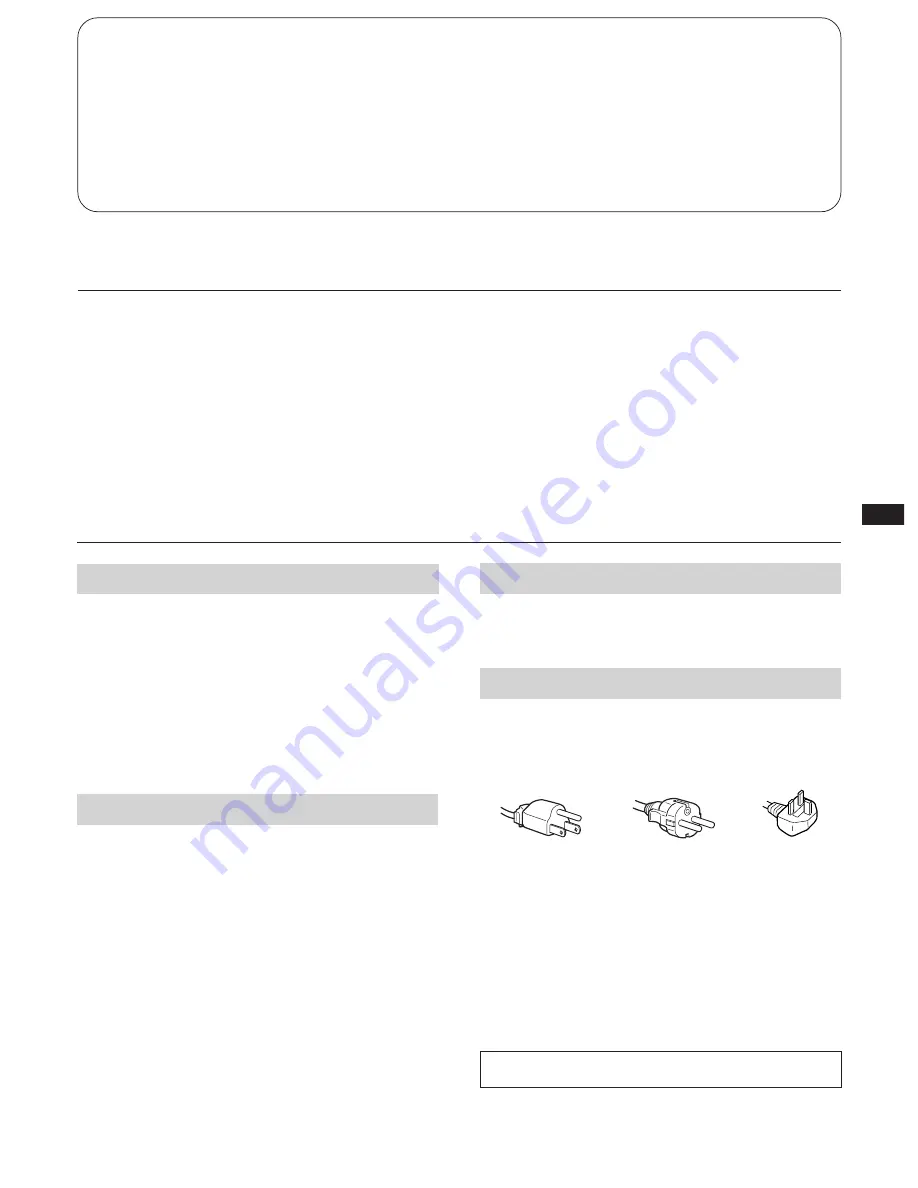
Use the supplied power cord.

For the customers in U.S.A.

If you do not do this, this monitor will not conform to
mandatory FCC standards.

for 100 to 120 V AC

for 220 to 240 V AC

Transportation

When you transport this monitor for repairing or shipping,
use the original carton box and packing materials.

for 240 V only

Содержание CPD-100ES

Страница 1: ...Instructions Mode d emploi Bedienungsanleitung Manual de instrucciones Istruzioni per I uso Trinitron Color Computer Display 3 864 001 31 1 1998 by Sony Corporation F EN CPD 100ES 100EST CPD 200ES 200EST D ES I C ...

Страница 2: ...this manual could void your authority to operate this equipment INFORMATION This product complies with Swedish National Council for Metrology MPR standards issued in December 1990 MPR II for very low frequency VLF and extremely low frequency ELF INFORMATION Ce produit est conforme aux normes du Swedish National Council for Metrology de décembre 1990 MPR II en ce qui concerne les fréquences très ba...

Страница 3: ...ions and much more All together it delivers incredible performance with the quality and support you can expect from Sony Precautions Maintenance Clean the cabinet glass panel and controls with a soft cloth lightly moistened with a mild detergent solution Do not use any type of abrasive pad scouring powder or solvent such as alcohol or benzine Do not rub touch or tap the surface of the screen with ...

Страница 4: ...80 800 600 800 600 832 624 1024 768 1024 768 1280 1024 Graphics Mode VGA 1 Graphic VESA 2 VESA 2 VESA 2 Macintosh 3 16 Color VESA 2 VESA 2 VESA 2 Vertical Frequency 60 Hz 85 Hz 75 Hz 85 Hz 75 Hz 75 Hz 85 Hz 60 Hz Getting Started Before using this monitor please make sure that the following items are included in your package Multiscan 100ES 200ES monitor 1 power cord 1 Windows Monitor Information D...

Страница 5: ... the OSD is on The horizontal and vertical frequencies for each input signal received appear on the BRIGHTNESS CONTRAST OSD Adjustments When one of the preset type signals is input no picture adjustment is necessary You can however adjust the picture to your preferences by following the procedure described below You can adjust all items on the OSD On Screen Display Control Panel p Before adjusting...

Страница 6: ... the Picture Size The adjustment data becomes the individual setting for each input signal received 1 Press the SIZE button The SIZE OSD appears 2 For vertical adjustment Press the buttons to enlarge to diminish For horizontal adjustment Press the buttons to diminish to enlarge To erase the SIZE OSD press the SIZE button again The SIZE OSD automatically disappears 10 seconds after you release the ...

Страница 7: ...e Color Temperature The selected color temperature becomes the common setting for all input signals 1 Press the COLOR button The COLOR TEMPERATURE OSD appears 2 Adjust with the and buttons To select 5000K or 9300K Press the buttons The selected color temperature is indicated in yellow to select 5000K to select 9300K To obtain the desired color temperature between 5000K and 9300K Press the buttons ...

Страница 8: ...d the monitor synchronizes with the V CLK in accordance with the VESA standards and outputs the EDID Extended Display Identification Data to the data line When a DDC2B host system is connected the monitor automatically switches to the DDC2B communication DDCTM is a trademark of the Video Electronics Standard Association Use of the Tilt Swivel With the tilt swivel this unit can be adjusted to be vi...

Страница 9: ...327 243 mm w h 12 7 8 9 5 8 inches 16 0 viewing image Logical resolution Horizontal Max 1280 dots Vertical Max 1024 lines Physical resolution Horizontal Max 1280 dots Vertical Max 1024 lines Standard image area Approx 312 234 mm w h 12 9 32 9 7 32 inches Deflection frequency Horizontal 30 to 70 kHz Vertical 50 to 120 Hz AC input voltage current 100 to 240 V 50 60 Hz 2 1 A Dimensions Approx 406 431...

Страница 10: ...ow to set the refresh rate consult the dealer of your computer or video board Screen image is not centered or sized properly Adjust the CENTER SIZE or GEOMETRY on the OSD pages 5 6 Some video modes do not fill the screen to the edge of the monitor There is no single answer to solve the problem There is a tendency to have this problem on higher refresh timings and Macintosh video timings Picture is...

Страница 11: ... la lumière directe du soleil à des poussières excessives à des vibrations ou à des chocs mécaniques N installez pas l appareil à proximité d un équipment qui génère un champ magnétique comme un convertisseur ou des lignes à haute tension Utilisez le cordon d alimentation fourni Pour les clients aux Etats Unis Si vous ne le faites pas ce moniteur ne sera pas conforme aux normes FCC en vigueur Avan...

Страница 12: ...ement prêt à l emploi Pour les modes moins courants la technologie numérique Multiscan du Multiscan 100ES 200ES réalise tous les réglages complexes nécessaires pour assurer une haute qualité d image pour n importe quelle synchronisation entre 30 et 70 kHz Ordinateur IBM ou compatible vers la sortie vidéo Ordinateur Macintosh ou compatible vers la sortie vidéo adaptateur Macintosh non fourni Cordon...

Страница 13: ...a touche RESET pendant que le menu est affiché Réglage de la luminosité de l image La valeur introduite devient le réglage commun à tous les signaux d entrée 1 Appuyez sur la touche Le menu BRIGHTNESS CONTRAST apparaît 2 Appuyez sur les touches pour régler la luminosité de l image pour moins de luminosité pour plus de luminosité Le menu BRIGHTNESS CONTRAST disparaît environ 3 secondes après que vo...

Страница 14: ...r réduire la taille de l image Pour le réglage de la taille horizontale Appuyez sur les touches pour réduire la taille de l image pour agrandir l image Pour désactiver le menu SIZE appuyez à nouveau sur la touche SIZE Le menu SIZE disparaît automatiquement 10 secondes après que vous avez relâché les touches Pour réinitialiser le réglage appuyez sur la touche RESET pendant que le menu est affiché 2...

Страница 15: ...OLOR Le menu COLOR TEMPERATURE disparaît 10 secondes après que vous avez relâché les touches Pour réinitialiser le réglage appuyez sur la touche RESET pendant que le menu est affiché Restauration des valeurs par défaut Pour restaurer un réglage individuel Appuyez sur la touche correspondant au réglage à réinitialiser puis appuyez sur la touche RESET avant que l écran OSD On Screen Display disparai...

Страница 16: ... ordinateur équipé du Display Power Management Signaling DPMS S il détecte l absence du signal de synchronisation provenant de l ordinateur il réduit la consommation électrique de la façon suivante ATTENTION La fonction d économie d énergie met automatiquement le moniteur en mode désactivé si l interrupteur d alimentation est actionné sans qu il y ait d entrée de signal vidéo Dès que les synchroni...

Страница 17: ...ST Tube image 0 25 mm de pas d ouverture de grille 17 pouces en diagonale 90 de déflexion Taille de l image affichée Env 327 243 mm l h 12 7 8 9 5 8 pouces Image affichée de 16 0 pouces Résolution logique Horizontale Max 1280 points Verticale Max 1024 lignes Résolution physique Horizontale Max 1280 points Verticale Max 1024 lignes Taille standard de l image Env 312 234 mm l h 12 9 32 9 7 32 pouces...

Страница 18: ... votre ordinateur ou de votre carte vidéo L image écran n est pas centrée ou correctement dimensionnée Réglez les paramètres CENTER SIZE et GEOMETRY via les menus d affichage pages 13 14 Certains modes vidéo ne remplissent pas l écran jusqu aux bords du moniteur Aucun remède à ce problème Ce problème a tendance à se manifester au niveau des synchronisations de régénération supérieures et des synch...

Страница 19: ...es in allem bietet dieses Gerät eine ausgezeichnete Leistung mit der Qualität und der Unterstützung die Sie von Sony immer erwarten können Sicherheitsmaßnahmen Achtung bei der Netzverbindung Verwenden Sie das mitgelieferte Netzkabel Für Kunden in den USA Wenn Sie nicht das mitgelieferte Netzkabel verwenden entspricht das Gerät nicht den obligatorischen FCC Standards Für Kunden in Großbritannien We...

Страница 20: ...s Warenzeichen der Microsoft Corporation in den Vereinigten Staaten von Amerika und anderen Ländern Netzkabel mitgeliefert an Netzsteckdose an Bildschirmausgang an Bildschirmausgang Nr 1 2 3 4 5 6 7 8 Horizontale Frequenz 31 5 kHz 43 3 kHz 46 9 kHz 53 7 kHz 49 7 kHz 60 0 kHz 68 7 kHz 64 0 kHz Auflösung Punkte Zeilen 640 480 640 480 800 600 800 600 832 624 1024 768 1024 768 1280 1024 Grafikmodus VG...

Страница 21: ...ET solange die Bildschirmanzeige zu sehen ist Anpassungen Wird eine der voreingestellten Signale eingespeist braucht das Bild nicht gesondert eingestellt zu werden Sie können das Bild jedoch anhand des unten erläuterten Verfahrens Ihren Wünschen gemäß einstellen Dabei nehmen Sie sämtliche Einstellungen mit Hilfe der Bildschirmmenüs vor OSD Bedienfeld p Bevor Sie die Einstellungen vornehmen schalte...

Страница 22: ...Sekunden nachdem Sie die Tasten wieder losgelassen haben Um den Wert zurückzusetzen drücken Sie RESET solange die Bildschirmanzeige zu sehen ist Einstellen der Bildgröße Der eingestellte Wert gilt nur für das gerade eingespeiste Eingangssignal 1 Drücken Sie die Taste SIZE Das Menü SIZE erscheint 2 Die Bildhöhe Stellen Sie mit den Tasten ein Mit vergrößern Sie das Bild in vertikaler Richtung Mit ve...

Страница 23: ...ie mit den Tasten ein Mit wählen Sie eine höhere Temperatur aus Mit wählen Sie eine niedrigere Temperatur aus Die zuletzt eingestellte Farbtemperatur können Sie mit den Tasten wieder aufrufen Wenn Sie die Taste COLOR noch einmal drücken verschwindet das Menü COLOR TEMPERATURE Es wird jedoch auch automatisch ausgeblendet und zwar 10 Sekunden nachdem Sie die Tasten wieder losgelassen haben Um den We...

Страница 24: ...ling arbeitet Wenn der Monitor anzeigt daß kein Synchronisationssignal vom Rechner eingeht reduziert er die Leistungsaufnahme folgendermaßen VORSICHT Die Energiesparfunktion schaltet den Monitor automatisch in den Status Deaktiviert wenn das Gerät eingeschaltet wird und keine Videosignale eingehen Wenn horizontale und vertikale Synchronisationssignale festgestellt werden kehrt der Monitor automati...

Страница 25: ...lösung Horizontal max 1280 Punkte Vertikal max 1024 Zeilen Physikalische Auflösung Horizontal max 1280 Punkte Vertikal max 1024 Zeilen Standard Bildfläche ca 312 234 mm B H Ablenkfrequenz Horizontal 30 bis 70 kHz Vertikal 50 bis 120 Hz Eingangsspannung 100 bis 240 V Wechselstrom 50 60 Hz 2 1 A Abmessungen ca 406 431 5 420 mm B H T Gewicht ca 18 5 kg Technische Daten Signal Masse Blau Masse Masse B...

Страница 26: ...ert oder die Größe stimmt nicht Stellen Sie die Werte mit Hilfe der Menüs CENTER SIZE und GEOMETRY korrekt ein Seite 21 22 Bei einigen Videomodi wird der Bildschirm nicht bis zum Rand des Monitors ausgefüllt Für dieses Problem sind mehrere Faktoren verantwortlich Dieses Problem tritt in der Regel bei hohen Auffrischungs Timings und bei Macintosh Video Timings auf Das Bild ist unscharf Stellen Sie ...

Страница 27: ...recta del sol a polvo excesivo o a vibraciones o sacudidas mecánicas Mantenga la unidad alejada de cualquier equipo que emita radiaciones magnéticas como transformadores o líneas eléctricas de alto voltaje Precauciones Mantenimiento Limpie el exterior el panel de cristal y los controles con un paño suave ligeramente humedecido en una solución detergente poco concentrada No utilice ningún tipo de e...

Страница 28: ...o horizontal 3 6 µseg Multiscan 100ES 3 0 µseg Multiscan 200ES Ancho de sincronización vertical 560 µseg Nota CPD 100ES 100EST o CPD 200ES 200EST no se aplica al modo de color Macintosh 21 CPD 100ES 100EST y CPD 200ES 200EST Procedimientos iniciales Antes de usar el monitor asegúrese de que en el paquete se incluyen los accesorios siguientes Monitor Multiscan 100ES 200ES 1 cable de alimentación 1 ...

Страница 29: ...bida 1 Oprima el botón CENTER Aparece la indicación CENTER OSD 2 Para realizar el ajuste vertical Oprima los botones para desplazarse hacia arriba para desplazarse hacia abajo Para realizar el ajuste horizontal Oprima los botones para desplazarse a la izquierda para desplazarse a la derecha Para borrar la indicación CENTER OSD vuelva a oprimir el botón CENTER La indicación CENTER OSD desaparece au...

Страница 30: ...undos después de soltar los botones Para reajustar oprima el botón RESET mientras la función OSD esté activada Ajuste del tamaño de la imagen Los datos de ajuste se convierten en el ajuste individual para cada señal de entrada recibida 1 Oprima el botón SIZE Aparece la indicación SIZE OSD 2 Para realizar el ajuste vertical Oprima los botones para ampliar para reducir Para realizar el ajuste horizo...

Страница 31: ... color La temperatura del color seleccionada se convierte en el ajuste común para todas las señales de entrada 1 Oprima el botón COLOR Aparece la indicación COLOR TEMPERATURE OSD 2 Realice el ajuste con los botones y Para seleccionar 5000K o 9300K Oprima los botones La temperatura del color seleccionada se indica en color amarillo para seleccionar 5000K para seleccionar 9300K Para obtener la tempe...

Страница 32: ...olverá automáticamente al estado de funcionamiento normal Función Plug and Play Este monitor cumple las normas DDCTM 1 y DDC2B que son las normas de Canal de Datos de Visualización DDC de VESA Cuando se conecta un sistema central DDC1 el monitor se sincroniza con V CLK de acuerdo con las normas VESA y transmite la EDID Extended Display Identification Data a la línea de datos Cuando se conecta un s...

Страница 33: ...mm an al aprox 12 7 8 9 5 8 pulgadas Imagen de visualización de 16 0 pulgadas Resolución lógica Horizontal Máx 1280 puntos Vertical Máx 1024 líneas Resolución física Horizontal Máx 1280 puntos Vertical Máx 1024 líneas Área estándar de la imagen 312 234 mm an al aprox 12 9 32 9 7 32 pulgadas Frecuencia de deflexión Horizontal 30 a 70 kHz Vertical 50 a 120 Hz Tensión intensidad de entrada CA 100 a 2...

Страница 34: ...sultados Si el problema continúa comuniquerse con el distribuidor autorizado de Sony más próximo Tome nota del modelo y número de serie de su monitor así como de la marca y modelo del ordenador y la tarjeta de video Esta sección puede ayudarle a aislar un problema de forma que no tenga necesidad de comunicarse con el servicio técnico e interrumpir así su productividad No aparece ninguna imagen Si ...

Страница 35: ...iscan 100ES 200ES si traducono in termini di prestazioni straordinarie con la qualità e l assistenza tipiche di tutti i prodotti Sony Precauzioni Avvertenza sui collegamenti per l alimentazione Usare il cavo di alimentazione in dotazione PerlaclientelanegliU S A Se non si utilizza il cavo il dotazione il monitor non sarà conforme agli standard FCC obbligatori Per la clientela nel Regno Unito Se si...

Страница 36: ...questo monitor come tipo di monitor dal Control Panel di Windows 95 98 Alcune schede grafiche PC non sono conformi a DDC Se la scheda grafica PC ha difficoltà a comunicare con questo monitor caricare il disco Windows Monitor Information Disk e selezionare il nome del modello di questo monitor come tipo di monitor Condizioni di sincronizzazione orizzontale raccomandate L ampiezza di sincronizzazion...

Страница 37: ...egati p Tutte le regolazioni vengono memorizzate automaticamente Le frequenze orizzontale e verticale per ogni segnale d ingresso ricevuto appaiono sul display BRIGHTNESS CONTRAST OSD Regolazione del contrasto dell immagine I dati della regolazione diventano l impostazione comune di tutti i segnali d ingresso 1 Premere il tasto Il controllo BRIGHTNESS CONTRAST OSD appare 2 Premere i tasti per rego...

Страница 38: ...amente 10 secondi dopo il rilascio dei tasti Per reimpostare premere il tasto RESET mentre il controllo a schermo è attivo Regolazione della rotazione dell immagine I dati della regolazione diventano l impostazione comune per tutti i segnali di ingresso 1 Premere il tasto GEOM Il controllo GEOMETRY OSD appare Regolazioni SIZE SIZE 32 68 GEOM GEOMETRY 32 68 Regolazione della dimensione dell immagin...

Страница 39: ...Il controllo COLOR TEMPERATURE OSD scompare automaticamente 10 secondi dopo il rilascio dei tasti Per reimpostare premere il tasto RESET mentre il controllo a schermo è attivo Ripristino delle impostazioni di fabbrica Per reimpostare un dato di regolazione Premere il tasto corrispondente al dato desiderato poi premere il tasto RESET prima che scompaia l indicazione a schermo OSD Per reimpostare tu...

Страница 40: ...onitor ritornerà automaticamente allo stato di funzionamento normale Il presente monitor è conforme agli standard DDCTM 1 e DDC2B Display Data Channel del marchio VESA Quando un sistema ospite DDC1 viene collegato il monitor si sincronizza con il V CLK secondo gli standard VESA ed emette EDID Extended Display Identification Data sulla riga di dati Quando viene collegato un sistema ospite DDC2B il ...

Страница 41: ...ne visibile Circa 327 243 mm l a Immagine visibile 16 0 Risoluzione logica Orizzontale Max 1280 punti Verticale Max 1024 linee Risoluzione fisica Orizzontale Max 1280 punti Verticale Max 1024 linee Area dell immagine standard Circa 312 234 mm l a Frequenza di deviazione Orizzontale da 30 a 70 kHz Verticale da 50 a 120 Hz Tensione corrente di ingresso CA 100 240V 50 60 Hz 2 1 A Dimensioni Circa 406...

Страница 42: ...aggiori dettagli su come impostare il valore di rinfresco contattare il rivenditore del computer o della scheda video Soluzione dei problemi L immagine sullo schermo non è centrata o non è proporzionata correttamente Regolare il CENTER SIZE e GEOMETRY sull OSD pagina 37 38 Alcuni modi video non riempiono lo schermo per tutta la grandezza del monitor Per risolvere questo problema le soluzioni sono ...

Страница 43: ...n offices consume an enormous amount of energy since they are often left running continuously What does labelling involve This product meets the requirements for the TCO 95 scheme which provides for international and environmental labelling of personal computers The labelling scheme was developed as a joint effort by the TCO The Swedish Confederation of Professional Employees Naturskyddsforeningen...

Страница 44: ...ally bound chlorine and bromine Lead Lead can be found in picture tubes display screens solders and capacitors Lead damages the nervous system and in higher doses causes lead poisoning TCO 95 requirement permits the inclusion of lead since no replacement has yet been developed Cadmium Cadmium is present in rechargeable batteries and in the colourgenerating layers of certain computer displays Cadmi...

Отзывы: