background image

23

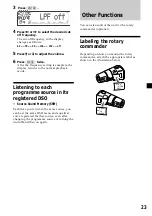
3

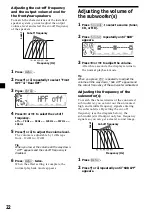
Press 

(ENTER)

.

4

Press 

<

 or 

,

 to select the desired cut-

off frequency.

The cut-off frequency in the display
changes as follows:

62 

y

 78 

y

 99 

y

 125 

y

 157 

y

 off

5

Press 

M

 or 

m

 to adjust the volume.

6

Press 

(MENU)

 twice.

After the frequency setting is complete, the
display returns to the normal playback
mode.

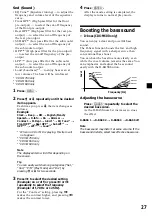
Listening to each
programme source in its
registered DSO

— Source Sound Memory (SSM)

Each time you return to the same source, you
can hear the same DSO menu and equalizer
curve registered for that source, even after
changing the programme source or turning the
unit off and then on again.

Other Functions

You can also control the unit with a rotary
commander (optional).

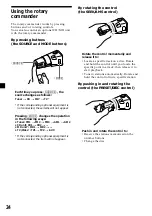
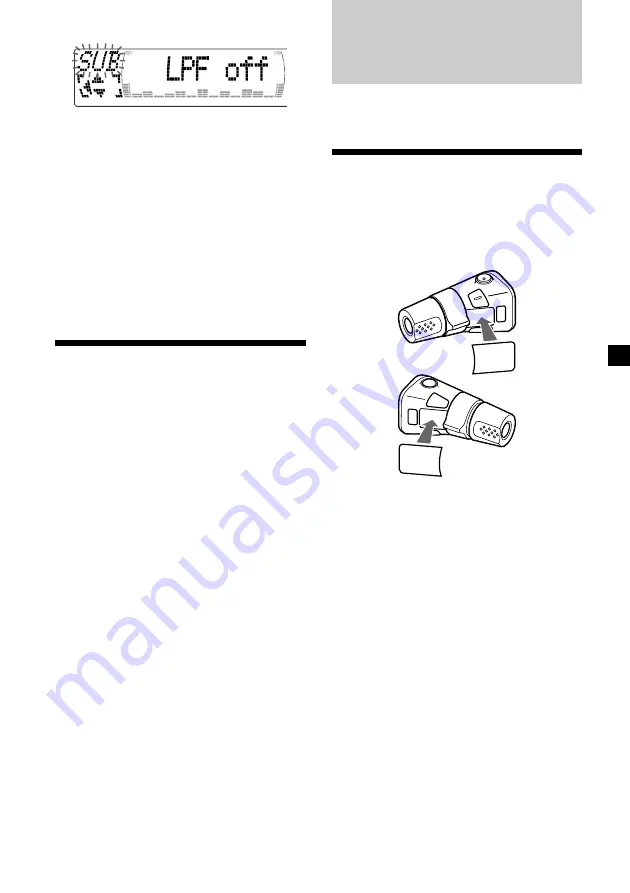
Labeling the rotary
commander

Depending on how you mount the rotary
commander, attach the appropriate label as
shown in the illustration below.

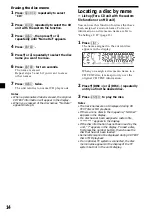
SOUND

DSPL

MODE

SOUND

DSPL

MODE

Содержание CDX-M600 - Fm/am Compact Disc Player

Страница 1: ...urni Para obtener información sobre la instalación y las conexiones consulte el manual de instalación conexiones suministrado Owner s Record The model and serial numbers are located on the bottom of the unit Record these numbers in the space provided below Refer to these numbers whenever you call upon your Sony dealer regarding this product Model No CDX M750 M650 M600 Serial No 3 047 692 11 1 FR E...

Страница 2: ...g the following controller accessories Supplied accessory Card remote commander RM X94 for the CDX M650 RM X93 for the CDX M600 RM X92 for the CDX M750 Optional accessory Rotary commander RM X4S In addition to the CD playback and radio operations you can expand your system by connecting optional CD MD units 1 When you operate this unit or a connected optional CD unit with the CD TEXT function the ...

Страница 3: ...nning and may cause malfunction or ruin your discs Do not use second hand or rental CDs that have a sticky residue on the surface for example from peeled off stickers or from ink or glue leaking from under the stickers There are paste residue Ink is sticky Do not use rental CDs with old labels that are beginning to peel off Stickers that are beginning to peel away leaving a sticky residue Do not u...

Страница 4: ...lecting the listening position 20 Selecting a soundstage menu Dynamic Soundstage Organizer DSO 21 Adjusting the balance BAL 21 Adjusting the front and rear fader 21 Adjusting the volume of the subwoofer s 22 Listening to each programme source in its registered DSO Source Sound Memory SSM 23 Other Functions Labeling the rotary commander 23 Using the rotary commander 24 Adjusting the sound character...

Страница 5: ...21 CDX M600 D BASS button 27 9 OPEN CLOSE button 10 0 LIST button 13 14 18 19 30 31 List up 14 19 30 31 Refer to the pages listed for details qa M m PRST DISC buttons 8 9 11 12 13 14 15 17 18 19 20 22 23 27 28 During CD MD playback Disc change 11 During radio reception Preset stations select 17 During TV reception Band select 29 qs ENTER button 9 11 13 14 15 16 17 18 19 20 22 23 27 29 31 qd MODE b...

Страница 6: ...6 Location of controls SOURCE 1 2 3 4 5 6 CLOSE OFF DISC DISC DSO ENTER S O U N D M E N U L I S T REP SHUF DSPL MODE CDX M750 M650 M600 Security side Operation side ...

Страница 7: ...Number buttons During radio reception Preset number select 16 17 During CD MD playback 1 REP 12 2 SHUF 12 During TV reception Preset number select 30 ql SOUND button w ENTER button wa CLOSE button Warning when installing in a car without ACC accessory position on the ignition key switch Be sure to press OFF on the unit for two seconds to turn off the clock display after turning off the engine When...

Страница 8: ...n the unit For details on operation refer to page 10 CD MD and page 16 radio Turning off the unit Press OFF to stop CD MD playback or FM AM reception the key illumination and display remains on Press OFF for two seconds to completely turn off the unit Note If your car has no ACC position on the ignition key switch be sure to turn the unit off by pressing OFF for two seconds to avoid car battery we...

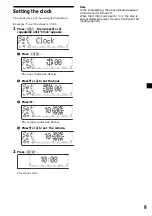
Страница 9: ...ress ENTER The hour indication flashes 2 Press M or m to set the hour 3 Press The minute indication flashes 4 Press M or m to set the minute 2 Press ENTER The clock starts Note In the initial setting the clock indication appears while the unit is turned off When the D Info mode is set to on the time is always displayed except for some functions of SA mode page 26 ...

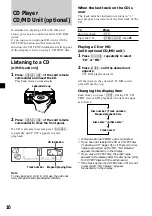
Страница 10: ...ion returns to 1 and playback restarts from the first track of the CD To Press Stop playback OFF Eject the CD OPEN CLOSE then Z Playing a CD or MD with optional CD MD unit 1 Press SOURCE repeatedly to select CD or MD 2 Press MODE until the desired unit appears CD MD playback starts All the discs in the current CD MD unit is played from the top Changing the display item Each time you press DSPL dur...

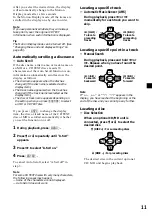
Страница 11: ... display item the disc or track name of the CD TEXT disc or MD is scrolled automatically whether you set the function on or off 1 During playback press MENU 2 Press M or m repeatedly until A Scrl appears 3 Press to select A Scrl on 4 Press ENTER To cancel Auto Scroll select A Scrl off in step 3 Note For some CD TEXT discs with very many characters the following cases may happen Some of the charact...

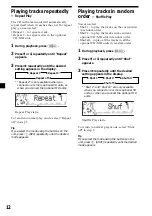
Страница 12: ...tons on the unit press 1 REP repeatedly until the desired mode appears Playing tracks in random order Shuffle Play You can select Shuf 1 to play the tracks on the current disc in random order Shuf 2 to play the tracks in the current optional CD MD unit in random order Shuf all to play all the tracks in all the optional CD MD units in random order 1 During playback press MENU 2 Press M or m repeate...

Страница 13: ...hes If you press the previous character flashes 3 Repeat steps 1 and 2 to enter the entire name 5 To return to normal CD play mode press ENTER Tips To erase or correct a name enter for each character There is another way to start labeling a CD Press LIST for two seconds instead of steps 2 and 3 You can also complete the operation by pressing LIST for two seconds instead of step 5 Displaying the di...

Страница 14: ...een assigned a custom name For more information on disc memo names refer to Labeling a CD page 13 1 Press LIST The name assigned to the current disc appears in the display When you assign a disc memo name to a CD TEXT disc it takes priority over the original CD TEXT information 2 Press M DISC or m DISC repeatedly until you find the desired disc 3 Press ENTER to play the disc Notes The track names ...

Страница 15: ...eat step 4 to set Play or Skip for all the tracks 6 Press MENU twice The unit returns to normal CD play mode Notes You can set Play and Skip for up to 24 tracks You cannot set Skip for all the tracks on a CD Playing specific tracks only You can select Bank on to play the tracks with the Play setting Bank inv Inverse to play the tracks with the Skip setting 1 During playback press MENU then press M...

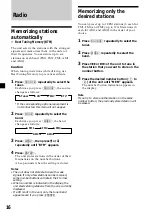
Страница 16: ...s on each band FM1 FM2 FM3 AM1 and AM2 Caution When tuning in stations while driving use Best Tuning Memory to prevent accidents 1 Press SOURCE repeatedly to select the tuner Each time you press SOURCE the source changes as follows B Tuner B CD B MD B TV If the corresponding optional equipment is not connected this item will not appear 2 Press MODE repeatedly to select the band Each time you press...

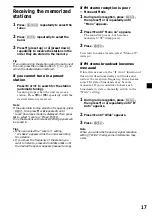
Страница 17: ...ect the Local on setting LCL Seek appears while the unit is searching for a station If you know the frequency of the station you want to listen to press and hold or until the desired frequency appears manual tuning If FM stereo reception is poor Monaural Mode 1 During radio reception press MENU then press M or m repeatedly until Mono appears 2 Press until Mono on appears The sound improves but bec...

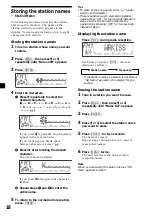
Страница 18: ...e name 5 To return to the normal radio reception press ENTER Tips To erase or correct a name enter under bar for each character There is another way to start storing station names Press LIST for two seconds instead of steps 2 and 3 You can also complete the operation by pressing LIST for two seconds instead of step 5 Displaying the station name Press DSPL during radio reception Each time you press...

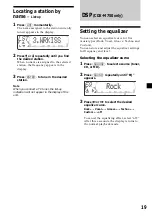
Страница 19: ...ation will not appear in the display of the unit DSP CDX M750 only Setting the equalizer You can select an equalizer curve for five music types Rock Vocal Groove Techno and Custom You can store and adjust the equalizer settings for frequency and level Selecting the equalizer curve 1 Press SOURCE to select a source tuner CD or MD 2 Press SOUND repeatedly until EQ appears 3 Press or to select the de...

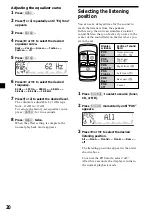
Страница 20: ...of sound field Normal setting 1 2 3 Front part 1 2 Right front 2 Left front 1 Rear part 3 Cancel 2 1 3 Display window POS All POS Front POS Front R POS Front L POS Rear POS off Selecting the listening position You can set a delayed time for the sound to reach the listeners from the speakers In this way the unit can simulate a natural sound field so that you feel as if you are in the center of the ...

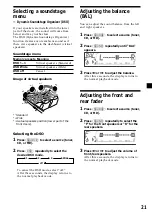
Страница 21: ...source tuner CD or MD 2 Press DSO repeatedly to select the desired DSO mode B 1 B 2 B 3 B Wide off b b b b b To cancel the DSO mode select off After three seconds the display returns to the normal playback mode Adjusting the balance BAL You can adjust the sound balance from the left and right speakers 1 Press SOURCE to select a source tuner CD or MD 2 Press SOUND repeatedly until BAL appears 3 Pre...

Страница 22: ...ng is complete the normal playback mode appears Cut off frequency Adjusting the volume of the subwoofer s 1 Press SOURCE to select a source tuner CD or MD 2 Press SOUND repeatedly until SUB appears 3 Press or to adjust the volume After three seconds the display returns to the normal playback mode Tip When you press VOL repeatedly to adjust the volume all the way down Sub ATT appears and the cutout...

Страница 23: ... programme source in its registered DSO Source Sound Memory SSM Each time you return to the same source you can hear the same DSO menu and equalizer curve registered for that source even after changing the programme source or turning the unit off and then on again Other Functions You can also control the unit with a rotary commander optional Labeling the rotary commander Depending on how you mount...

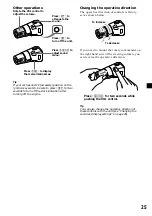
Страница 24: ... number buttons Change the disc Using the rotary commander The rotary commander works by pressing buttons and or rotating controls You can also control an optional CD MD unit with the rotary commander By pressing buttons the SOURCE and MODE buttons Each time you press SOURCE the source changes as follows Tuner t CD t MD t TV If the corresponding optional equipment is not connected these items will...

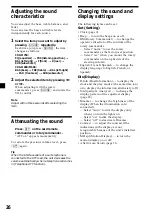
Страница 25: ...DSPL to display the memorized names Press SOUND to adjust sound menu Changing the operative direction The operative direction of controls is factory set as shown below If you need to mount the rotary commander on the right hand side of the steering column you can reverse the operative direction Press SOUND for two seconds while pushing the VOL control Tip You can also change the operative directio...

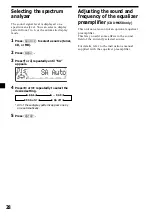
Страница 26: ...tions in the display are not recognizable because of the unit s installed position M Dspl Motion Display to turn the motion display on or off A Scrl Auto Scroll page 11 Adjusting the sound characteristics You can adjust the bass treble balance and fader You can store the bass and treble levels independently for each source 1 Select the item you want to adjust by pressing SOUND repeatedly Each time...

Страница 27: ...ing this item will not appear 2 CDX M750 only 3 CDX M650 only 4 CDX M600 only Note The displayed item will differ depending on the source Tip You can easily switch among categories Set Snd P M Play Mode and Dis by pressing M or m for two seconds 3 Press to select the desired setting Example on or off or press or repeatedly to select the frequency Example off 78 Hz or 125 Hz For the Contrast settin...

Страница 28: ...lied with the equalizer preamplifier Selecting the spectrum analyzer The sound signal level is displayed on a spectrum analyzer You can select a display pattern from 1 to 6 or the automatic display mode 1 Press SOURCE to select a source tuner CD or MD 2 Press MENU 3 Press M or m repeatedly until SA appears 4 Press or repeatedly to select the desired setting B SA 1 b B SA 6 b B SA Auto b B SA off b...

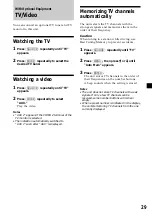
Страница 29: ...matically The unit selects the TV channels with the strongest signals and memorizes them in the order of their frequency Caution When tuning in a station while driving use Best Tuning Memory to prevent accidents 1 Press SOURCE repeatedly until TV appears 2 Press MENU then press M or m until Auto Mem appears 3 Press ENTER The unit stores TV channels in the order of their frequencies on the number b...

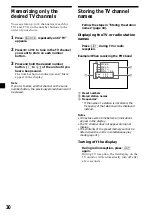
Страница 30: ... page 31 Turning off the display During radio reception press LIST again During TV reception the list display on the TV monitor will automatically turn off after a few seconds FM 1 2 3 4 5 6 W W W C B K 1 1 B T 0 0 S U 2 S WR K I S 1 S L 1 9 7 Memorizing only the desired TV channels You can store up to 12 channels six each for TV1 and TV2 on the number buttons in the order of your choice 1 Press S...

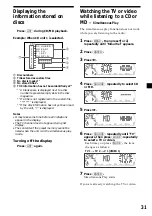
Страница 31: ...ing list display The contents of the preset memory cannot be listed when the unit is in the simultaneous play mode Turning off the display Press LIST again CD 1 1 2 3 4 5 6 7 9 1 0 8 S M B L C C O A I H H Z C S O U A H Z P B R T I E T N R T Watching the TV or video while listening to a CD or MD Simultaneous Play The simultaneous play function does not work while you are listening to the radio 1 Pr...

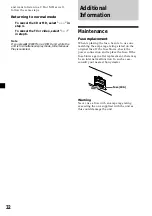
Страница 32: ...canceled Additional Information Maintenance Fuse replacement When replacing the fuse be sure to use one matching the amperage rating stated on the original fuse If the fuse blows check the power connection and replace the fuse If the fuse blows again after replacement there may be an internal malfunction In such a case consult your nearest Sony dealer Warning Never use a fuse with an amperage rati...

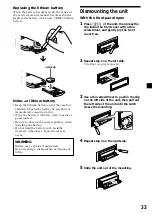
Страница 33: ...Do not hold the battery with metallic tweezers otherwise a short circuit may occur WARNING Battery may explode if mistreated Do not recharge disassemble or dispose of in fire x side up Dismounting the unit With the front panel open 1 Press OPEN of the unit then press the clip inside the front cover with a thin screwdriver and gently pry the front cover free 2 Repeat step 1 on the left side The fro...

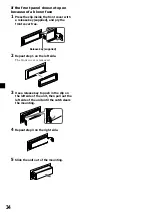
Страница 34: ...d and pry the front cover free 2 Repeat step 1 on the left side The front cover is removed 3 Use a release key to push in the clip on the left side of the unit then pull out the left side of the unit until the catch clears the mounting 4 Repeat step 3 on the right side 5 Slide the unit out of the mounting Release key supplied ...

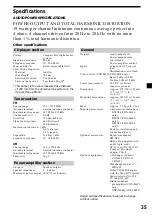
Страница 35: ...PECIFICATIONS POWER OUTPUT AND TOTAL HARMONIC DISTORTION 19 watts per channel minimum continuous average power into 4 ohms 4 channels driven from 20 Hz to 20 kHz with no more than 1 total harmonic distortion General Outputs Audio outputs 3 Power antenna relay control lead Power amplifier control Inputs Telephone ATT control lead Illumination control lead Tone controls CDX M650 CDX M600 only Bass 9...

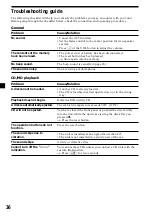
Страница 36: ...F You have closed the front panel or pushed the disc forcibly into the unit while the unit was ejecting the disc after you pressed Z t Press the reset button Press the reset button The unit is installed at an angle of more than 60 The unit is not installed in a sturdy part of the car A dirty or defective disc You cannot label CDs unless you connect a CD unit with the custom file function t Press L...

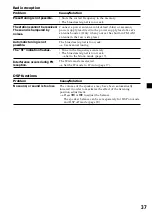
Страница 37: ... too weak t Set to the Mono mode page 17 The Wide mode is selected t Set the IF mode to IF Auto page 17 Problem Preset tuning is not possible The stations cannot be received The sound is hampered by noises Automatic tuning is not possible The ST indication flashes Interference occurs during FM reception Cause Solution The volume of the speakers may have been automatically lowered in order to maxim...

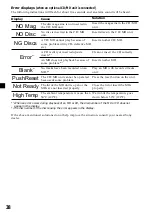
Страница 38: ...e disc magazine is not inserted in the CD MD unit No disc is inserted in the CD MD unit A CD MD cannot play because of some problem dirty CD defective MD etc A CD is dirty or inserted upside down 2 An MD does not playback because of some problem 2 No tracks have been recorded on an MD 2 The CD MD unit cannot be operated because of some problem The lid of the MD unit is open or the MDs are not inse...

Страница 39: ...39 ...

Страница 40: ... titres des plages Ces informations sont enregistrées sur le disque Précautions Si votre voiture est parquée en plein soleil et si la température à l intérieur de l habitacle a considérablement augmenté laissez refroidir l appareil avant de l utiliser Si l appareil n est pas alimenté vérifiez d abord les connexions Si tout est en ordre vérifiez le fusible Si votre voiture est équipée d une antenne...

Страница 41: ...ins disques CD R ne puissent être enregistrés sur cet appareil Vous ne pouvez pas reproduire de disques CD R non finalisés la finalisation est indispensable pour pouvoir reproduire des disques CD R enregistrés sur le lecteur CD audio Vous ne pouvez pas reproduire des CD RW CD réinscriptibles sur cet appareil Remarques sur la manipulation des CD Un disque souillé ou défectueux peut occasionner des ...

Страница 42: ...0 seulement Réglage de l égaliseur 19 Sélection de la position d écoute 20 Sélection d un menu de niveau sonore Dynamic Soundstage Organizer DSO 21 Réglage de la balance BAL 21 Réglage de la balance avant arrière 21 Réglage du volume des haut parleurs d extrêmes graves 22 Ecoute de chaque source programme avec le DSO enregistré Source Sound Memory SSM 23 Autres fonctions Etiquetage du satellite de...

Страница 43: ... 28 Pendant la lecture d un CD MD Changement de disque 11 OFF SEEK SEEK MENU LIST SOUND ENTER DISC DISC SOURCE DSPL MODE VOL ATT OPEN CLOSE DSO Référez vous aux pages indiquées pour plus de détails En cours de réception radio Sélection des stations de présélection 17 En cours de réception téléviseur Sélection de bande 29 qs Touche ENTER 9 11 13 14 15 16 17 18 19 20 22 23 27 29 31 qd Touche MODE 10...

Страница 44: ...6 Emplacement des commandes SOURCE 1 2 3 4 5 6 CLOSE OFF DISC DISC DSO ENTER S O U N D M E N U L I S T REP SHUF DSPL MODE CDX M750 M650 M600 Face de sécurité Face de commande ...

Страница 45: ... Touche D BASS qd Touche LIST qg Touche OFF 8 qh Touche MODE qj Touche SOURCE qk Touches numériques En cours de réception radio Sélection du numéro de présélection 16 17 Pendant la lecture d un CD MD 1 REP 12 2 SHUF 12 En cours de réception téléviseur Sélection du numéro de présélection 30 ql Touche SOUND w Touche ENTER wa Touche CLOSE Avertissement en cas d installation dans une voiture dont le c...

Страница 46: ... la page 10 CD MD et à la page 16 radio Mise hors tension de l appareil Appuyez sur OFF pour arrêter la lecture CD MD ou la réception FM AM l illumination de la touche et l affichage restent activés Appuyez sur OFF pendant deux secondes pour mettre l appareil complètement hors tension Remarque Si le contact de votre voiture ne comporte pas de position ACC n oubliez pas de mettre l appareil hors te...

Страница 47: ... Les chiffres des heures clignotent 2 Appuyez sur M ou m pour sélectionner l heure 3 Appuyez sur Les chiffres des minutes clignotent 4 Appuyez sur M ou m pour sélectionner les minutes 2 Appuyez sur ENTER L horloge démarre Remarque Pendant le réglage initial l indication de l horloge apparaît lorsque l appareil est hors tension Lorsque le mode D info est sur on l heure est toujours affichée à l exe...

Страница 48: ... sur Z Lecture d un CD ou d un MD avec l appareil CD MD en option 1 Appuyez plusieurs fois sur SOURCE pour sélectionner CD ou MD 2 Appuyez sur MODE jusqu à ce que l unité désirée apparaisse La lecture CD MD démarre Tous les disques de l appareil CD MD en cours sont reproduits à partir du haut Changement du paramètre affiché Chaque fois que vous appuyez sur DSPL en cours de lecture CD disque CD TEX...

Страница 49: ... disque ou de la plage du disque CD TEXT ou MD défile automatiquement que la fonction soit activée ou non 1 En cours de lecture appuyez sur MENU 2 Appuyez plusieurs fois sur M ou m jusqu à ce que A Scrl apparaisse 3 Appuyez sur pour sélectionner A Scrl on 4 Appuyez sur ENTER Pour désactiver la fonction de défilement automatique sélectionnez A Scrl off à l étape 3 Remarque Pour certains disques CD ...

Страница 50: ...rs fois sur 1 REP jusqu à ce que le mode désiré apparaisse Lecture de plages dans un ordre quelconque Lecture aléatoire Vous pouvez sélectionner Shuf 1 pour reproduire les plages du disque en cours dans un ordre aléatoire Shuf 2 pour lire les plages dans l appareil CD MD en option dans un ordre aléatoire Shuf all pour lire toutes les plages dans les appareils CD MD en option dans un ordre aléatoir...

Страница 51: ...e met à clignoter 3 Répétez les étapes 1 et 2 pour introduire le titre en entier 5 Pour revenir en mode de lecture CD normal appuyez sur ENTER Conseils Pour supprimer ou corriger un titre introduisez un pour chaque caractère Il y a une autre méthode pour identifier un CD Maintenez enfoncé LIST pendant deux secondes au lieu des étapes 2 et 3 Vous pouvez également terminer l opération en maintenant ...

Страница 52: ... informations sur les noms des mémos de disque reportez vous à Identification d un CD page 13 1 Appuyez sur LIST Le titre attribué au disque en cours apparaît dans la fenêtre d affichage Lorsque vous assignez un nom de mémo de disque à un disque CD TEXT il a priorité sur les informations CD TEXT d origine 2 Appuyez plusieurs fois sur M DISC ou m DISC jusqu à ce que vous trouviez le disque désiré 3...

Страница 53: ... 4 pour choisir Play ou Skip pour toutes les plages 6 Appuyez deux fois sur MENU L appareil revient au mode de lecture CD normale Remarques Vous pouvez régler Play ou Skip pour un maximum de 24 plages Vous ne pouvez pas régler Skip pour toutes les plages d un CD Lecture de plages déterminées Vous pouvez sélectionner Bank on pour reproduire les plages avec le réglage Play Bank inv Inverse pour repr...

Страница 54: ...ques dans l ordre de leur fréquence Un bip retentit lorsque le réglage est mémorisé Remarques L appareil ne mémorise pas les stations émettant avec de faibles signaux Si seulement quelques stations sont captables certaines touches numériques conserveront leur réglage préalable Si un numéro est indiqué dans la fenêtre d affichage l appareil commence la mémorisation des stations à partir de la stati...

Страница 55: ...yez plusieurs fois de suite sur SOURCE pour sélectionner le syntoniseur 2 Appuyez plusieurs fois sur MODE pour sélectionner la bande de fréquence 3 Appuyez plusieurs fois sur M présélection vers le haut ou m présélection vers le bas pour capter les stations dans l ordre de leur mémorisation Conseil Si vous choisissez de mémoriser la station à l aide des touches de l appareil appuyez sur la touche ...

Страница 56: ...al appuyez sur ENTER Conseils Pour supprimer ou corriger un nom sélectionnez un tiret inférieur pour chacun des caractères Il y a une autre méthode pour sauvegarder les noms des stations Maintenez enfoncé LIST pendant deux secondes au lieu des étapes 2 et 3 Vous pouvez également terminer l opération en maintenant enfoncé LIST pendant deux secondes au lieu de l étape 5 Affichage du nom de la statio...

Страница 57: ...ck y Vocal y Groove y Techno y Custom y off Pour annuler l effet d égalisation sélectionnez off Au bout de trois secondes la fenêtre d affichage revient au mode de lecture normal Localisation d une station par son nom Répertoire 1 Appuyez brièvement sur LIST Le nom assigné à la station actuellement accordée apparaît dans la fenêtre d affichage 2 Appuyez plusieurs fois sur M ou m jusqu à ce que vou...

Страница 58: ... champ sonore Réglage normal 1 2 3 Avant de l habitacle 1 2 Avant droit 2 Avant gauche 1 Arrière de l habitacle 3 Annuler Fenêtre d affichage POS All POS Front POS Front R POS Front L POS Rear POS off 2 1 3 Réglage de la courbe d égalisation 1 Appuyez sur MENU 2 Appuyez plusieurs fois de suite sur M ou m jusqu à ce que l indication EQ Tune apparaisse 3 Appuyez sur ENTER 4 Appuyez plusieurs fois su...

Страница 59: ...1 2 2 3 3 Sélection d un menu de niveau sonore Dynamic Soundstage Organizer DSO Si vos haut parleurs sont installés dans la partie inférieure des portières le son est diffusé par le bas et risque de ce fait de ne pas être très clair La fonction DSO Dynamic Soundstage Organizer crée davantage un son d ambiance comme s il y avait des haut parleurs installés dans le tableau de bord haut parleurs virt...

Страница 60: ... obtenir une image sonore plus claire 1 Appuyez sur MENU 2 Appuyez plusieurs fois de suite sur M ou m jusqu à ce que l indication SUB LPF apparaisse Réglage de la fréquence de coupure et du niveau du volume de sortie pour les haut parleurs avant arrière Pour faire correspondre les caractéristiques du système de haut parleurs installé vous pouvez régler le niveau du volume de sortie et la fréquence...

Страница 61: ...ec le DSO enregistré Source Sound Memory SSM Chaque fois que vous revenez à la même source vous pouvez écouter le son avec le même menu DSO et la même courbe d égalisation enregistrés pour cette source même après avoir changé de source programme ou mis l appareil hors et puis de nouveau sous tension Autres fonctions Vous pouvez commander l appareil au moyen d un satellite de commande en option Eti...

Страница 62: ...sélection Changer le disque Utilisation du satellite de commande Le satellite de commande fonctionne en appuyant sur les touches et ou en tournant les commandes du satellite Vous pouvez également commander un appareil CD MD en option au moyen d un satellite de commande En appuyant sur une touche les touches SOURCE et MODE Chaque fois que vous appuyez sur SOURCE la source change selon la séquence s...

Страница 63: ...puyez sur DSPL pour afficher les titres mémorisés Appuyez sur SOUND pour régler le menu audio Modification du sens de fonctionnement Le sens de fonctionnement des commandes est réglé en usine comme illustré ci dessous Si vous devez monter le satellite de commande du côté droit de la colonne de direction vous pouvez inverser le sens de fonctionnement des commandes Appuyez sur SOUND pendant deux sec...

Страница 64: ...éléphonique entre fonction Telephone ATT Modification des réglages du son et de l affichage Les options suivantes peuvent être réglées Set Réglage Clock page 9 Beep pour activer ou désactiver le bip sonore RM satellite de commande pour inverser le sens de fonctionnement des commandes du satellite en option Sélectionnez norm pour utiliser le satellite de commande dans la position définie par défaut...

Страница 65: ...courbe d égalisation Front HPF 1 filtre passe haut pour la présortie frontale pour sélectionner la fréquence de coupure de la présortie avant Rear HPF 1 filtre passe haut pour la présortie arrière pour sélectionner la fréquence de coupure de la présortie arrière SUB LPF 1 filtre passe bas pour la sortie du haut parleur d extrêmes graves pour sélectionner la fréquence de coupure de la sortie de hau...

Страница 66: ... de l analyseur de spectre Le niveau du signal audio est affiché sur un analyseur de spectre Vous pouvez sélectionner un mode d affichage de 1 à 6 ou le mode d affichage automatique 1 Appuyez sur SOURCE pour sélectionner une source syntoniseur CD ou MD 2 Appuyez sur MENU 3 Appuyez plusieurs fois de suite sur M ou m jusqu à ce que l indication SA apparaisse 4 Appuyez plusieurs fois sur ou pour séle...

Страница 67: ...ectionne les chaînes de télévision émettant avec les signaux les plus puissants et les mémorise dans l ordre de leur fréquence Attention Pour syntoniser des stations pendant que vous conduisez nous vous conseillons d utiliser la fonction de mémorisation du meilleur accord BTM de façon à éviter les accidents 1 Appuyez plusieurs fois de suite sur SOURCE jusqu à ce que l indication TV apparaisse 2 Ap...

Страница 68: ...ctivation de l affichage En cours de réception radio appuyez à nouveau sur LIST En cours de réception télévisée l affichage de la liste sur le moniteur de télévision est automatiquement désactivé au bout de quelques secondes FM 1 2 3 4 5 6 W W W C B K 1 1 B T 0 0 S U 2 S WR K I S 1 S L 1 9 7 Mémorisation de chaînes de télévision particulières Vous pouvez mémoriser jusqu a 12 canaux 6 pour TV1 et T...

Страница 69: ...ns ne peut être affiché lorsque l appareil se trouve en mode de lecture simultanée Désactivation de l affichage Appuyez à nouveau sur LIST CD 1 1 2 3 4 5 6 7 9 1 0 8 S M B L C C O A I H H Z C S O U A H Z P B R T I E T N R T Regarder la télévision ou une source vidéo tout en écoutant un CD ou un MD Lecture simultanée La fonction de lecture simultanée est inopérante pendant que vous écoutez la radio...

Страница 70: ...ela peut révéler une défaillance interne de l appareil Dans ce cas consultez un revendeur Sony Avertissement N utilisez jamais de fusible dont l intensité dépasse celle du fusible fourni avec l appareil car vous risqueriez d endommager l appareil Pour revenir au mode normal Pour désactiver la lecture CD ou MD sélectionnez à l étape 4 Pour désactiver le téléviseur ou la source vidéo sélectionnez à ...

Страница 71: ...es métalliques car cela risque de provoquer un court circuit AVERTISSEMENT Si la pile est malmenée elle risque d exploser Il est interdit de la recharger de la démonter ou de la jeter au feu x côté vers le haut Démontage de l appareil Le panneau frontal étant ouvert 1 Appuyez sur OPEN de l appareil puis appuyez sur l attache à l intérieur du panneau frontal à l aide d un fin tournevis et dégagez d...

Страница 72: ...t fournie et libérez le couvercle frontal 2 Répétez l étape 1 du côté gauche Le couvercle avant est retiré 3 Utilisez la clé de dégagement pour pousser l attache sur le côté gauche de l appareil puis retirez le côté gauche de l appareil jusqu au dégagement complet 4 Répétez l étape 3 du côté droit 5 Sortez l appareil de son emplacement Clé de dégagement fournie ...

Страница 73: ... commande d amplificateur de puissance Entrées Fil de commande de mise en sourdine du téléphone Fil de commande d éclairage Commandes de tonalité CDX M650 CDX M600 seulement Graves 9 dB à 100 Hz Aiguës 9 dB à 10 kHz Puissance de raccordement Batterie de voiture 12 V CC masse négative Dimensions Approx 178 50 182 mm 7 1 8 2 7 1 4 po L H P Dimensions de montage Approx 182 53 163 mm 7 1 4 2 1 8 6 1 2...

Страница 74: ...isque à l intérieur de l appareil alors que l appareil était en train d éjecter le disque après que vous avez appuyé sur Z t Appuyez sur la touche de réinitialisation Appuyez sur la touche de réinitialisation L appareil est installé suivant un angle de plus de 60 L appareil n a pas été installé à un endroit suffisamment stable de la voiture Un disque encrassé ou défectueux Vous ne pouvez pas ident...

Страница 75: ...nt si votre voiture est équipée d une antenne FM AM intégrée dans la vitre arrière latérale Le signal d émission est trop faible t Utilisez la syntonisation manuelle Accordez la fréquence avec précision Le signal d émission est trop faible t Activez le mode Mono page 17 Le mode Wide est sélectionné t Réglez le mode IF sur IF Auto page 17 Cause Solution Le volume des haut parleurs a peut être été b...

Страница 76: ... Cause Le magasin à disques n a pas été introduit dans l unité CD MD Il n y a aucun disque dans l unité CD MD La lecture d un CD MD ne démarre pas en raison d un problème CD souillé MD défectueux etc Un CD est souillé ou a été introduit à l envers 2 Un MD n est pas reproduit en raison d un problème 2 Aucune plage n a été enregistrée sur un MD 2 L unité CD MD ne peut fonctionner en raison d un prob...

Страница 77: ...39 ...

Страница 78: ...a información está grabada en el disco Precauciones Si aparca el automóvil bajo la luz solar directa y se produce un considerable aumento de temperatura en su interior deje que la unidad se enfríe antes de utilizarla Si la unidad no recibe alimentación compruebe las conexiones en primer lugar Si todo está en orden examine el fusible Si los altavoces no emiten sonido con un sistema de dos altavoces...

Страница 79: ...miento o dañar los discos No utilice discos compactos de segunda mano o de alquiler que tengan residuos adherentes en la superficie por ejemplo de adhesivos despegados o tinta o de restos de pegamento de los adhesivos Residuos adherentes Tinta adherente No utilice discos compactos de alquiler con etiquetas viejas que estén comenzando a despegarse Adhesivos que empiezan a despegarse y dejan un resi...

Страница 80: ...DSP Sólo CDX M750 Ajuste del ecualizador 19 Selección de la posición de escucha 20 Selección de un menú Soundstage Organizador Soundstage dinámico DSO 21 Ajuste del balance BAL 21 Ajuste de la atenuación frontal y posterior 21 Ajuste del volumen de los altavoces potenciadores de graves 22 Escucha de cada fuente de programa con su DSO registrado Memoria de sonido fuente SSM 23 Otras funciones Etiqu...

Страница 81: ... 21 CDX M600 Botón D BASS 27 9 Botón OPEN CLOSE 10 0 Botón LIST 13 14 18 19 30 31 Listado 14 19 30 31 qa Botones M m PRST DISC 8 9 11 12 13 14 15 17 18 19 20 22 23 27 28 Durante la reproducción de CD MD Cambio de discos 11 Durante la recepción de la radio Selección de emisoras memorizadas 17 Durante la recepción de TV Selección de banda BANDO 29 qs Botón ENTER 9 11 13 14 15 16 17 18 19 20 22 23 27...

Страница 82: ...6 Localización de los controles SOURCE 1 2 3 4 5 6 CLOSE OFF DISC DISC DSO ENTER S O U N D M E N U L I S T REP SHUF DSPL MODE CDX M750 M650 M600 Lado de seguridad Lado de utilización ...

Страница 83: ...ón LIST qg Botón OFF 8 qh Botón MODE qj Botón SOURCE qk Botones numéricos Durante la reproducción de la radio Selección de número de memorización 16 17 Durante la reproducción de CD MD 1 REP 12 2 SHUF 12 Durante la recepción de TV Selección de número de memorización 30 ql Botón SOUND w Botón ENTER wa Botón CLOSE Advertencia sobre la instalación en un automóvil que no disponga de posición ACC acces...

Страница 84: ...de la unidad Presione OFF para detener la reproducción de CD MD o la recepción de FM AM la iluminación de las teclas y el visualizador permanecerán activados Presione OFF durante dos segundos para apagar completamente la unidad Nota Si el automóvil no dispone de posición ACC en la llave del interruptor de encendido asegúrese de desactivar la unidad presionando OFF durante dos segundos para evitar ...

Страница 85: ...ra ajustar la hora 3 Presione Los dígitos de los minutos parpadean 4 Presione M o m para ajustar los minutos 2 Presione ENTER El reloj se pone en funcionamiento Nota Con el ajuste inicial la indicación del reloj aparece mientras la unidad está apagada Si selecciona el ajuste on del elemento D Info página 26 podrá ver la índicación del reloj en la parte superior del visualizador mientras disfruta d...

Страница 86: ...sco registrado en el MD el visualizador mostrará NO D Name momentáneamente 3 Si reproduce un disco CD TEXT el nombre del artista aparecerá en el visualizador después del título del disco Sólo para discos CD TEXT con nombre del artista 4 Si el título del tema de un disco CD TEXT o MD no está previamente registrado el visualizador mostrará NO T Name momentáneamente Lado de la etiqueta hacia arriba R...

Страница 87: ...ra cambiar el elemento mostrado el título del disco o del tema del disco CD TEXT o del MD se desplaza automáticamente tanto si activa como si desactiva la función 1 Durante la reproducción presione MENU 2 Presione M o m varias veces hasta que aparezca A Scrl 3 Presione para seleccionar A Scrl on 4 Presione ENTER Para cancelar la función de desplazamiento automático seleccione A Scrl off en el paso...

Страница 88: ...l paso 3 Consejo Si selecciona el modo con los botones de la unidad presione 2 SHUF varias veces hasta que aparezca el modo deseado Reproducción repetida de temas Reproducción repetida El CD de la unidad principal se repetirá automáticamente al llegar al final Para la reproducción repetida es posible seleccionar Repeat 1 para repetir un tema Repeat 2 para repetir el disco que se encuentre en la un...

Страница 89: ...rpadeará 3 Repita los pasos 1 y 2 para introducir el título completo 5 Para volver al modo normal de reproducción de CD presione ENTER durante dos segundos Consejos Para borrar o corregir un nombre introduzca por cada carácter Existe otro método para comenzar a asignar título al CD Mantenga presionado LIST durante dos segundos en lugar de realizar los pasos 2 y 3 También puede completar la operaci...

Страница 90: ...ación de discos el visor mostrará Para introducir el disco presione en primer lugar el botón numérico y a continuación seleccione el disco que no se ha introducido No es posible mostrar ciertas letras durante la reproducción de discos CD TEXT o MD Si conecta un sistema opcional de TV el nombre del memorando de discos aparecerá en la pantalla del sistema de TV y no en el visualizador de la unidad B...

Страница 91: ...inir Play reproducción o Skip omisión para todos los temas 6 Presione MENU dos veces La unidad vuelve al modo normal de reproducción de CD Notas Es posible definir el modo Play y Skip para un máximo de 24 temas No es posible definir el modo Skip para todos los temas de un CD Reproducción sólo de temas específicos Es posible seleccionar Bank on para reproducir los temas con el ajuste Play Bank inv ...

Страница 92: ...uméricos las emisoras por orden de frecuencia La unidad emite un pitido al almacenar el ajuste Notas La unidad no almacena emisoras de señales débiles Si sólo pueden recibirse unas pocas emisoras algunos botones numéricos conservarán sus ajustes anteriores Si el visualizador muestra algún número la unidad almacenará las emisoras a partir del mostrado en el visualizador Si no hay ningún CD en la un...

Страница 93: ...Recepción de emisoras memorizadas 1 Presione SOURCE varias veces para seleccionar el sintonizador 2 Presione MODE varias veces para seleccionar la banda 3 Presione M memorización hacia arriba o m memorización hacia abajo varias veces para recibir las emisoras en el orden en que están almacenadas en la memoria Consejo Si ha memorizado las emisoras con los botones de la unidad presione el botón 1 a ...

Страница 94: ...e borrar 5 Presione ENTER durante dos segundos El nombre se borra Repita los pasos 1 a 4 si desea borrar otros nombres 6 Presione MENU dos veces La unidad vuelve a la recepción de radio normal Nota Una vez borrados todos los nombres de emisora la indicación NO Data aparecerá en el paso 5 Almacenamiento de nombres de emisora Memo de emisora Es posible asignar un nombre a cada emisora de radio y alm...

Страница 95: ...zador de la unidad DSP Sólo CDX M750 Ajuste del ecualizador Es posible seleccionar una curva de ecualizador para cinco tipos de música Rock Vocal Groove Techno y Custom Puede almacenar y definir los ajustes del ecualizador de frecuencia y nivel Selección de la curva de ecualizador 1 Presione SOURCE para seleccionar una fuente sintonizador CD o MD 2 Presione SOUND varias veces hasta que aparezca EQ...

Страница 96: ... modo de reproducción normal Centro del campo sonoro Ajuste normal 1 2 3 Parte frontal 1 2 Parte frontal derecha 2 Parte frontal izquierda 1 Parte posterior 3 Cancelación Visualizador POS All POS Front POS Front R POS Front L POS Rear POS off Ajuste de la curva de ecualizador 1 Presione MENU 2 Presione M o m varias veces hasta que aparezca EQ Tune 3 Presione ENTER 4 Presione o para seleccionar la ...

Страница 97: ...sione DSO para seleccionar el modo DSO que desee B 1 B 2 B 3 B wide off b Para cancelar el modo DSO seleccione off Transcurridos tres segundos el visualizador vuelve al modo de reproducción normal Ajuste del balance BAL Es posible ajustar el balance de sonido entre los altavoces izquierdos y derechos 1 Presione SOURCE para seleccionar una fuente sintonizador CD o MD 2 Presione SOUND varias veces h...

Страница 98: ...s de graves emitirán solamente las señales de baja frecuencia para obtener una imagen de sonido más nítida 1 Presione MENU 2 Presione M o m varias veces hasta que aparezca SUB LPF Nivel Frecuencia de corte Frecuencia Hz Ajuste de la frecuencia de corte y del nivel de volumen de salida de los altavoces frontales posteriores Es posible ajustar el nivel de volumen de salida y la frecuencia de corte d...

Страница 99: ...scucha de cada fuente de programa con su DSO registrado Memoria de sonido fuente SSM Cada vez que recupere la misma fuente podrá escuchar el mismo menú DSO y curva del ecualizador registrados para esa fuente incluso después de cambiar la fuente de programa o de apagar la unidad y encenderla de nuevo Otras funciones Esta unidad también puede controlarse con el mando rotativo opcional Etiquetado del...

Страница 100: ...FM3 t AM1 t AM2 Unidad de CD CD1 t CD2 t Unidad de MD MD1 t MD2 t TV Video TV1 t TV2 t AUX Si el equipo opcional correspondiente no está conectado el elemento no aparecerá MODE Mediante el giro del control SEEK AMS Gire el control momentáneamente y suéltelo para Localizar un tema específico de un disco Gire y mantenga girado el control hasta localizar el punto específico de un tema y a continuació...

Страница 101: ...rizados Presione SOUND para ajustar el menú de sonido Para aumentar Para disminuir Cambio de la dirección de funcionamiento La dirección de funcionamiento de los controles está ajustada de fábrica como se muestra a continuación Si es preciso instalar el mando rotativo en el lado derecho de la columna de dirección puede invertir la dirección de funcionamiento Presione SOUND durante dos segundos al ...

Страница 102: ...ón de la unidad M Dspl Desplazamiento de indicaciones para activar o desactivar el modo de desplazamiento de indicaciones por el visualizador A Scrl Desplazamiento automático página 11 Ajuste de las características de sonido Es posible ajustar los graves los agudos el balance y el equilibrio entre altavoces Es posible almacenar los niveles de graves y agudos de forma independiente para cada fuente...

Страница 103: ... t HPF 3 4 t LPF 3 4 t Loud 3 1 Cuando no se está reproduiendo ningún CD o MD este elemento no aparece 2 Sólo CDX M750 3 Sólo CDX M650 4 Sólo CDX M600 Nota El elemento mostrado variará en función de la fuente Consejo Es posible cambiar fácilmente las categorías Set Snd P M Modo de reprodcción y Dis presionando M o m durante dos segundos 0dB D BASS 3 D BASS 2 D BASS 1 D BASS 3 D BASS 2 D BASS 1 Niv...

Страница 104: ...dor ecualizador Selección del analizador de espectro El nivel de señal de sonido se muestra en un analizador de espectro Es posible seleccionar un patrón de visualización de 1 a 6 o el modo de visualización automática 1 Presione SOURCE para seleccionar una fuente sintonizador CD o MD 2 Presione MENU 3 Presione M o m varias veces hasta que aparezca SA 4 Presione el o varias veces para seleccionar e...

Страница 105: ...les de TV de señal débil Si sólo pueden recibirse unos pocos canales de TV algunos botones numéricos permanecerán vacíos Si el visualizador muestra un número de memorización la unidad comenzará a almacenar canales de TV a partir del mostrado actualmente Con equipo opcional TV Video Es posible conectar un sintonizador y monitor de TV opcionales con esta unidad Visualización de la TV 1 Presione SOUR...

Страница 106: ...dad se encuentra en el modo de reproducción simultánea página 31 Desactivación de la indicación Durante la recepción de la radio vuelva a presionar LIST Durante la recepción de TV la indicación de listado del monitor de TV se desactivará automáticamente transcurridos unos segundos FM 1 2 3 4 5 6 W W W C B K 1 1 B T 0 0 S U 2 S WR K I S 1 S L 1 9 7 Memorización únicamente de determinados canales de...

Страница 107: ...ido de la memoria programada no puede enumerarse cuando la unidad se encuentra en el modo de reproducción simultánea Desactivación de la indicación Vuelva a presionar LIST CD 1 1 2 3 4 5 6 7 9 1 0 8 S M B L C C O A I H H Z C S O U A H Z P B R T I E T N R T Visualización de la TV o de video mientras se escucha un CD o un MD Reproducción simultánea La función de reproducción simultánea no se activa ...

Страница 108: ...nterno En este caso póngase en contacto con el proveedor Sony más próximo Advertencia No utilice nunca un fusible de amperaje superior al del suministrado con la unidad ya que ésta podría dañarse Regreso al modo normal Para cancelar el CD o MD siga los pasos anteriores y seleccione en el paso 4 Para cancelar la TV o video siga los pasos anteriores y seleccione en el paso 6 Nota Si presiona Z EJECT...

Страница 109: ... hace puede producirse un cortocircuito ADVERTENCIA La pila puede explotar si no se emplea adecuadamente No recargue la pila tampoco la desmonte ni la arroje al fuego Desmontaje de la unidad Con el panel frontal abierto 1 Presione OPEN en la unidad y a continuación presione el clip del interior de la cubierta frontal con un destornillador fino y haga palanca cuidadosamente para liberar dicha cubie...

Страница 110: ...e la cubierta frontal 2 Repita el paso 1 en el lado izquierdo La cubierta frontal podrá extraerse 3 Utilice la llave de liberación para ejercer presión sobre el clip del lado izquierdo de la unidad y después tire de dicho lado de la unidad hasta que el retén libere la fijación 4 Repita el paso 3 en el lado derecho 5 Saque la unidad del marco Llave de liberación suministrada ...

Страница 111: ...rizada Cable de control de amplificador de potencia Entradas Cable de control de atenuación para teléfono Cable de control de iluminación Controles de tono sólo CDX M650 CDX M600 Graves 9 dB a 100 Hz Agudos 9 dB a 10 kHz Requisitos de alimentación Batería de automóvil de 12 V CC toma a tierra negativa Dimensiones Aprox 178 50 182 mm 7 1 8 2 7 1 4 pulgadas an al prf Dimensiones de montaje Aprox 182...

Страница 112: ...a del automóvil Un disco está sucio o es defectuoso No es posible asignar títulos a los discos compactos a menos que conecte una unidad de CD con función de archivo personalizado t Presione LIST durante dos segundos Problema No es posible insertar un disco La reproducción no se inicia El disco se expulsa automáticamente El CD no se expulsa Los botones de funcionamiento no se activan El sonido se o...

Страница 113: ...ible realizar la sintonización automática La indicación ST parpadea Se producen interferencias durante la recepción de FM Causa Solución Memorice la frecuencia correcta La emisión es demasiado débil Conecte un cable de control de antena motorizada azul o un cable de fuente de alimentación auxiliar rojo al cable de fuente de alimentación del amplificador de antena del automóvil Sólo si el automóvil...

Страница 114: ...l cargador de discos en la unidad de CD MD No ha insertado ningún disco en la unidad de CD MD No es posible reproducir un CD MD debido a algún problema CD sucio MD defectuoso etc Un CD está sucio o insertado al revés 2 Un MD no se reproduce debido a algún problema 2 No ha grabado ningún tema en el MD 2 No es posible emplear la unidad de CD MD debido a algún problema La tapa de la unidad de MD está...

Страница 115: ...39 ...

Страница 116: ...2 Sony Corporation Printed in Korea ...

Отзывы: