


– 19 –
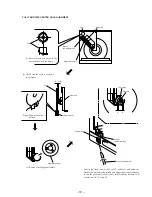
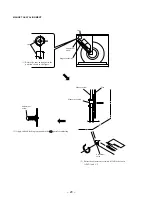
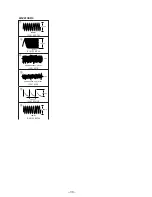
PULLY AND DISC CENTER HOLE ALIGNMENT
Cam
Disc
0.5 - 2mm
Base unit
Disc pulley
Bracket
(BU adjustment)
Tapering screwdriver
Magnet assembly
A
B
Disc hole
Holder (disc A)
Fixed screw
Cam
Base unit
Bracket
(BU adjustment)
Magnet assembly
(1) Rotate the cam and adjust to the
position shown in the figure.
(2) Check that the state is as shown
in the figure.
Note: The disc should not
be fixed.
Loosen the fixed screw by 60
°
to 90
°
, and move and adjust the
bracket (BU adjustment) up and down using a tapering screwdriver
so that the positions of the disc hole and disc pulley become A=B
or between A:B=2:1 and 1:2.
(3) Remove the Magnet assembly.
Содержание CDP-CX260 - 200 Disc Cd Changer
Страница 7: ... 7 This section is extracted from instruction manual ...
Страница 8: ... 8 ...
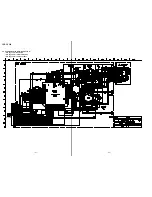
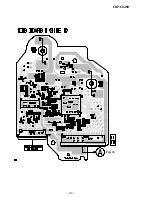
Страница 31: ...6 4 PRINTED WIRING BOARD BD SECTION See page 24 for Circuit Boards Location 33 ...
Страница 32: ... 34 CDP CX260 Page 36 ...
Страница 36: ... 41 42 CDP CX260 6 8 PRINTED WIRING BOARD JACK SECTION See page 24 for Circuit Boards Location Page 35 Page 36 ...
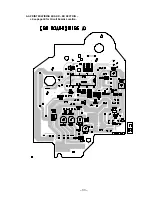
Страница 37: ... 43 44 CDP CX260 6 9 SCHEMATIC DIAGRAM DISPLAY SECTION See page 51 for IC Block Diagrams Page 37 ...
Страница 39: ... 47 CDP CX260 6 11 SCHEMATIC DIAGRAM SENSOR MOTOR SECTION Page 37 Page 37 Page 37 Page 37 Page 37 ...


