5.
20.
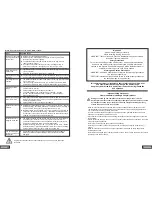
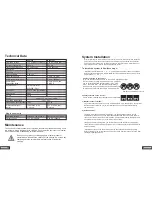
Technical Data
Maintenance
Camera
Receiver
Operating voltage
7.5V DC(plug-in power unit)
7.5V DC (plug-in power unit)
Current consumption
300 mA
300 mA
Transmitting frequency
2.4-2.4835Ghz
2.4-2.4835Ghz
Modulation
FM
Channels
3
3
Light sensitivity
2-20 Lux
Video output level
1 Vp-p / 75 Ohm
Audio output level, mono
1 Vp-p / 600Ohm
Audio/Video
3.5 mm phone jack
USB 2.0
Connection jacks
Picture sensor
1/3“ CMOS color
510x492 ( PAL )
Resolution
330 TV lines (horizontal),
Microphone
mono
Picture
Color
Range
approx 100 m at free visibility
Operating temperature
-10
o
C~ 50
o
C
Mass approx. (without tripod) 160g
122.3g
Dimensions without
Aerial
128x72x60 (mm)
L x W x H
100 x 76 x 26 (mm)
L x W x H
Plug-in power units
Operating voltage
100~240V / 60 or 50Hz
100~240V / 60 or 50Hz
Output voltage
7.5V DC / 300mA
7.5V DC / 300mA
System Installation
Channel selection on the receiver
a) Manual channel selection:
b) Auto-scan mode:
To install the system, follow these steps:
CH 1 2 3
CH 1 2 3
CH 1 2 3
1
2 3
2
1
3
3
1 2
Channel selection on the camera
To set the channel selection switch on the camera, proceed as follows:
-Set the channel by using a pointed object, e.g. a ballpoint
pen, to select the desired channel switch ( CH1, CH2,
CH3 ) to position "ON". The selected channel always
remains active. Only one channel may be activated at one
time. Repeat if more than one camera is being installed.
Position of Camera Channels 1-3
There are two methods to set the channel on the receiver.
Prior to installing the camera, make sure receiver has clear, interference-free reception.
To do this, have someone hold the camera in the area to be monitored. Have another
person move the receiver to a variety of locations to check reception. If interference or
other problems occur, refer to the Troubleshooting Guide.
-Select the channel (Channel 1, 2, 3 as indicated on Channel Label) to be used on
both the camera and receiver. NOTE: Make sure the camera and receiver are set to the
same channel ( 1, 2, 3 ).
To set the channel on the receiver, use a pointed object, e.g. a ballpoint pen, to select the
desired channel switch (no. 1-3) to the "ON" position. The selected channel always
remains active.
If there is more than one camera in operation, you can allow the channels to scan
automatically (scan mode). To use this mode select desired channel on each camera,
then set the receiver channels to "ON" position. The receiver will automatically switch to
each camera view in order (1-3) at an interval of 5 seconds.
If only one camera is being used, you can block the unused channel by selecting the
"OFF" position on both camera and receiver. Any unused channel will be skipped in the
auto-scan mode.
-Adjust the antenna on the camera to ensure the best possible transmission quality.
Rotate carefully in the vertical position. The antenna has a limited range of rotation. Over
rotating will damage antenna.
The devices are maintenance-free. Only clean the outside of the devices using a soft,
dry cloth or a brush. Unplug prior to cleaning. Do not paint the camera or the receiver.
Do not disassemble. Disassembly voids the warranty.
Do not use any carboxylic cleaning agents or petrol, alcohol or
similar which will destroy the surfaces of the devices. Do not use any
sharp edged tools, screw drivers, metal brushes or similar for
cleaning.

