83
Controller Menu
Chapt
er
3
Me
n
u
Fu
nct
ion K
e
y
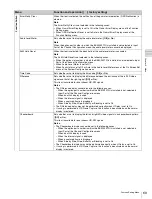
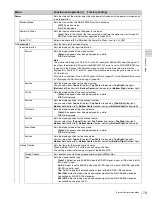
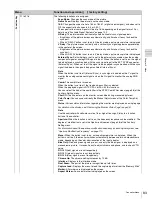
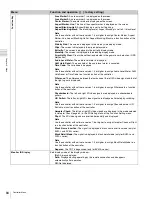
F1 to F16
The following functions are assigned.
Scan Mode:
Changes the scan mode of the picture.
Native Scan:
Displays the picture in native scan mode.
16:9:
Changes the aspect ratio to 16:9 or 1.896:1 (digital cinema signal), and when set to
Off, the aspect ratio changes to 4:3 or 2.39:1.
The aspect ratio of some signals is fixed to 16:9 depending on the signal format. For
details, see “Available Signal Systems” on page 109.
H Delay:
The picture moves horizontally and a horizontal sync signal appears.
• Brightness of the picture increases automatically, and it makes it easy to check the
sync part.
• When V DELAY button is set to on in H delay mode, a pulse cross picture is displayed.
V Delay:
The picture moves vertically and a vertical sync signal appears approximately
in the center of the screen.
• Brightness of the picture increases automatically, and it makes it easy to check the
sync part.
• When H DELAY button is set to on in V delay mode, a pulse cross picture is displayed.
External Sync:
Sets whether or not to set to the external sync mode when the analog
component signal or analog RGB signal is input. When the button is set to on, the signal
to be displayed is synchronized with the sync signal input to the EXT SYNC connector
(External Sync). When set to off, the signal to be displayed is synchronized with the sync
signal included in the signals being monitored (Internal Sync).
Note
When the button is set to off (Internal Sync), a sync signal is added on the Y signal to
monitor the analog component signal and on the G signal to monitor the analog RGB
signal.
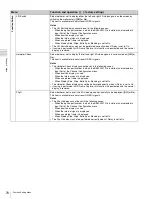
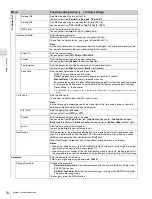
Comb:
The comb filter is turned on.
When the button is set to off, the trap
·
band-pass filter is selected.
When the displayed signal is NTSC, PAL or PAL-M, this functions.
You can select the kind of the comb filter in the NTSC Comb Filter menu (page 58) of the
Auxiliary Setting menu.
Char Off:
The characters on the monitor screen hide during manual adjustment.
Color Temp:
You can access directly the Manual Adjust menu of the Color Temp Adj
menu.
Status:
Various status information regarding the monitor are displayed on a single page.
For details on the display, see “Displaying the Monitor Status Page” (page 98).
Note
Use the controller with software version 1.6 or higher to assign Status to a function
button of the controller.
Aperture:
When the function is set to on, the frequency response can be modified. The
degree of modification is set in the Aperture Value menu (page 58) of the Auxiliary
Setting menu.
For information about the aperture modification frequency for each signal system, see
“Aperture Modification Frequency” on page 119.
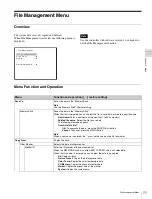
Mono:
When the button is set to on, a monochrome picture is displayed. When the
button is set to off, the monitor switches automatically between color and monochrome
mode, depending on the color discrimination of the input adaptor.
Blue Only:
Red and green signals are cut, and only the blue signal is displayed as a
monochrome picture. It makes it easy to adjust chroma and phase, and to check VTR
noise.
R Off:
R (red) signals are cut respectively.
G Off:
G (green) signals are cut respectively.
B Off:
B (blue) signals are cut respectively.
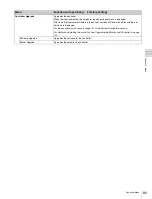
Chroma Up:
The chroma setting increases by 12 dB.
Interlace:
Displays in the interlace mode.
Pixel Zoom:
The part of the picture is magnified up to 8 times.
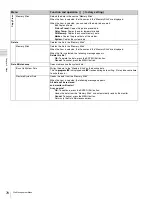
Capture Load:
Displays the menu to load the captured picture from the “Memory Stick”.
Marker:
All markers are displayed on the screen.
Aspect Marker:
An aspect marker is displayed on the screen.
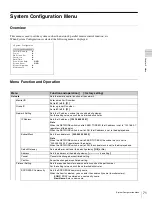
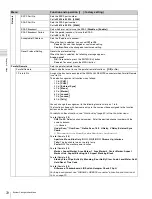
Menu
Function and operation ([ ]: factory setting)

