


22
GB
~
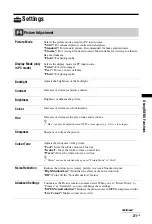
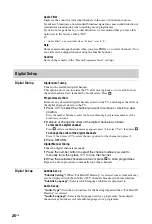
• “Brightness”, “Colour”, “Hue” and “Sharpness” are not available when “Picture Mode” is set to “Vivid” or when “Display
Mode” is set to “Text”.
• “Noise Reduction” is not available when “Picture Mode” is set to “Photo” or when “Display Mode” is set to “Text” or
“Photo”.
• “Advanced Settings” is not available when “Picture Mode” is set to “Vivid” or “Photo” or when “Display Mode” is set to
“Text” or “Photo”.
~
• “Sound Effect”, “Surround”, “Treble”, “Bass”, “Balance”, “Reset” and “Auto Volume” are not available when “Speaker”
is set to “Audio System”.
Reset
Resets all “Picture Adjustment” settings except “Picture Mode” and “Display Mode”
(only in PC mode) to the factory settings.
Sound Adjustment
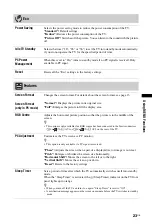
Sound Effect
Selects the sound mode.
“Dynamic”:
Intensifies clarity and sound presence for better intelligibility and
musical realism.
“Standard”:
Enhances clarity, detail, and sound presence.
“Clear Voice”:
Makes voice sound clearer.
Surround
Selects the surround mode.
“Surround”:
For surround sound (for stereo programmes only).
“Simulated Stereo”:
Adds a surround-like effect to mono programs.
“Off”:
For normal stereo or mono reception.
Treble
Adjusts higher-pitched sounds.
Bass
Adjusts lower-pitched sounds.
Balance
Emphasizes left or right speaker balance.
Reset
Resets all the “Sound Adjustment” settings to the factory settings.
Dual Sound
Selects the sound from the speaker for a stereo or bilingual broadcast.
“Stereo”
,
“Mono”:
For a stereo broadcast.
“A”/“B”/“Mono”:
For a bilingual broadcast, select “A” for sound channel 1, “B”
for sound channel 2, or “Mono” for a mono channel, if available.
z
• If you select other equipment connected to the TV, set “Dual Sound” to “Stereo”, “A” or
“B”.
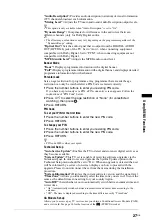
Auto Volume
Keeps a constant volume level even when volume level gaps occur (e.g., adverts tend
to be louder than programmes).
Speaker
Turns on/off the TV’s internal speakers.
“TV Speaker”:
The TV speakers are turned on in order to listen to the TV’s sound
through the TV speakers.
“Audio System”:
The TV speakers are turned off in order to listen to the TV’s sound
only through your external audio equipment connected to the audio output sockets.


